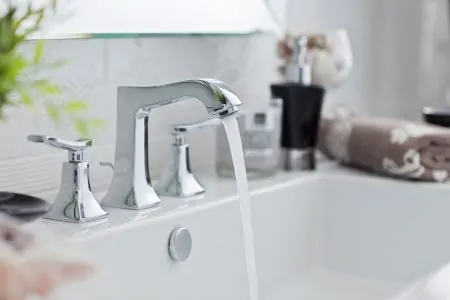
If you have a stack of dishes that need cleaning, the last thing you want is for your kitchen faucet to have low water pressure. It’s possible that there is a problem with your water supply, but it might also be an issue with the faucet itself.
Fortunately, this problem is rarely caused by anything serious. You should be able to fix it without needing to call a plumber, but you might need some advice on how to get started.
This article will explain everything you need to know about low pressure from your kitchen faucets. We will also guide you through how to fix the water pressure in your kitchen sink and get the faucet working properly again.
Key Takeaways
- Low pressure in a kitchen faucet can be caused by a clogged aerator, malfunctioning cartridge, or damaged water lines.
- To fix low pressure, check and clean the aerator, clean or replace the cartridge, and flush the supply lines.
- Normal water pressure in residential properties ranges from 45 to 80 psi.
- If only one faucet has low pressure, it is likely an issue with the faucet itself, and simple fixes can be attempted before calling a plumber.
Reasons for Low Pressure in Kitchen Faucet
The most common causes of low pressure in a kitchen faucet are relatively simple and only affect one fixture. Issues that affect multiple faucets are a cause for greater concern. Here are five of the likeliest reasons for reduced water pressure:
- Malfunctioning cartridge
- Clogged aerator
- Damaged water lines
- Impaired pressure reducing valve
- Leaking pipes
Malfunctioning Cartridge
The cartridge, or shut-off valve, is responsible for stopping the water flow by the supply lines when you close the tap. They are part of every modern faucet and will prevent leaks and other issues from occurring.
However, debris, sediment, and corrosion inside the supply lines can severely reduce the water pressure that passes through the cartridge. There are ways to fix this but, in some cases, a replacement is necessary.
Clogged Aerator
A clogged aerator is perhaps the most common cause of reduced water pressure. The aerator is an attachment with tiny holes, positioned at the end of the spout where the water exits. It serves multiple purposes including saving water, preventing splashing, and filtering some debris and sediment.
As an aerator has such small holes, they are vulnerable to blockages, particularly in homes with hard water. Fortunately, this is very easy to fix — we provide a step-by-step guide further down this article.
Damaged Water Lines
Corrosion, sediment, and debris also affect the water lines running through your walls and beneath your floors. If this becomes too significant, it will also reduce the water pressure from nearby faucets. This is more common if your plumbing is older or galvanized.
Repairing damaged water lines requires the expertise of a qualified plumbing contractor. Finding and fixing the problem could call for cutting through your walls, cabinets, and floors.
Impaired Pressure Reducing Valve
Some plumbing systems are equipped with something called a “pressure reducing valve”. This device regulates the pressure coming from the municipal water supply into your home. It should be relatively easy to locate; look for a bell-shaped device attached to the incoming water line.
If the water pressure is low, you can adjust it by loosening the screw at the top. Turn it counter-clockwise and open the tap again to check for any improvement. If the pressure is still too low, the valve might be worn out — we recommend calling a plumber to check.
Leaking Pipes
Leaking pipes usually also cause a decrease in water pressure. The biggest problem with leaks, however, is that they are often invisible.
Inspect your basement for any traces of water near your pipes, as well as around water heaters and faucets.
If you can’t find anything, you can use your water meter to check for leaks. Shut off the supply at the main water valves, then check your water meter. Write down the reading, then do something else for a couple of hours before checking again. If the reading is higher than before, it means you have a leak.
If there is a leak, consult a professional. You might need to replace a pipe or two.
Only Hot Water Pressure Is Low
If you notice that there is only low pressure when you run the hot faucet, it might not be an issue with the plumbing. Start by inspecting your water heater.
Go to your water heater and ensure that the outlet valve is fully open. A partially closed valve can make a significant difference to your water pressure. Return to your faucet and try running it again.
If it makes no difference, there might be a problem with the pipes nearest to the water heater. Mineral deposits and other sediments can accumulate here, causing trouble. If the issue is in your pipes, you may need to seek help from a skilled professional.
What Is Normal Water Pressure?
Most residential properties have water pressure ranging from 45 to 80 psi (1). If the pressure dips below 30 psi, it is considered low. If you’re in doubt, you can use a water pressure gauge, which is inexpensive and easy to use.
Keep In Mind
Kitchen, House, or Neighborhood?
It is important to determine whether the issue is affecting one faucet, your entire property, or even your neighborhood as a whole. Walk around your home and check any other faucets. This will help you discover whether the problem is only in the kitchen or the rest of the property.
Remember that kitchen sink water pressure can be low during peak hours when multiple people use plumbing fixtures. This usually occurs during busy times such as weekday mornings and evenings.
If you discover that all your faucets have weak pressure, check with your neighbors. If they are experiencing similar issues, it is probably being caused by the municipal supply. There isn’t much you can do about this other than wait, or invest in a booster if the problem isn’t temporary.
If there is low water pressure in your kitchen sink but nowhere else, there are some simple fixes to try before attempting anything too technical.
Check the Valves
Inspect the valves beneath the sink. There should be one for hot water and one for cold. Ensure that both valves are fully open.
These control how much water is supplied to your faucets. If the valves are partially closed, it could have a significant impact on the water pressure.
Inspect the Supply Lines
Kinked supply lines can also restrict the flow of water, thus reducing the pressure. Look under the sink again and ensure that both supply lines are straight.
Fixing Low Pressure in a Kitchen Faucet
We will now take a look at some of the fixes you can attempt before calling a plumber, to ensure your kitchen faucet provides its intended water pressure. These include:
- Checking the aerator
- Cleaning/replacing the cartridge
- Fixing line blockages
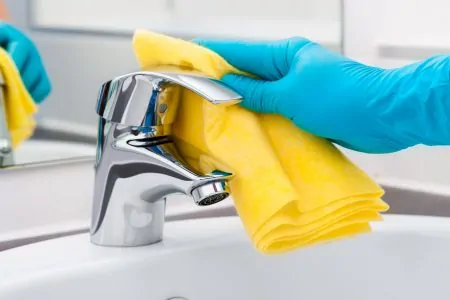
How to Check the Aerator
If you suspect that a clogged aerator is causing the issue, it is very easy to check and fix.
What You Need
- Pliers
- Plastic tape
- Bowl or dish
- White vinegar
- Warm water
- Old toothbrush
- Plastic bag
Step 1: Remove the Aerator
Use a hand to unscrew the aerator from the tip of the faucet. Turn it counter-clockwise to loosen it.
If it won’t move, wrap some tape around it. This will prevent you from scratching it accidentally. Then, use your pliers to grip and turn the aerator.
Check The Pressure
Step 2: Soak It
Mix an equal amount of white vinegar and warm water in a bowl. For example, half a cup of vinegar and half a cup of water.
Then, place the aerator in the solution. Leave it to soak for 30 minutes to an hour.
If you can’t remove the aerator, get a watertight plastic bag and pour the solution into it. Place the bag over the faucet nozzle and secure it with a rubber band or some tape. Leave it for 30 minutes to an hour, and it should dissolve most of the sediment.
Step 3: Inspect the Aerator
After a couple of hours, check the aerator and see if it looks cleaner. You can run it under some water to rinse it. If there are any stubborn deposits, use an old toothbrush to gently scrub the aerator.
Rinse it thoroughly before moving on to the next step.
Step 4: Replace It
Once the aerator is clean, screw it back on until it’s snug. Avoid tightening it too much as you could damage your faucet. Your water pressure should now be restored.
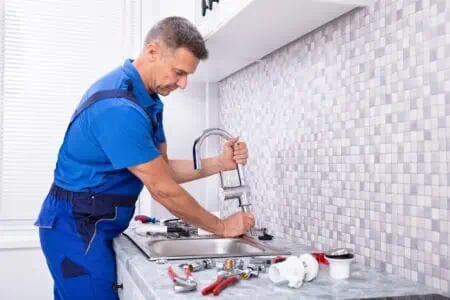
How to Clean/Replace the Cartridge
If the aerator wasn’t the problem, you might need to check the cartridge. This requires more time and patience.
We recommend placing the parts down in the order you removed them, to make it easier to reassemble the faucet later. Place them on a towel or rag to make sure you don’t misplace them.
What You Need
- Wrench
- Screwdriver
- White vinegar
Step 1: Turn off the Supply Valves
Crouch under your sink and turn off the hot and cold supply valves.
Open the tap to drain any remaining water.
Step 2: Detach the Screw Cap
Plug the sink to ensure nothing falls down the drain while you are working on it.
On the faucet handle, there should be a screw covered by a cap, holding the handle in place. Use your hand to turn it to remove it. Then, use the screwdriver to undo the screw and access the cartridge.
Step 3: Remove the Cartridge Nut
Locate the cartridge nut and remove it using a wrench.
Step 4: Clean the Cartridge
Rinse the cartridge under running water.
If limescale and mineral deposits are covering it, place it in a dish of vinegar and water. Let it soak for 30 minutes to an hour.
If the cartridge appears damaged or even slightly worn out, we recommend replacing it. Take it to your local hardware store and get a like-for-like replacement.
Step 5: Reassemble the Faucet
Once the cartridge is clean, or you have a new one, reverse the above steps to reconnect the cartridge.
Tighten the cartridge nut gradually and avoid overdoing it. Reopen the supply valves and check the pressure. It should be back to normal.
Dealing with a Line Blockage
If neither the cartridge nor the aerator was causing the issue, there could be something stuck in the water lines. This calls for flushing, which is very easy to do.
What You Need
- Bucket
- Wrench or basin wrench
Step 1: Close the Supply Valves
Turn the supply valves to the “Off” position and open a tap to release any leftover water.
Step 2: Disconnect the Valves
Use a wrench or basin wrench to detach the supply lines from the faucet.
While still attached to the water lines, gently move the supply lines downward and place them into a bucket.
Step 3: Turn on the Water
Fully open both supply valves and let the water run into the bucket for a few seconds.
Step 4: Reconnect Everything
Connect the supply lines to the faucet again, using the wrench. Don’t tighten them too much, as this could damage them.
Check the pressure by opening the tap.
FAQs

Why Is My Kitchen Sink Water Pressure Low?
It isn’t always clear what causes low water pressure in a kitchen sink, but there are a few common reasons. These can be divided into issues with the faucet itself, such as a clogged aerator or inhibited cartridge, and problems with the supply to the faucet. Issues with the faucet are usually easily fixed, whereas you might need a plumber to check the pipes within your home. It could also be caused by your municipal water supply, in which case you might need to be patient.

Why Is Water Pressure Low in One Faucet Only?
If the water pressure is only low in one faucet in your home, the problem should be easier to fix than if it affects multiple faucets. The likeliest causes of low pressure in one faucet are a blocked aerator, which can be easily removed and cleaned using white vinegar, or a problem with the cartridge, which can be removed and either cleaned or replaced. There could also be a problem with the sink’s supply lines, which can be flushed.

How Much Does It Cost To Replace a Faucet Cartridge?
Replacing a cartridge is not particularly cheap, as it is one of the most expensive parts of a faucet. It will usually cost between $10 and $80, with high-end brands at the upper end of this scale, but it should still be significantly cheaper than replacing the entire faucet. Before you replace a cartridge, try soaking it in white vinegar to clean it, as this could save you a decent amount of money.

Do Kitchen Faucets Have Flow Restrictors?
Every kitchen faucet sold since 1994 is required to have a flow restrictor to conserve water. The standard flow rate for an aerator on a kitchen faucet is around 2.2 gallons per minute.

How Do You Clean a Non-Removable Faucet Aerator?
If your faucet aerator is not removable, it’s likely because it’s stuck due to all the gunk that’s accumulated in that area over time.
To clean it, it’s best to remove it first. First, place a towel or a rag on the faucet cap. Turn the cap counterclockwise using a wrench or pliers positioned over the rag.
Once the cap is loose, remove the pliers and the towel and unscrew the aerator using your bare hands. Remember the positions for each piece of the mechanism, as you have to put them back in that exact order. Proceed to clean the aerator as you normally would.

How Do I Know If My Faucet Cartridge is Bad?
If you’re unsure whether your faucet cartridge is bad, look for the following signs: difficulty adjusting water temperature, dripping spout, or hot water found in the cold water lines.