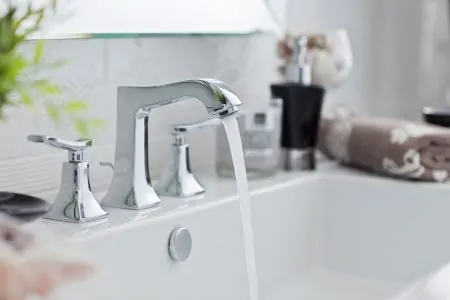
A faucet plays a major role in the overall appearance of your bathroom or kitchen. There are countless stylish faucets to choose from, but dirt and stains can turn even the most beautiful faucet into an eyesore.
Deposits of dirt or minerals can also reduce the flow rate of your faucet, making it more difficult and time-consuming to perform your daily tasks. The simple solution, if you are having these issues, is to clean your faucet, so it could be time to roll your sleeves up.
Cleaning your fixtures will keep them working as intended, so this article will teach you how to clean faucets in both your kitchen and bathroom. Let’s get started.
Key Takeaways
- Regularly clean faucets with a gentle solution of dish soap and warm water to prevent grime and mineral deposits.
- For limescale buildup, soak the faucet in white vinegar or use a CLR cleaner for more stubborn deposits.
- To clean the aerator, remove it from the faucet and soak it in white vinegar to remove mineral build-up.
- Use non-abrasive cleaning tools like a soft cloth, sponge, or old toothbrush to avoid scratching the faucet’s finish.
Common Causes of Dirty Faucets
Sparkling faucets go a long way toward making a room look bright and clean. However, they are constantly exposed to the minerals and other corrosive elements present in water. Some of the problems you might encounter include:
- Water spots
- Limescale build-up
- Corrosion
Water Spots
Unless you have a special finish such as matte black, oil-rubbed bronze, or white, water spots are likely to be a frequent sight. Metallic coats such as chrome and stainless steel are particularly prone to water spots.
Water spots are left by water that splashes up onto the faucet. Sometimes, this water is mixed with soap or cream, exacerbating the problem. These spots can make a beautiful new faucet look old and tarnished.
Fortunately, modern faucets are easy to clean without using harsh chemicals — our guide will tell you how.
Limescale Build-Up
If your fixture is looking cloudy, tarnished, or stained around the faucet head, it is likely due to limescale build-up. Dissolved minerals, including magnesium and calcium, are present in all household water. Some areas have a higher concentration of minerals (1).
These dissolved minerals pass through your plumbing system until they reach your faucet. If you have an aerator, it may prevent some of the larger deposits from leaving the faucet. When the water evaporates, the minerals are left behind, creating a deposit.
As you continue using your fixture, more of the minerals are accumulated. This eventually leaves you with scaly, hard limescale deposits, which block your faucet’s nozzle and reduce its flow rate (2). Fortunately, this is an easy problem to fix, though you might need to remove or replace the aerator.
Corrosion
Corrosion generally occurs as a result of limescale. It is unpleasant to look at but it can also spread and potentially ruin your entire faucet if left unchecked. With severe limescale, you might notice the water spurting out instead of flowing normally.
There are some very simple ways to remove limescale, especially in the early stages. However, if the problem is more serious, the faucet might need replacing.
How to Clean Faucets: General Exterior Clean
Although this is a general clean, it is still thorough and could remove most of the minerals and water spots.
Keep In Mind
What You Need
- Dish soap
- Warm water
- Bowl or bucket
- Baking soda
- Old toothbrush
- Washcloth
- Dental floss
- Microfiber cloth
Step 1: Prepare the Solution
Prepare a dish soap solution by mixing 1–2 tablespoons of soap with 2 cups of warm water in a bowl. Mix it vigorously until you see some foam.
Avoid using hard chemicals containing bleach, ammonia, or alcohol — these can ruin your faucet’s finish.
Step 2: Wash the Faucet
Grab a regular washcloth and soak it in the solution. Rub the fixture using circular motions — soak the rag in the soapy mixture again after a few rubs.
Clean the neck, handles, and near the base a couple of times to be thorough. You don’t need to apply much force, just enough to remove any grime that is present.
Step 3: Clean Grimy Areas
Get a small dish or plate and place a couple of tablespoons of baking soda in it.
Add some water and mix it to create a paste. Add the water in small amounts to avoid diluting it too much.
Take an old toothbrush, scoop up some of the mixture, and use it to clean the grimy parts. Dirt tends to build up around the base. Don’t apply too much pressure, to avoid damaging the finish.
Step 4: Clear out Small Cracks and Crevices
If there are no small crevices on your faucet, you can skip this step. If there are, grab some dental floss.
Take about 12 inches of floss and place it in any spaces where your toothbrush can’t reach. Use an up and down motion, much like flossing your teeth. You should soon see some grime on the string.
Step 5: Rinse with Cold Water
Fill a bowl with clean, cold water and get a new cloth. Dampen the cloth in the water and use it to wipe the faucet. Repeat this step until soap residue, grime, and gunk are gone.
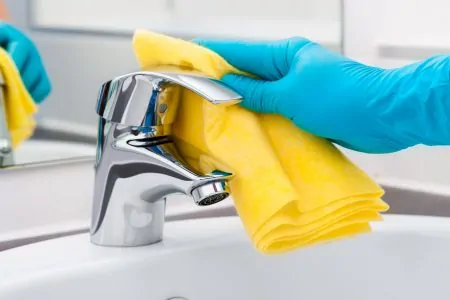
Step 6: Dry the Faucet
Take a clean, dry microfiber cloth and wipe the faucet to dry it. Drying the faucet after cleaning will help to polish it and give it some shine. This also ensures that all the water spots will be gone.
Gently pat the faucet back and forth until it is completely dry. Step back and admire your freshly-cleaned fixture.
How to Clean Faucets: Limescale
Hard limescale requires a stronger cleaning solution than dish soap. You can use a CLR (calcium, lime, and rust) remover if the build-up is severe. However, we recommend just using white vinegar as it is kinder to the environment and your faucet, and it works just as well.
What You Need
- White vinegar or CLR
- Small plastic bag
- An old toothbrush
- Microfiber cloth
- Rubber band
Step 1: Prepare the Vinegar
Take a bottle of white vinegar, and pour a cup or two into a (watertight) plastic bag.
Watch Out
Step 2: Wrap the Spout
Take your vinegar-filled plastic bag and attach it to the spout. Try to hold it at an angle, so the vinegar flows into one corner.
Slide it over the fixture to submerge the nozzle.
This is the tricky part! Secure the bag using a rubber band — think of it like tying a ponytail. Let your faucet soak for 24 hours. If you don’t have that much time, use CLR instead, and soak it for up to two hours.
Step 3: Remove the Bag
After 24 hours, remove the bag and dispose of its contents. Vinegar is fine to pour down the drain, and it could even clean your pipes slightly on the way.
Step 4: Scrub Like You Mean It
Once the bag is off, grab an old toothbrush and scrub the faucet. Focus on the spout to remove limescale build-up on the nozzle. Move under the spout and scrub deposits from within it as well.
Step 5: Rinse and Dry
Like the general method, grab a clean cloth and dampen it with cold water. Rinse the spout and nozzle until all residue is gone. Then, use the microfiber cloth to dry the fixture.
How to Clean Faucets: The Aerator
If you notice a reduced flow from your faucet, check the aerator. This is a small screen with tiny holes, attached to the nozzle. The aerator is responsible for introducing air into the flow to reduce how much water is used.
However, the tiny holes are also prone to mineral and sediment build-up.
What You Need
- Vinegar
- Warm water
- Bucket, bowl, or dish
- Pliers
- Plastic tape
- Old toothbrush
Step 1: Remove the Aerator
The biggest challenge of the cleaning process is removing the aerator, but it shouldn’t be too difficult.
Start by using your fingers and try to turn it. Rotate it counterclockwise to loosen. If it won’t move, wrap some plastic tape around the gripping surface, then use your pliers. Apply minimal pressure to avoid damaging the faucet.
If you can’t remove it, use the limescale cleaning technique instead. Fill a plastic bag with white vinegar and attach it to the spout.
Be Gentle
Step 2: Flush the Aerator
Once you have removed the aerator, flush it under running water. Turn it over so minerals and debris can fall out.
Step 3: Soak in Vinegar
Grab a small dish or bowl and make a solution of white vinegar and warm water. Mix it 50/50; for example, fill half a cup with vinegar and half a cup with water.
Place the aerator in the solution and leave it to soak for 30–60 minutes.
While the aerator is out of the faucet, use the opportunity to flush the spout. Place a thick rag or towel over the drain. Then, open the tap and let the water run for 30 seconds to a minute. The rag will catch any significant debris, preventing it from falling into the drain and causing other problems.
Step 4: Rinse Again
After 30–60 minutes, remove the aerator from the vinegar solution.
Grab an old toothbrush and scrub the aerator gently under running water. It should look much cleaner in no time.
Step 5: Replace the Aerator
Screw the aerator back onto the nozzle until it is secure. Turn on the water and enjoy your improved flow.
How to Clean Faucets: Minerals Around the Plating
The plating is the surface around the faucet’s base. It is important to clean it, as minerals tend to accumulate there. Dirty plating isn’t very nice to look at as it often turns brownish and gives your faucet an overall neglected appearance.
What You Need
- Dry rag
- Washcloth
- Bowl
- Vinegar
- A scrub sponge
- Microfiber cloth
Step 1: Dry the Surface
Use a dry rag to remove any moisture from the surface you want to clean. If any water is present, it will dilute the vinegar and reduce its effectiveness.
Step 2: Soak a Washcloth in Vinegar
Grab a clean bowl and fill it halfway with white vinegar. Submerge a washcloth until it is completely soaked.
Step 3: Drape the Washcloth Around the Spout
Remove the washcloth from the bowl. Without squeezing the vinegar out, drape it around the faucet’s neck to cover the plating.
Pour any leftover vinegar over the washcloth to ensure full coverage. Leave it for about an hour — try not to keep peeking at the faucet.
Step 4: Remove and Scrub
After an hour, remove the washcloth and grab a scrub sponge. Use the hard side and gently rub the calcium-covered surface to remove any gunk around the faucet spout.
If this removes the deposits, rinse the area and cloth with some cold water. If you didn’t get everything off, repeat the process of soaking and scrubbing.
Step 5: Dry and Finish
Once everything is clean, use the microfiber cloth to dry the surface. With that, you’re done!
FAQs

What Is the Best Way To Clean Faucets?
The best way to clean most faucets is by using a solution of dish soap and water, or white vinegar and water. Dish soap should clean most dirt and mineral deposits, especially if you clean your faucets regularly. White vinegar is a great solution for more stubborn deposits or limescale. If deposits are left for too long, your faucet might develop corrosion and need replacing.

How Long Should You Leave Vinegar on a Faucet?
How long to leave the vinegar on a faucet will depend on how severe your mineral deposits or limescale are. If your faucet head has stubborn limescale deposits, you can fill a plastic bag with white vinegar, then place it over the head and secure it with an elastic band. It can be left for 24 hours to ensure you remove all the deposits. Smaller parts, such as the aerator, can be placed in a bowl of vinegar for a couple of hours.

Is Vinegar Better Than CLR?
CLR stands for Calcium, Lime, and Rust, which are the three problems it is designed to treat. CLR is an alternative to white vinegar and it is acidic, making it a more powerful cleaner than its natural counterpart. While this means CLR can remove more stubborn deposits, a CLR cleaner can also damage the finish of your faucet and potentially your pipes. In most cases, vinegar should be sufficient and it will protect your faucet, so it is the safer option.

How Often Should You Clean Faucets?
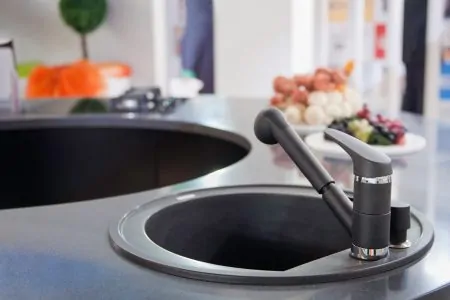
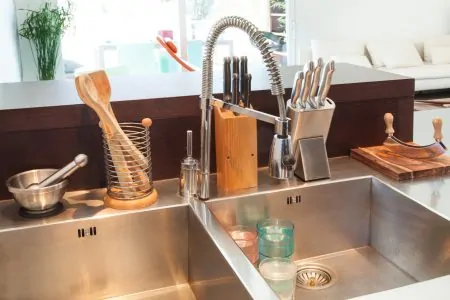
You should clean the surface of your faucets every time you clean the house, at least once a week. Because they are a perfect environment for the growth of mildew, mold, and lime deposits, it is crucial to thoroughly clean kitchen faucets at least once every couple of weeks.

How Do You Clean a Faucet Without Scratching It?
The easiest way to clean a faucet without scratching it is to avoid any abrasive cleaners or very rough brushes that could damage its finish.
You could use a rag, a piece of cloth, or even a sponge when you wash the faucet. None of these cleaning tools should scratch the finish of your faucet.

Can Vinegar and Baking Soda Ruin Stainless Steel?
If you let concentrated vinegar sit on stainless steel for more than a few minutes, it can corrode the material and cause other problems.
However, it is safe to use vinegar that has been diluted on stainless steel. To avoid damaging the stainless steel’s finish, most cleaners dilute the vinegar with baking soda before applying it.

What Is the Strongest Limescale Remover?
Lime-A-Way is currently considered to be one of the strongest limescale removers. It also works on calcium and rust. It also promises to help you get rid of lime without having to scrub, which helps avoid any potential scratches on your faucet.