Did you wake up this morning to find you had no hot water? Has your water heater been making strange noises lately? Water heater problems can be very disruptive and these are just two of the many issues that can occur.
Occasional problems with household appliances are an unavoidable part of owning a home, and it can be difficult to know what to do in such situations. Should you attempt to resolve the issue yourself or is it time to call for professional help?
In this article, we will explore common issues with water not heating and explain how to fix your heater. We will also tell you when you are probably better off calling a professional.
Key Takeaways
- Common water heater issues include leaks, no hot water, and foul smells.
- Maintenance, such as flushing the system and replacing anode rods, can prevent many problems.
- Check valves and power supply when troubleshooting water heater issues.
- Consider consulting a professional for complex or electrical issues.
Traditional Tank vs On-Demand
Whether you have a traditional tank or a tankless on-demand heater, you will probably run into many of the same or similar issues. Let’s look at the key differences between these two units.
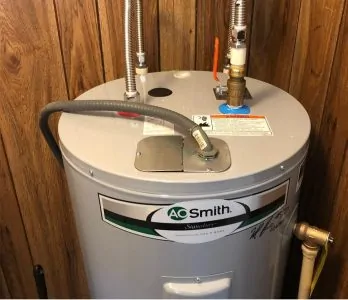
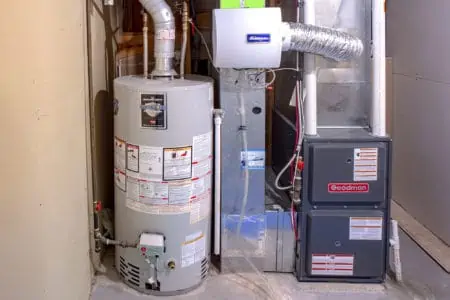
You will find a traditional tank water heater in most older homes. A large water tank is filled and heated to provide a home with hot water. The temperature of the water needs to be maintained so it’s ready when needed.
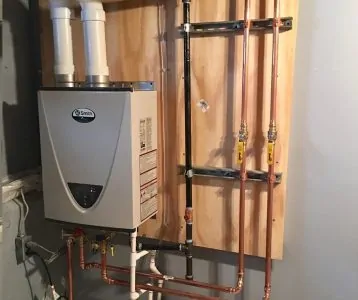
In contrast, tankless water heaters only provide hot water when it is needed (1). As you don’t need to maintain the water temperature in a tank, this option reduces your carbon footprint and saves money on your bills.
Many people are now switching to on-demand water heaters. This is largely due to their superior efficiency.
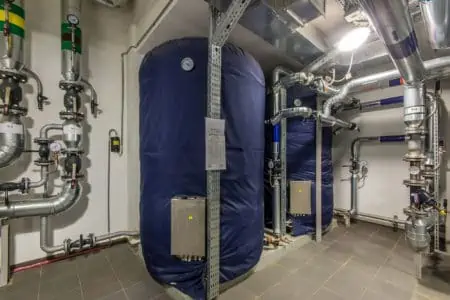
The main issue with tankless heaters is that even the largest models might be unable to heat enough water for a large family to use simultaneously. You might need to invest in more than one heater, depending on your usage.
Gas vs Electric Units
Diagnosing and resolving a problem will depend on whether your unit is fuelled by gas or electric-powered.
When you experience any water heater issues, the first thing to do is to check the power supply. In many cases, interruptions to the power supply are the cause of water heater problems.
When Your Water Is Too Hot
What should you do if you turn on your faucet and the water is scalding hot? Start by running a diagnostic on the thermostat of your heater unit. If the temperature is too high, turn it down a few degrees.
The U.S. Consumer Product Safety Commission (CPSC), recommends setting your water heater to 120 degrees Fahrenheit (2). Not only will this prevent scalding, but it’s also more efficient and economical.
Depending on your unit type, there will be a different way to check the temperature and set it lower.
Electric
If you’re too uncomfortable to reset it yourself, you can call your electric company to do it for you. In some cases, they will do this at no extra cost.
However, if you’re feeling confident, resetting your electric water heater temperature is fairly easy.
Try not to use any hot water for at least two hours prior to resetting the temperature. Before proceeding, turn off all water and power to your system.
Your electric hot water system will probably have two thermostats. Make sure both are set to the same temperature.
There should be instructions provided with your unit showing how to properly adjust the thermostats. To reach them, you will probably need to remove the upper and lower access panels.
Once they are adjusted, turn the power and water back on. You can use a cooking thermometer under a faucet to check that the water is now at an acceptable temperature.
Gas
Thermostats on gas hot water systems differ from unit to unit. Call your gas company for special instructions or consult the owner manual to make sure you adjust it correctly.
When you have set the thermostat to an acceptable temperature, check the water coming from your faucet with a thermometer before using it.
Whatever your type of energy supply, if adjusting the thermostat doesn’t resolve the problem, call in a professional.
When There’s No Hot Water
Your location and a lack of proper maintenance could be significant reasons for your lack of hot water. It’s also possible that your water heater isn’t enough to keep up with your household’s demands.
1. Frozen Pipes
Frozen pipes are a frequent problem in colder regions. It is especially common in pipes located in garages, attics, and basements (3). Frozen pipes can become problematic if they aren’t dealt with immediately and can lead to your heater not working at all.
If this is your issue, we recommend investing in pipe insulation. This is inexpensive and you can get it at any hardware store.
You can also reduce the risk of frozen pipes by leaving cabinets open and keeping external doors shut.
Letting your cold water drip and keeping the thermostat at a consistent temperature throughout the day will also reduce the risk of freezing. We only recommend these as temporary solutions as they are not energy efficient.
2. Overuse
You might also experience your hot water running out or becoming too cold. This could be a simple case of using too much at once.
What was adequate when the water heater was installed might no longer be enough to keep up. With a lifestyle change or additional household members, it could be time for a change. You may need to invest in a larger heater or buy an extra unit for your home.
3. Poor Maintenance
Maintenance of your household appliances probably isn’t the main thing on your mind. However, without it, your appliances are going to have a shorter lifespan and will eventually malfunction and encounter major problems.
It’s recommended to flush your water heater system at least once per year. You can call a professional to do this, but it’s relatively easy to do yourself.
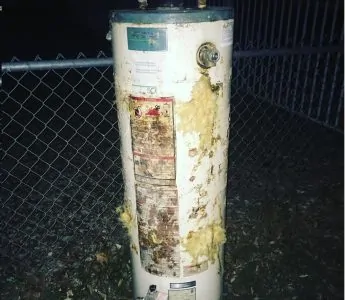
4. Unit Is Too Old
Water heaters are only expected to last so long. If you have maintained yours properly but are still experiencing issues, it’s probably time to invest in a new one.
Many heaters have a shelf life of between 10-15 years (4). Water heaters can come with a pretty hefty price tag, so be sure to check your warranty. This could also be a good time to invest in a tankless water heater if you don’t already have one.
Inadequate Water Pressure
If you turn on your faucets and have low water pressure, there might be an issue with parts of your water heater system. These can include blocked plumbing, a closed shut-off valve, a blocked faucet, or water leaks (5).
When you have this problem, there are a few ways of troubleshooting it.
1. Checking the General Water Pressure
Check whether the low water pressure is in every part of your house. If you find it’s only in one room, it’s possible you simply have a clogged pipe in that area.
If low water pressure only affects your hot water faucet, it’s likely an issue with your water heater.
2. Checking Pressure Relief and Water Shut-Off Valves
Often, low water pressure is due to pressure relief or water shut-off valves. Check the pressure relief valve first. This is the valve that’s shaped like a bell.
Adjust the pressure relief valve by turning the screw. To increase pressure, tighten the screw by turning it clockwise. If the valve is damaged or broken, you will need to replace it.
The water shut-off valve can cause water pressure issues even if it has only been adjusted slightly. Ensure your shut-off valve is completely open and then check whether or not your water pressure is normal.
3. Water Leak
Water leaks can cause low pressure because you are losing water before it reaches the faucet. Check the floor around your unit for water. This is a solid indicator that you have a leak somewhere in your water heating system.
Look and listen for any dripping water and check your unit for any cracks or condensation around it.
Foul Smells and Discoloration
Have you turned on your faucets only to smell rotten eggs or sewage? This is very common and is generally pretty easy to diagnose. If you have a traditional tank water heater, the anode rod is the likely cause of the foul smell.
Anode rods are sometimes referred to as “sacrificial anode rods” because they’re made of a material that corrodes easily. These are placed in hot water tanks to draw corrosion to the rod rather than the tank itself.
The corrosive agents on the anode rods can mix with your water and react to create hydrogen sulfide gas. If you smell rotten eggs, you need to replace the anode rod. This is something that should be done periodically anyway.
Anode rods typically last between 4-5 years. It’s always recommended to have two anode rods with your heater to last the unit’s full shelf life.
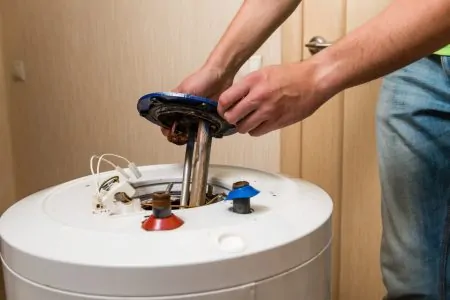
Follow these steps to replace an anode rod:
- Find your unit’s anode rod: You can typically find it right on top but, in some cases, you will need to take the lid off your tank to find it.
- Turn off the water and power supplies.
- Drain the water just enough: You only need to drain enough to be able to get the rod out. You still want the weight of the water to hold the tank down for you.
- Use a socket to twist it off and take out the old rod: You may need help with this as the rod can sometimes be fused onto the tank.
- Insert your new anode rod and seal it off.
A Noisy Unit
If your water heater is making any unusual noises, chances are that something is wrong. However, not every noise means the same thing. Different noises will indicate various issues that need addressing (6).
Noisy units are typically more common with traditional tanks than tankless water heaters. Some noises are nothing to worry about. Clicking sounds in a tankless heater, for example, are usually just the unit turning on and off.
Any other noise from a tankless water heater could be caused by:
- Calcium deposits from hard water.
- Burner issues.
- A dirty fan system.
- A sealed combustion leak.
Noises from traditional tanks are far more common and due to several reasons:
1. Crackles, Pops, and Rumbles
If you hear these noises from your traditional tank, it’s probably due to sediment build-up on your heating elements. This is much more common in older units.
The noise comes from the water element working harder to push the water through the cracks. Steam is produced around or under the sediment, which causes the popping sounds.
Fix this issue by cleaning out or replacing the affected elements. If you hear more of a rumbling sound, it’s probably time for your annual flush out. Rumbling occurs when sediment is being stirred inside your tank.
It’s also possible that the noise is simply expansion and contraction in your unit’s expansion tank. This isn’t an issue and doesn’t need any maintenance.
2. Humming
Humming can indicate a loose element. Elements are typically placed vertically in your tank. The constantly-moving water can cause vibrations and the vibrations may loosen the elements. They can easily be tightened again with the right tools.
3. Screeching
Screeching or other high-pitched noises in your water heater can be caused by a valve that isn’t completely open.
The noise usually comes from the water trying to push itself through a small space, so this makes sense. Simply check your valves to make sure they are completely open.
Water Heater Leaks
Leaks are probably the most common and critical water heater problem you will need to deal with quickly. Minor leaks won’t cause much damage if you address them early on, but in time they can get worse and cause major problems.
The issue can depend on where your leak is located.
Leaking from the top can be due to the parts located on your tank’s lid. A leak from the bottom could be either the drain valve or your pressure relief valve. If, however, your tank has water on its sides, pinhole leaks or condensation could be the cause.
Pilot Light Isn’t Lit
The pilot light of your water heater is what initially powers your system. In older heaters, your pilot light is the small blue flame in your power system (7). Pilot lights provide the flame needed to get the gas working to power your gas water heater.
Most new systems don’t have a pilot light because they tend to waste a lot of gas. If you have an older system and don’t want to upgrade yet, here’s how you can relight your pilot light.
- Tools you will need: A pair of pliers, a box of matches, and a flashlight.
- Turn off your power supply: Wait about five minutes for all gas to clear the area. Once you can’t smell it anymore, you can proceed.
- If you still smell gas: Call a professional as it could suggest an underlying issue elsewhere.
- Open or remove your access panels.
- Locate the pilot light tube: Once you do this, turn your power control knob from off to the pilot setting.
- Light a match and place it at the end of the pilot light tube: While doing this, you need to press the reset button on the pilot light controls.
- Wait until you see a flame: Keep the reset button held down for about 60 seconds of burning.
- Release the reset button: Turn your power supply from pilot to on.
- Put your access panels back on: Set your water heater’s thermostat to your desired temperature.
FAQs

What Are the Common Problems for Water Heaters?
This depends on how old your water heater is. For a new unit, the most common problems are frozen pipes, which can occur at any time in cold regions, and leaks, which usually come from the pipes or connectors rather than the heater itself. As time passes, you will encounter wear and tear issues such as anode rods needing to be replaced and eventually the heater itself leaking, at which point it needs replacing entirely.

How Do I Know if My Hot Water Heater Is Going Bad?
If you notice changes in the flow of hot water, it could be a sign that something is wrong with your boiler. This is particularly true if the issue only affects the hot water and the cold water still flows as it always has. Discolored hot water is a sign that there is probably rust inside the pipes or heater unit, which is a serious problem if it occurs inside the unit itself.

How Long Should a Hot Water Heater Last?
The lifespan of a hot water heater will vary depending on the type of heater, the quality of its construction, the materials used, and how well it is maintained. A heater that is used rarely and carefully maintained will last longer than one that is used constantly and poorly maintained. In general, a traditional tank heater is expected to last eight to 12 years, while a modern tankless heater is expected to last 15 to 20.

Why Did My Water Heater Suddenly Stop Working?
When a water heater stops working, it could be due to several reasons. A damaged or loose in-line valve, damage to the pressure relief valve, a low supply of hot water, your water heater is not powered, there is a power cut-off throughout the house, or your gas supply has been cut off.

What Trips the Reset Button on a Hot Water Heater?
A trippy reset button on a water heater includes a loose electrical connection, a bad thermostat, a bad reset button, or a faulty heating element. Because you are dealing with 240 volts of electricity, attempting to diagnose this problem yourself is not only difficult but also dangerous.
Suppose you do not have experience working with wiring and other electrical components. In that case, we recommend you consult an expert rather than attempting to identify the exact problem on your own. But a qualified technician can do both an inspection and repairs on your water heater.

Why Is My Hot Water Not Working but My Cold Water Is?
If your hot water is not working, but your cold water is, you likely have a valve closed somewhere. Simply locate the valve and twist it to an open position.

How Do I Reset My Water Heater?
To reset your water heater, you have to locate the reset button. It is typically colored red and is frequently found close to the thermostat.
It might also be concealed behind a metal panel that can be removed from the device, and then again behind some insulation. When you locate the button, press it and then let go of it.
In Conlusion
Many water heater issues can be avoided if you perform annual maintenance on your unit. Flushing your system at least once every 12 months will prevent too much sediment build-up. If you have a traditional tank, remember to replace your anode rods every few years.
No homeowner enjoys having to deal with issues when they arise. Knowing what to do when water heater problems occur will make fixing them much easier and far less stressful.