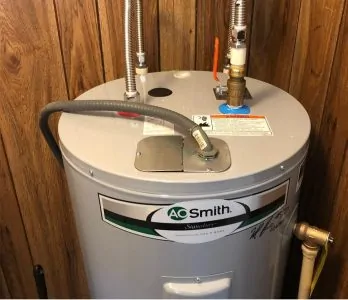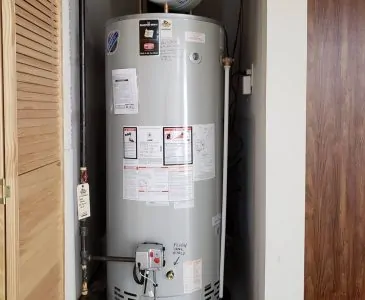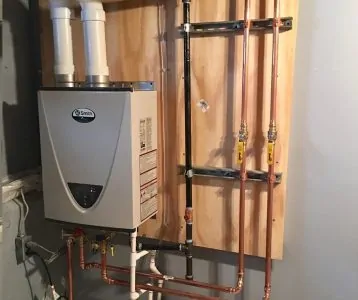
AO Smith is one of the leading tankless water heater brands in the world, producing some of the most efficient and reliable heaters available today. However, even their heaters will eventually have issues if you use them for long enough.
Thankfully, AO Smith’s tankless heaters provide an error code when something goes wrong. These error codes correspond to a specific problem that might affect your heater, but this isn’t much help if you don’t know what they mean.
In this article, we will take a closer look at AO Smith tankless water heater error codes, why they are important, and how they can help you resolve any issues with your boiler. Understanding an error code might mean you can fix the problem by simply pressing the reset button, rather than calling out a professional technician.
Key Takeaways
- AO Smith tankless water heaters display error codes to indicate specific issues.
- Error codes can be found on digital displays, remote controls, or through blinking lights.
- Common issues include ignition failure, abnormal combustion, and faulty thermistors.
- Always turn off the power and gas supply before attempting any maintenance.
Where Can I Find the Error Code?
AO Smith tankless water heater troubleshooting is quick and easy thanks to the brand’s error code system. Where exactly error codes are displayed on AO Smith tankless water heaters varies from model to model.
Some models, including the 240, 340, and 540 series, have a remote control that displays an error code when something is wrong. These models also display the error code on the appliance’s LED display, where you would normally see the water temperature.
The 510 series displays the error code on the LCD display. Other models, such as the 110 and 310, alert you with a flashing red light on the appliance. The light blinks a specific number of times, depending on the error.
You should consult your owner’s manual to discover the exact model you have and where error codes can be found.
AO Smith Tankless Error Codes and Troubleshooting
As long as your water heater has been installed according to the manufacturer’s specifications, these are the error codes you might see.
For each error, we have included:
- The numbers that are displayed on a remote control
- The numbers that are shown on an LED display
- How many times the warning light will blink
BE AWARE
Remote 03, LED 031, Light Blinks 1x
What It’s Telling You
- The dip switch settings are incorrect.
The Solution
- Disconnect the power: Turn off the power supply.
- Check the dip switches: Remove the front cover and find the dip switches. They will be at the center of the computer board. Make sure the settings are correct, according to your user’s manual.
Remote 10, LED Display 101, Light Blinks 5x
What It’s Telling You
- This is a warning code for abnormal combustion.
The Solution
- Air flow: Check the venting for obstructions such as bird nests, leaves, etc.
- Check clearance: The exhaust and intake terminals need to have the specified clearance between them.
- Clean: Check for dirt or grease in the fan motor and gas burner, and remove it if necessary. Make sure the intake is free from dust and grease.
Remote 11, LED Display 111, Light Blinks 3x
What It’s Telling You
- There is an ignition failure where the unit doesn’t fire up after three failed attempts.
The Solution
- Check connections: Make sure the hi-limit switch is working properly and there are no loose wires or connections. If the switch has tripped, turn the power off and reset it but you should also call out a technician to determine why it is tripping.
- Flame rod: Make sure the flame rod is free from soot.
- Computer board: Ensure the computer board is not damaged and there are no loose wires or connections.
Remote 12, LED Display 121, Light Blinks 3x
What It’s Telling You
- Flame loss during operation.
The Solution
- Tripped switch: Make sure the hi-limit switch hasn’t tripped.
- Computer board: Verify that the computer board settings are in line with those in your owner’s manual.
- Obstructions: Ensure there are no blockages in the gas supply, and that the gas is on and at the right pressure. Look for blockages in the vents.
Remote 31, LED Display 311, Light Blinks 2x
What It’s Telling You
- There has been a failure in the outlet thermistor.
The Solution
- Connections: Ensure the thermistor wiring is connected properly and there is no damage.
- Clean: Check the thermistor for dirt or debris and clean it if necessary.
- Replace parts: If the error code persists, replace the outlet thermistor.
Remote 32, LED Display 321, Light Blinks 2x
What It’s Telling You
- There has been a failure in the inlet thermistor.
The Solution
- Connections: Inspect the thermistor wiring, make sure the connections are correct and there is no damage.
- Clean: Check the thermistor for dirt or debris and clean it if necessary.
- Replace parts: If the error code persists, replace the inlet thermistor.
Error Code: 331, Light Blinks 2x
What It’s Telling You
- There has been a failure in the mixing thermistor.
The Solution
- Connections: Check the thermistor wiring, make sure it is connected properly and there is no damage.
- Clean: Check the thermistor for dirt or debris and clean it if necessary.
- Replace parts: If the error code persists, replace the mixing thermistor.
Error Code: 341, Light Blinks 2x
What It’s Telling You
- The exhaust thermistor has failed.
The Solution
- Connections: Check the thermistor wiring, make sure it is connected properly and there is no damage.
- Clean: Examine the thermistor for dirt or debris and clean it if necessary.
- Replace parts: If the error code persists, replace the exhaust thermistor.
Remote 39, LED Display 391, Light Blinks 2x
What It’s Telling You
- The air-fuel ratio rod (AFR) is faulty.
The Solution
- Connections: Make sure the wiring is connected properly and isn’t damaged.
- Clean: Check the AFR rod for soot and clean it if necessary.
Error Code: 441, Light Blinks 2x
What It’s Telling You
- There is an issue with the flow sensor. This happens when you have more than one heater connected and the master unit is unable to activate a secondary heater.
The Solution
- Connections: Make sure the problematic heater is receiving a water supply. Also, ensure that the wires to the computer board are connected and are not damaged.
- Airflow: Make sure the inlet filter is clear of debris
- Clean: Check that the flow sensor has no dirt on it.
Remote 51, 55, LED Display 510, 511, Light Blinks 6x
What It’s Telling You
- There is a problem with the gas solenoid valve.
WARNING
The Solution
- Check for damage: Make sure the wires to the gas valve assembly are not damaged.
- Test pressure levels: Ensure the gas pressure is at the correct level.
Remote 61, LED Display 611, Light Blinks 4x
What It’s Telling You
- The fan motor is faulty.
The Solution
- Damage: Check the wiring to the fan motor for damage and the PC board for burn marks or moisture. If there is moisture, let it dry completely before turning the power back on.
- Clean: Make sure there is no water or dust in the fan housing or on the motor. If there is, dry it or clean it.
- Replace parts: If the error persists, the computer board might need replacing.
Error Code: 651, Light Blinks 4x
What It’s Telling You
- There is a faulty flow adjustment valve.
The Solution
- Damage: Check the wiring to the flow adjustment valve for damage or breaks.
- Inspect for leaks: Make sure the valve isn’t leaking.
- Clean: See if there is any build-up on the valve and clean it.
- Replace parts: If it can’t be cleaned, replace the valve.
Error Code: 661, Light Blinks 4x
What It’s Telling You
- There is a fault with the bypass valve.
The Solution
- Damage: Check the wiring to the flow adjustment valve for damage.
- Clean: Make sure there is no scale build-up on the motor drive and clean it if necessary.
- Leaks: Check for water leaking from the valve.
Remote 70, LED Display 701, Light Blinks 1x
What It’s Telling You
- The computer board is experiencing a problem.
The Solution
- Connections: Check that there are no breaks in the wires and they are connected properly.
- Damage: Inspect the board closely. Can you see any burn marks?
- Power: Make sure there is a power supply to the unit.
Error Code: 711, Light Blinks 1x
What It’s Telling You
- There is a failure in the gas solenoid valve drive circuit, hi-limit valve, or overheat cut off switch. This code might appear instead of codes 111 or 121.
The Solution
- Damage: Check the hi-limit switch and overheat cut-off switch for wire damage.
- Connections: Inspect the control board connection for the gas valve.
Remote 72, LED Display 721, Light Blinks 6x
What It’s Telling You
- There has been a false flame detection.
The Solution
- Power: Turn off the power before proceeding.
- Check the condensate drain: Make sure it is installed on the heater’s vent collar.
- Leaks: Inspect the appliance for leaks from the heat exchanger.
- If in doubt: The issue could be caused by the flame sensor but you should call a service technician in case it is more serious.
Remote 74, LED Display 741 and 751
What It’s Telling You
- There is a communication error between the remote control and the water heater. This can happen if you disconnect the remote from the heater while the power supply is on.
The Solution
- Power: Turn the power off before disconnecting the remote.
- Connections: Check the connections between the remote and the water heater. Make sure you have the correct remote control for your heater model.
- Check for a power surge: Look for symptoms such as burnt-out wires or a damaged control board. A minor surge or outage might cause LCD displays to flash when power has been lost.
Error Code: LED Display 761
What It’s Telling You
- There is a communication error between heaters in an Easy-Link system. The error code will appear on the master heater and will state which heater is at fault.
The Solution
- Check the power: Ensure the heater that has lost connection is receiving power.
- Make sure the units are communicating with each other: Check that the communication system is correctly set up in line with your user manual.
Remote 99, LED Display 991, Light Blinks 5x
What It’s Telling You
- There has been improper gas combustion.
The Solution
- Make sure the altitude setting is correct: Check that the water heater is set for the correct elevation.
- Blockages: Ensure there are no obstructions in the venting system.
- Check the clearance: Verify that the intake and exhaust are the necessary distance apart.
- Clean: Look for grease, dirt, or debris on the gas burner or fan motor and remove them.
FAQs

How Does an AO Smith Tankless Heater Display Errors Codes?
An AO Smith tankless water heater displays error codes in different ways, depending on your specific model. If you have a digital remote, the error code will usually be displayed on both the remote and the unit’s display. If you don’t have a remote, it will be displayed on the unit’s digital display alone. If you don’t have a digital display, warning codes should be indicated by a blinking light. For some issues, for example, the light blinks 3 times.

Why Don’t I See an Error Code on My AO Smith Water Heater?
If you have an AO Smith water heater with a digital display, it should provide an error code when something goes wrong with the heater. In some cases, the heater won’t be able to do this. If it is stuck in standby mode, you might have no hot water but no way of seeing an error code. If you don’t have a digital display, your heater might alert you to errors with a blinking light, with the number of blinks corresponding to a type of error.

Are AO Smith Water Heaters Reliable?
AO Smith water heaters comply with all the necessary safety regulations and have excellent lifespans. Most of their heaters are protected by warranties of between 6 to 12 years, but you can expect one of their tankless water heaters to last twice this long with proper maintenance and a soft water supply. If you do encounter any issues, you can check the error code and provide it to the company’s customer support team.

How Long Do AO Smith Tankless Water Heaters Usually Last?
The basic lifespan of an AO Smith water heater is between 10 and 12 years. However, this depends on several elements such as the quality of the water, the amount used or how frequently it is used, the temperature setting, and many more. There are even certain
AO Smith water heaters have a lifespan of more than 20 years.

What Is the Most Common Problem With AO Smith Tankless Water Heaters?
The most common problem with AO Smith tankless water heaters is the heater, not lighting. In some water heaters, the gas is lit with an igniter. If the igniter isn’t working properly, the burner won’t light.
Check to see if voltage is supplied to the igniter before deciding whether or not it is functioning properly. If the igniter is receiving voltage but it does not glow, this is evidence that the igniter is faulty and has to be changed.
Deposits of carbon can sometimes accumulate on the pilot, which can eventually lead to the formation of a limitation.
If the pilot is obstructed, try removing it and cleaning it out with a sharp brush and/or compressed air. If that doesn’t work, try replacing the pilot. You should replace the pilot if there is no way to clean it.

What Does It Mean When an AO Smith Tankless Water Heater Beeps?
There are a few potential causes for the beeping sound coming from your AO Smith water heater.
The water heater has to have its scale removed, there is a warning of it overheating, the water pressure is extremely high, there is not enough fuel, and either the air intake or the vent channel is clogged.
If there’s a leak, whether it’s water or gas or a defective sensor, your AO Smith water heater can sound an alarm and beep. This issue may potentially be caused by an inadequate intake supply, a clogged inlet or aerator, or both.

Why Is My AO Smith Water Heater Blinking?
If your AO Smith water heater is blinking 3 times, it could be a problem with the pressure switch, a blocked exhaust gas vent, a damaged gas valve, or a problem with the blowers.
The pressure switch would fail to close properly, which would cause your AO Smith heater to blink 3 times. Additionally, it will prevent the fan from functioning properly on the water heater.

How Do You Troubleshoot an AO Smith Tankless Water Heater?
To troubleshoot an AO Smith tankless water heater, you must first determine what error code you’re dealing with.
For instance, if you are seeing the error code 10, look for vent blockages, ensure that the distance between the intake and exhaust terminals is as specified in the instructions, and clean out the fan motor and gas burner if you notice dirt or grease build-ups.
When you notice the error code 651, the flow adjustment valve may have broken connections or wires, there may be a scale building on the motor drive that causes it to become locked, or there may be a water leak.

How Do I Reset My AO Smith Tankless Water Heater?
First things first, before you do anything else, you need to make sure that the power unit is disconnected so that there is no possibility of any energy reaching the power unit. The cover plate must then be located and removed.
You will need a screwdriver to complete the task. At this point, take off the insulation. After that, you need to press the button labeled “Reset.” After everything is put back together, activate the Ao Smith water heater.