Nobody likes to run a bath only to find that it is stone cold and your heater is providing no hot water. Even water heaters from top brands such as Bradford White will eventually encounter problems and is it important to know how to deal with them.
To help you resolve the issue, Bradford White tankless water heaters provide an error code when something doesn’t work as it should. This code will tell you what is wrong with the unit or fuel supply, but only if you understand what it means.
When you know the kind of problem you are dealing with, you can find out how to fix it. It might be a simple case of pressing a reset button yourself, or you might need to call in professional help. In this article, we will look at Bradford White error codes and how they can help you troubleshoot issues with your tankless heater.
Key Takeaways
- Bradford White tankless water heaters display error codes to help identify problems.
- Common error codes include 10 (blockage in air supply or exhaust), 11 (ignition failure), and 16 (overheating warning).
- Follow the recommended solutions for each error code, such as checking gas supply, clearing blockages, or replacing faulty parts.
- Regular maintenance can extend the life of your water heater and prevent issues.
Where is the Error Code Displayed?
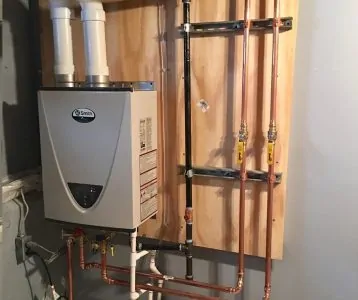
Modern Bradford White tankless water heaters feature an LCD window on the front of the unit. During normal operation, this is where you will be able to see the current water temperature.
When something prevents the heater from working properly, an error code will appear on the display instead. These error codes remove a huge amount of the guesswork from Bradford White tankless water heater troubleshooting.
Bradford White Tankless Error Code Troubleshooting
Let’s take a closer look at some of the most common error codes that might be displayed by your Bradford White water heater, what they mean, and how to resolve them (1).
Error Code 10
What It’s Telling You
- There is a blockage in the air supply or the exhaust.
The Solution
- Check the exhaust and intake ports: Make sure there are no obstructions.
- Examine the flue: Check that the flue inlet and exhaust aren’t blocked.
- Is the clearance correct? Ensure that there is enough distance between the unit and combustible materials such as wood.
Error Code 11
What It’s Telling You
- Ignition failure.
The Solution
- Check the gas supply: Make sure the gas supply to the appliance is active.
- Gas type and pressure: Ensure you have the correct gas supply for your unit and that it is set to the specified pressure.
- Air in the gas lines: Bleed any air from the gas lines.
- Dip switches: Make sure the dip switches are appropriately set.
- Disconnect the MSA controls: If you have more than one heater connected, disconnect them.
- Check lines for size: Make sure the gas line, gas meter, and/or gas regulator is the correct size.
- Is the unit grounded? Check that your appliance is properly grounded.
- Are the circuits correct? Look for any short circuits or open circuits in the gas solenoid.
- Check the igniter: Make sure the igniter is working and the wiring harness doesn’t show signs of damage.
Error Code 12
What It’s Telling You
- There has been a flame failure. This usually suggests a gas valve defect or an electronic fault has been detected.
The Solution
- Gas pressure and type: Make sure you have the appropriate gas type and the pressure is correct.
- Air in the gas line: Bleed any air that is present in the gas lines.
- Dip switches: Make sure the dip switches are correctly set.
- Flame rod: Check that the flame rod wire is connected and the rod has no carbon build-up.
- Line sizes: Make sure you have the correct dimensions for the gas line, meter, and/or regulator.
- Is the heater grounded? Check that your appliance is properly grounded.
- Check the circuits: Look for open or short circuits in the gas solenoid valves.
- Look for loose connections: Make sure there are no loose power connections and that the power supply is the correct voltage.
- Has there been a change in the power voltage? Check for power drops or surges.
- Disconnect all the MSA controls and the keypad: If you have multiple heaters connected, disconnect them.
- Check the wiring harnesses: Disconnect and reconnect the wiring harnesses on the appliance and the PC board.
Error Code 14
What It’s Telling You
- Problem with the thermo-fuse.
The Solution
- Dip switches: Make sure the dip switches are set to the correct position.
- Manifold pressures: Check that the high and low settings for manifold pressures are correct.
- Correct gas: Make sure you have the appropriate gas type for your unit.
- Look for damage: Check for any cracks or separations in the heat exchanger.
- Check the resistance: Make sure the resistance of the safety circuit is correct (2).
- Have there been any conversions?: Check that the product has not been improperly converted.
- Is the airflow restricted?: Make sure nothing is interfering with the airflow around the appliance and in the vent exhaust.
- Check for a low flow: Make sure there is no low flow circulating in the system and causing the heater to short cycle.
- Blockages: Make sure there are no obstructions in the exhaust piping and/or combustion chamber.
Error Code 16
What It’s Telling You
- Overheating warning.
The Solution
- Obstructions in the heat exchanger: Make sure there is no blockage in the heat exchanger and that it hasn’t become clogged.
- Airflow: Look for any restrictions to the airflow around the appliance and in the vent terminal.
- Low flow: Look for a low flow in the circulation system that is causing the heater to short cycle.
- Obstructions: Ensure there are no obstructions or blockages in the exhaust and/or combustion chamber.
Error Code 32
What It’s Telling You
- The outgoing water temperature sensor is faulty.
The Solution
- Check the wiring: Make sure there is no damage to the sensor wiring.
- Resistance: Check the resistance on the sensor is correct.
- Scale build-up: Look for any scale on the sensor and clean it.
- Replace the part: If necessary, replace the sensor.
Error Code 33
What It’s Telling You
- A faulty outgoing sensor on the heat exchanger.
The Solution
- Check the wiring: Make sure there is no damage to the sensor wiring.
- Resistance: Check that the resistance on the sensor is correct.
- Scale build-up: See if there is any scale on the sensor and clean it if there is.
- Replace the part: Replace the sensor if necessary.
Error Code 34
What It’s Telling You
- A faulty air combustion temperature sensor.
The Solution
- Check the wiring: Make sure the wiring for the sensor isn’t damaged.
- Resistance: Check that the ohms on the sensor are correct.
- Clean the sensor: Look for any dirt or debris on the sensor and clean it if necessary.
- Inspect the fan blade: Check that the fan blade is fitted securely on the motor shaft and is not damaged or dirty.
- Clean the blades: Check the blower blades for dirt and clean them.
- Replace the part: Replace the sensor if necessary.
Error Code 52
What It’s Telling You
- There is an abnormal signal from the modulating solenoid valve.
The Solution
- Inspect for damage: Make sure the wiring harness and terminals for the solenoid valve aren’t damaged or loose.
- Test the ohms: Check that the resistance on the valve is correct.
Error Code 61
What It’s Telling You
- Failure of the combustion fan.
The Solution
- Is the fan obstructed? Make sure the fan can turn freely and isn’t prevented from moving. The motor will still work when there’s a small amount of resistance.
- Inspect the wiring: Make sure the wiring harness for the motor isn’t loose or damaged.
- Check the ohms: Test the resistance on the motor winding to make sure it’s correct.
Error Code 71
What It’s Telling You
- The solenoid valve circuit for SV0, SV1, SV2, and SV3 is faulty.
The Solution
- Inspect the solenoids: Check each solenoid for loose connections or damage.
- Test the resistance: Make sure the resistance on each solenoid is correct.
Error Code 72
What It’s Telling You
- There is a fault in the flame-sensing device.
The Solution
- Test the power: Ensure the microamps produced by the flame rod are correct.
- Check the flame rod: Remove the flame rod and inspect it for carbon build-up. Use some sandpaper to clean it if necessary. Make sure the flame rod touches the flame when the appliance fires.
- Inspect for obstructions: Look inside the burner chamber for any blockages affecting the flame at the flame rod.
- Look for damage: Is the wiring to the flame rod intact?
- Replace the part: Replace the flame rod if necessary.
Error Code LC
What It’s Telling You
- There is a build-up of scale in the heat exchanger.
The Solution
- Power supply: Turn the power supply to the heater off and back on. If the code does not reappear, separate the control wires from the unit’s power supply.
- Clear the limescale: Flush the heat exchanger according to the instructions in your owner’s manual. You might need to do this regularly if you live in an area with hard water.
- Replace the part: Replace the heat exchanger if necessary.
No Error Code
You might turn on a hot water tap but only receive cold water. In most cases, a Bradford White tankless water heater will tell you what is wrong but, in some instances, there will be no error code.
If your Bradford White heater provides no hot water but there is no error code, you can try these troubleshooting tips:
- Clean the filter: Remove the filter from the water supply inlet and scrub it with a toothbrush to remove any debris.
- Check the flow rate: Make sure your flow rate is at least the minimum needed to use the appliance.
- Look for blockages: Ensure there is no blockage in the control turbine for the water flow.
- Inspect the water supply pipes: If your plumbing was installed recently, make sure the hot and cold water lines have not been crossed.
- Remove air from the system: Bleed the lines by turning off your hot water and opening the pressure relief valve. If the appliance fires up, there is a bleed-over in the system. Before doing this, if there is a circulatory system in use, you must isolate it.
- Check the water flow control: Disconnect the water flow control motor and turn on your hot water. If the unit fires up, replace the water flow control.
- Test the resistance: Check the resistance on the sensor for the water flow control.
The correct resistance for any of these troubleshooting tips can be found in your owner’s manual.
Safety First
