You probably haven’t spent much time thinking about anode rods before. There’s a good chance you don’t even know what an anode rod is, and you wouldn’t be alone in that.
Although they usually go unnoticed, anode rods play an important role in maintaining your water heater’s tank. You will also need to replace the rods every three to five years to ensure they can keep doing their part.
Do all water heaters have anode rods? In this article, we will explain what a water heater anode rod is, why you should replace them, and how you can do it.
Key Takeaways
- Anode rods protect water heater tanks from rusting and need to be replaced every 3-5 years.
- Signs an anode rod needs replacing include rust-colored water, pinging sounds, and metallic taste in water.
- Replacing an anode rod involves turning off the power supply, locating the anode rod, draining the water heater, and inserting a new rod.
- Magnesium anode rods are generally better than aluminum anode rods, but aluminum rods are more budget-friendly.
What Is an Anode Rod?
Also known as a “sacrificial rod”, an anode rod is made of a steel wire that is covered with magnesium, aluminum, or aluminum/zinc alloy. There are two types of anode nodes: the nipple type and the plug type.
The nipple type rod is located on the hot water outlet while the plug type can be found on top of the tank. The plug-type anode rod will have a dedicated opening and, depending on the heater model, it may be concealed under a plastic cap.
The role of the anode rod is to protect the steel tank from rusting. Steel is a more noble metal (resistant to oxidation and corrosion) than magnesium, aluminum, and aluminum/zinc alloys.
As corrosive elements in water will always attack metals, the more reactive material of the anode rod will corrode first. This leaves the steel tank intact.
This is the reason anode rods are called sacrificial nodes; they sacrifice themselves for the good of your steel tank (1). The same logic applies to a zinc anode rod, an aluminum anode rod, or a magnesium rod.
Without an anode rod, your water tank will start to corrode from the inside, eventually causing leaks. If this happens, you will likely need to buy a new tank.
A corroded anode rod that isn’t replaced could end up breaking off and falling to the bottom of the tank. As water passes through the tank, the loose rod will move around and potentially damage the tank’s lining.
Any damage done by the broken rod will shorten your heater’s lifespan and you will need to replace it sooner. It’s clear that having a functional anode rod is very important.
Signs an Anode Rod Needs Replacing
One of the most reliable ways of determining if an anode rod needs to be replaced is by taking it out and inspecting it. We will look at how to remove it in the following section.
If the rod only shows signs of light wear and is slightly corroded, you can put it back. If the steel wire is visible or it no longer has any protection, you should replace it immediately.
If the casing is completely corroded, it’s likely that the water is now attacking your steel tank, and you should act quickly to prevent any further damage.
Other signs to look out for include:
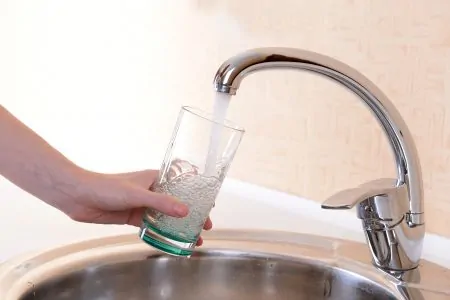
- Rust-colored water flows from your hot water faucets.
- Pinging sounds come from within the tank. These could indicate a broken rod rattling around.
- Faucet aerators clog frequently.
- Foul-smelling water.
- Presence of a slimy gel around the faucet aerator.
- Foam floating in your heater. Aluminum rods are susceptible to this because aluminum produces a foamy waste by-product during corrosion (2).
- Metallic taste in the water.
People living in areas with hard water may need to use a water softener, but the water softener will also corrode anode rods faster. If you use water softeners, you will need to replace your sacrificial rod more often.
How to Replace an Anode Rod
Anode rod replacement isn’t as daunting as it might sound. In fact, you can probably do it yourself.
Our step-by-step guide describes the basic way to replace an anode rod, but steps may differ depending on your model. If our guide doesn’t seem to match, refer to your owner’s manual or visit the manufacturer’s website for specific instructions.
You will need the following:
- A new anode rod.
- A 1-1/16” socket wrench. A closed-end wrench can also work depending on the anode rod socket size.
- Breaker bar or cheater pipe (optional).
- Garden hose.
- Water collection bucket (optional).
- Teflon tape.
- Flat blade screwdriver (optional).
1. Turn Off Power Supply
If you’re using an electric heater, you will need to turn off the circuit breaker. If you leave it on, air may come into contact with the heater’s heating element and burn it out.
With a gas heater, look for the vacation setting and set the gas control valve to it. You can also turn the control valve to the lowest setting on the heater. Turning it off completely means you will need to relight the pilot.
2. Look for the Anode Rod
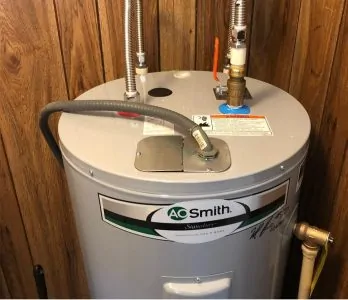
If you have the owner’s manual to hand, you can find the anode rode’s location from there. On most models, it’s located on top of the heater and might look like a hexagonal plug nut head. It could also be concealed under a plastic cap.
On some heaters, the sacrificial rod may be connected to the hot water outlet port. For the purposes of this article, we will focus on anode rods located on top of the heater or on the side.
3. Close the Cold Water Supply
Close the cold water supply or the main inlet supply. Then, open the nearest hot water faucet. This helps to release pressure from the tank by allowing air inside, breaking the vacuum before the next step.
4. Drain Water Heater
Connect the garden hose to the drain outlet at the bottom of the heater and extend the hose to a drain or somewhere outside your house. For the water to drain from the heater, the hose must be lower than the water level inside the heater.
The water that comes from the heater is very hot and could exceed 125 degrees Fahrenheit. Ensure that no one is in contact with the hosepipe or exposed to the water as it’s being drained.
Heaters with anode rods at the top should be drained until the water level is below the rod. Those with anode rods on the side will require draining until the water level is lower than the anode rod port.
Once you’re done, close the drain valve and remove the hose.
Quick Tip
5. Loosen the Anode
If the anode rod is concealed by a plastic cap, use a flat blade screwdriver to remove the cap and expose the anode head. Then, use a wrench to carefully remove the anode.
Anode rods that have been left in the heater for several years may be harder to remove. Have someone hold the heater in place as you try to extract the rod. This will prevent you from damaging any pipe connections that could cause leaks.
Use a breaker bar to provide the leverage needed to break the seal.
A few tips:
- Avoid banging on the anode as you may end up damaging the lining of the heater.
- If you’re having trouble removing the anode, even with the breaker bar, enlist the help of a professional plumber.
- Contrary to some information online, avoid using chemicals to loosen the threads on a snugly fit anode. These chemicals can get into the water heater and contaminate the water.
6. Remove the Anode
With the anode rod loosened, lift it out of the heater. Be careful as it could be hot. An anode rod that shows signs of wear has been doing its job.
Depending on the location of the heater, you may not have enough space to pull out the anode. In this case, you can bend it to remove it. In rare cases, you may need to cut it.
7. Insert the New Anode
Prepare the threads of the replacement anode with Teflon tape and be sure to wrap five or six turns. Insert the new anode and use the wrench to tighten it. Depending on your tank’s location, you may need to use a flexible anode bar.
8. Refill the Tank
Open the cold water supply and refill the tank. When water starts coming out of the hot water faucet you opened in step 3, your water tank is full. The faucet will most likely spit out air with the initial water.
Allow the water to run until all the air has been expelled. You will know your tank is free of air when the water is flowing freely, without any spitting.
9. Final Inspections
Inspect the heater’s connections and the area around the new anode rod for leaks. If there are none, it’s time to turn on the power of your electric heater. Set the control valve back to its original setting on a gas heater.
Congratulations! You have successfully replaced your anode rod.
FAQs

Where Is the Anode Rod on My Water Heater?
The location of your heater’s anode rod will vary depending on which water tank you own. In most cases, the anode rod will be inserted into the top of the tank, meaning you won’t have to drain as much water when replacing the rod. Sometimes they are placed in the side of the tank, in which case you will need to drain more water. You can find the specific location in your water heater’s owner manual.

Do Electric Water Heaters Have Anode Rods?
Electric tank water heaters have anode rods. It is important to turn off the electrical supply to the heater before removing the anode rod; otherwise, air can come into contact with the heating element and burn it out. It’s also better to be safe than sorry when dealing with any kind of electrical appliance, so turning off your heater’s power supply is for the best.

Do Gas Water Heaters Have Anode Rods?
Gas tank water heaters have anode rods and you will need to adjust their settings before removing the rod. Many gas water heaters have a vacation setting, which you can set the heater to for safety before removing the rod. It’s also possible to simply turn the heater to its lowest setting to avoid having to relight the pilot after replacing the rod.

How Long Will Water Heater Last Without Anode Rod?
A water heater usually lasts around 5 years without a new anode rod. Because a water heater’s longevity is determined by various elements in addition to the anode rod, it is difficult to provide an accurate period for its expected lifespan.
Examining the lifespan of an anode rod is, nevertheless, a useful method for approaching this problem and arriving at an estimate of its severity.

What is the Cost to Replace a Water Heater Anode Rod?
When replacing your water heater anode rod, expect to pay between $30 and $50 for the part. If you hire a professional to replace it, expect to pay another $250 to $300.

How Often Should You Replace the Anode Rod In a Water Heater?
You should replace your anode rod once every 5 years if you want to expand the water heater’s lifespan. It is highly suggested that you perform routine maintenance checks on the anode rod of your water heater.
This can be accomplished during the annual plumbing inspection that you have. If you check the condition of your anode rod every 2 to 5 years, you will be able to determine when it is time to replace it to prevent it from falling apart entirely.

Can I Replace Anode Rod Myself?
You can replace the anode rod, but the process can be complicated. Most tanks are situated in areas with insufficient headroom to remove the old rod or conveniently install the new one.
To get started, you need to switch off the power (or gas) that the heater is supplied with, turn off its water supply, and then open a hot-water faucet to release the pressure inside the appliance.
Next, loosen the anode by applying a generous amount of penetrant to its threads and using a long wrench to loosen it or by using an 11/16-inch socket and a socket wrench. As you pull the old anode out, you should curve it into a curve. Caution is advised since rusted anodes can easily break.

Which is Better, Magnesium or Aluminum Anode Rod?
When you look at the pros and cons of each, it seems that magnesium anode rods are better than aluminum anode rods.
Keep your spending under control if you aren’t going to be drinking the water with aluminum rods. They are a good option for you to go with.
On the other hand, Magnesium anode rods will produce better outcomes in practically every other scenario, even though they will need to be replaced more frequently.