If you have been living with weak water pressure for a while, you might have accepted your situation and resigned yourself to taking longer showers. After all, if your home has a municipal water supply, there isn’t much you can do about the overall pressure without buying an expensive pump.
However, it is possible to increase the water pressure of your shower even if your plumbing’s overall pressure seems low. How to approach this will vary depending on what is causing your low pressure, as it could be an issue with your entire home or just the shower itself.
In this guide, we will explain how to increase the water pressure in your shower using thirteen possible methods. One of these methods, or a combination of them, should help you get your shower working more effectively.
Key Takeaways
- Check your showerhead for clogs and clean it to improve water flow.
- Inspect and adjust the shut-off valve and pressure regulator to ensure proper water flow.
- Consider removing the flow restrictor from the showerhead for stronger water pressure.
- If all else fails, consult a professional plumber for further assistance in improving water pressure.
How to Increase Water Pressure in Your Shower
Household plumbing is often a complicated network of pipes that has been altered and added to over several decades. This complexity also means there are numerous potential causes of low water pressure.
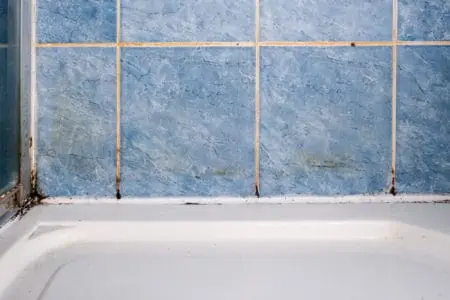
Low water pressure could be caused by something as basic and easy to fix as a dirty shower head. If you live in a hard water area, mineral content can leave solid deposits (or limescale) that clog up shower nozzles or pipes and restrict the flow of water (1). There might also be basic human error such as a valve that has not been opened entirely somewhere in your home.
Each potential problem has a different solution but one of the thirteen methods listed below should help you tackle the majority of issues with your water pressure.
Method #1: Check Water Heater
If you have noticed that your cold water has sufficient water pressure but your hot water doesn’t, you should begin your investigation at your water heater.
If your hot and cold water streams are equally weak, move on to Method #2.
- Open Water Heater Shut-Off Valve: Your water heater’s shut-off valve controls its hot water supply. If it isn’t completely open, your hot water pressure will be impacted. Check your water heater’s manual to determine where the shut-off valve is, then ensure that it is fully opened before running the hot water again.
- Flush the Water Heater: Scale deposits can also form inside your water heater, reducing its effectiveness and clogging pipes. Flush your water heater to see if it improves the pressure. How exactly to do this will vary depending on the make and model of your heater unit — consult your owner’s manual.
How to Flush the Water Heater
Always defer to the heater’s manual when flushing it, as every brand is different. However, most of them will follow these basic steps:
- Unplug: Turn off the power supply to your water heater. If it is electric, unplug it or switch off the breaker. Gas models can be set to pilot or vacation mode.
- Valve off: Locate the water supply valve and shut it off.
- Connect hose: Connect a garden hose to your drain spigot. Place the other end of the hose outside, or into a drain or pan. Make sure it is connected snugly but don’t force it or you could damage the threads.
- Run hot water: Open a hot water faucet on the lowest level of your home. This will allow the water to drain out of the heater’s tank.
- Open spigot valve: Open the drain spigot valve. This might require a screwdriver. You should hear water flowing out if you have done it right.
- Pressure relief valve: If you don’t hear any water flowing out, you might need to open the pressure relief valve.
- Drain the water: Water should start flowing out of the hose. Let it do this until the tank is empty. Avoid the water flowing out as it will usually be very hot.
- Dislodge sediment: Once the tank is empty, open the cold water supply valve for about 10 to 15 seconds. This should dislodge some of the sediment in the tank.
- Repeat: Open and close the cold water valve a few more times until the water runs clear.
- Close spigot valve: Close the drain spigot valve.
- Cold water valve: Refill the water heater completely by opening the cold water valve. Switch your pressure relief valve back on and then close the cold water valve.
- Open spigot valve: Open the drain spigot valve again and let the water flow out. This will help you get all the buildup and debris out.
- Close spigot valve: Close the drain spigot for the last time. Open the cold water valve to let your tank fill. Don’t leave the heater unattended or water will pour out of the open pressure relief valve. Leaving it open will allow air to escape safely.
- Close spigot valve: Once your heater tank is approximately half full or near the level of your pressure relief valve, close the spigot valve completely.
- Restore power: Plug your electric water heater in again, or turn your gas unit’s thermostat back on.
- Well done! Test that your water heater is working properly. If it is, you might have improved your hot water pressure.
Method #2: Open the Shut-Off Shower Valve
Low water pressure in your shower isn’t always caused by something major. In fact, it could be so simple that you completely miss something quite obvious.
Shut-off shower valves are water-conserving devices. They enable you to temporarily pause the flow of water without adjusting the temperature knobs.
Your shut-off valve might not be completely open. If the mechanism is corroded or simply stuck, you might need to remove it entirely and buy a replacement.
Method #3: Investigate Drips and Dribbles
Leaks can have a significant impact on your shower’s water pressure.
Run your shower and check all the connecting parts. If water is leaking from the hose connection, the internal threads of your shower head could be worn down and allowing water to escape.
If there are leaks coming from the body of the shower head or hose, they will need to be replaced. If the issue is with a connector rather than a major component, you might be able to simply replace that piece.
Method #4: Inspect Diverter Valve
A diverter valve allows you to have multiple accessories attached to your shower at the same time. You can also use it to switch between a bathtub faucet and shower head as required (2).
- Isolate shower heads: If you have a diverter for multiple outlets, such as a fixed shower head and a handheld unit, it could be distributing water unevenly. Try using only one showerhead at a time and see if the pressure gets any better.
- Inspect diverter valves: Look closely at the diverter valve that switches between the tub and faucet. Is there any water coming from the tub faucet while you shower? If so, you might need to replace the valve using the following steps.
How to Replace a Diverter Valve
Make sure your new diverter valve is compatible with your existing setup. This will make installation quick and simple:
- Remove the old: Remove your old tub faucet and diverter valve. This process will vary depending on your current setup, but it will usually be held in place by screws. Either unscrew the faucet or simply pull it out.
- Attach the new: Attach your new faucet and valve, tightening them as required. Your shower should now work properly.
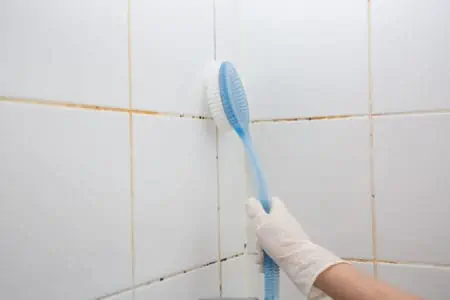
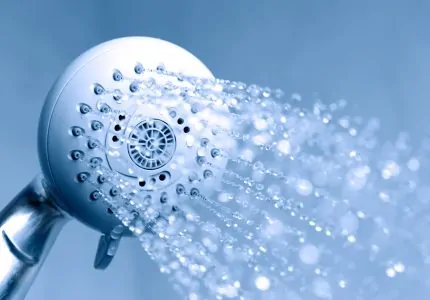
Method #5: Clean Your Showerhead
Cleaning your shower head is one of the quickest and easiest ways to resolve low water pressure. To do it:
- Unscrew: First, try to unscrew your shower head by hand. If there is resistance, you might need to use slip-joint pliers, two towels, and an adjustable wrench.
- Grip: To avoid damaging the finish, wrap a towel around the shower arm (the part that connects to the head). Grip the towel and arm with your pliers.
- Loosen: Wrap a towel around your shower head to prevent scratches. Loosen the shower head with the wrench until you can unscrew it by hand.
- Apply vinegar: Place your shower head into a bucket or container. Cover it with a mixture of one part white vinegar and three parts water until the head is completely submerged. The acidity of the vinegar should break down any mineral and dirt deposits without damaging the finish (3).
Warning
Be careful when using vinegar near natural wood and stone. Its acidity can damage the surface (4). - Wait: Leave the shower head in the vinegar solution for at least 30 minutes. You can also leave it overnight for a more thorough cleaning.
- Rinse: Rinse the shower head with water while scrubbing it with a soft bristle brush to remove any remaining deposits. An old toothbrush is ideal.
- Reconnect: Reattach your shower head. Hopefully, this will have improved your water pressure.
Method #6: Remove Flow Restrictor
Many modern showers are equipped with a flow restrictor or regulator, which limits the maximum flow rate. If you already have low-pressure plumbing, this can have a negative impact on shower performance. Flow restrictors typically have a limit of 2.0 gallons per minute (GPM) (5).
Thankfully, these components are usually easy to remove. Consult your shower head’s user manual, as there are often instructions on how to remove them.
If not, here are the usual steps to remove a flow restrictor, from both of the most popular locations:
How to Remove a Flow Restrictor From a Shower Head
- Remove the shower head: As with our cleaning guide, you can use a wrench and needle-nose pliers if the head can’t be unscrewed by hand. Cover both the arm and head with towels to protect them from scratching.
- Remove with pliers: The flow restrictor will be in the narrow, connecting end of the showerhead. Try to remove it with needle-nose pliers first.
- If necessary, use a screwdriver: If pliers don’t help you remove the restrictor, use a screwdriver, or a screwdriver and a nail, to loosen it, and then pull it out.
How to Remove a Flow Restrictor From a Shower Mount
- Unscrew the mount: If the mount doesn’t come off easily, use an adjustable wrench and towel to remove it safely.
- Remove the restrictor: It should be easy to remove the restrictor by hand.
Still Struggling?
Method #7: Check Your Water Main Valve
The water main valve controls the flow of water to your entire house. If it isn’t completely open, it will negatively affect your water pressure.
This valve can usually be found somewhere within the perimeter of your home, on the side nearest the street. If you can’t find it, check your property inspection report for guidance.
Once you have located it, ensure it is all the way open. Turn the lever or knob in the required direction, whether it is clockwise or counter-clockwise.
It can be helpful to have an assistant inside the house to monitor a faucet if you are unsure which way to turn the main valve.
Method #8: Adjust Pressure Regulator
Many homes have a water supply with a pressure regulator. This keeps the pressure of the water entering your home at a certain level.
Regulators are usually set at 50 pounds per square inch (PSI). Be aware that higher pressures can reduce the lifespan of your plumbing fixtures (6).
In most cases, it is possible to safely increase the pressure slightly. You will need a standard pressure gauge to monitor the pressure.
- Locate: The pressure regulator is typically found near your water meter, in the same location as your water main. It is a distinctive bell-shaped device.
- Switch off: Switch off your water heater (disconnect the plug or set it on vacation mode). Make sure there is no water running anywhere in your home.
- Attach the gauge: Attach a pressure gauge to a faucet, washing machine shut-off valve, or your water heater’s drain spigot.
- Run the water: Run the water in your home to get an initial pressure reading. This will give you a baseline before you make adjustments. Once you have a reading, turn the water off.
- Loosen the nut: Use a wrench to loosen the nut on top of the water pressure regulator.
- Adjust the pressure: To increase the pressure, turn the adjuster bolt clockwise. To lower it, turn it counterclockwise.
Quick Tip
Don’t make the locking nut and bolt touch as they can wear each other’s threads out. - Rerun and test: Run the water in your home again and monitor the pressure gauge you used earlier. Adjust the pressure until it is at your desired level.
Method #9: Check the Curb-Side Water Main
The street-side (or curb-side) water main is the one your water company is responsible for. It connects to the water main that flows into your home (7). Faulty construction or installation might leave the valve only partly open.
You will need to acquire a water key to attempt this method. They are inexpensive and should prove useful again in the future.
- Locate the main: Find the curb-side water main. There should be a metal cap or box outside your home on the side facing the street.
- Remove the cover: Use the water key to pry the cover off. Be careful as the cover will likely be heavy. Place it to one side.
- Inspect: You should now see the valve and water meter. You can check your water meter if you are curious. Open the protective cap to see inside.
- Locate the valve: The valve should be either horizontal (shut off) or vertical (open). If it is at an angle, this is a probable cause of your low shower pressure.
- Adjust: Grip the valve with the water key and open it fully.
Method #10: Look for Leaks
If none of the previous methods increase your water pressure, you might be dealing with a more serious problem. You can perform a simple test to check if you have a leak somewhere in your home.
- Take a water reading: Check your water meter and make a note of the reading.
- Wait: Don’t use any water for a couple of hours.
- Take another reading: Look at your water meter again. If the reading has increased, you almost certainly have a leak in your home (8).
Method #11: Call a Professional
At this point, you have tried numerous different techniques to increase your shower’s water pressure. If none of these solutions have worked, you should call for professional assistance.
More complicated issues could require a plumber, such as if you have blocked pipes. A clog will force your plumbing appliances to work harder and potentially stop them from working entirely (9). Damage or general wear and tear could also interfere with your water pressure.
It is also possible that you simply live in an area with a low-pressure water supply. If your plumber believes that this is the case, there are two more solutions you can try to increase your shower’s pressure.
Method #12: Buy a Pressure-Amplifying Shower Head
A pressure-amplifying shower head forces water out at higher pressure than a standard model does. Your home’s water pressure remains the same, but the spray will be more powerful when showering. This is usually achieved by having smaller holes for the water to spray from.
To find the right model for your home, read our reviews of the best high-pressure shower heads for low water pressure.
Method #13: Purchase a Pressure Booster Pump
A pressure booster pump is a reliable way to increase the water pressure throughout your home, including your shower. They are ideal for homes where the water pressure is insufficient to meet your demands, such as when you want to run a dishwasher while you take a shower (10). Pressure booster pumps are a significant investment but they can also make a major difference to your home’s plumbing.
Take Note
FAQs

How Do I Check My Shower Water Pressure?
To check the shower’s water pressure, you’ll need a stopwatch, a one-liter measuring cup, and a calculator. Turn off the water taps throughout the house. Put the measuring cap under the shower and turn the faucet on to the maximum.
You must ensure that all the water from the shower head goes inside the cup. Start the stopwatch and see how long it takes for the cup to be filled with water. You’re dealing with a low flow rate if it takes more than 6 seconds to fill the mug.

Why Is Water Pressure Low in One Bathroom?
Suppose the water pressure is low in one bathroom and not throughout the house. In that case, it usually means that you’re dealing with a clogged pipe in that particular bathroom or mineral build-up that’s decreasing the water pressure.
It’s best to check where the water pressure is lower, exactly. If you notice low water pressure at a single fixture, you might be dealing with a clogged aerator or valve. Remove the aerator and check inside it. You should be able to tell if any deposits lead to low water pressure.
The best ways to deal with this problem are to soak the aerator in white vinegar or flush it with water to remove build-up and residue.
If you have low water pressure in the entire bathroom, it’s usually caused by a leak or a clogged pipe. If someone fiddled with the valve recently, it could be they forgot to fully open it, which is why you have low water pressure.

Why is My Hot Water Pressure Low but Cold Fine?
If your hot water pressure seems low, but your cold-water pressure is fine, silt or limescale may have built up in the faucet and pipes. It may also result from a shutdown valve partially closed or restricted in its movement.

Why Does My New Shower Head Have No Pressure?
If your new shower head has no pressure, it’s likely because of the flow restrictor inside. You may experience a decrease in pressure as a direct result of replacing the showerhead and the valve simultaneously.
It’s possible that the low-pressure model of your old showerhead was concealing a problem that the high-pressure model of your new showerhead helped surface.

What Is a Good Shower Flow Rate?
The best and maximum flow rate for a shower head (considering the current regulations) is 2.5 GPM. Even if you can find a shower head with an output of 2 GPM, it’s still a decent option for taking a shower. People usually consider anything under 1.8 GPM to be a low flow rate.