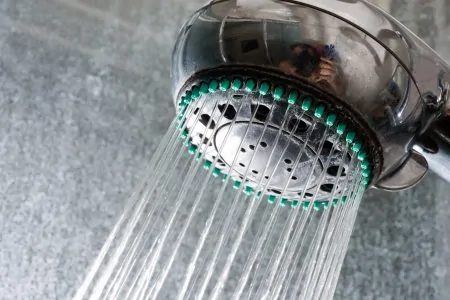
Many modern shower heads are fitted with a flow restrictor to help them reduce water waste. In the United States, regulations specify that shower heads must produce no more than 2.5 gallons of water per minute when they are sold (1).
While this is good news for your water usage and energy bills, it can also reduce the effectiveness of your shower. As a flow restrictor limits the amount of water that flows through your shower head, it weakens its spray. If your home already has low water pressure, this can reduce your shower spray to a trickle.
In most cases, a flow restrictor will not negatively impact your shower. If it does, however, many shower heads are designed to allow for easy removal of the restrictor. In this article, we will walk you through how to remove a flow restrictor from your shower head.
Key Takeaways
- Flow restrictors in shower heads reduce water waste and save energy, but may also decrease water pressure.
- Removing a flow restrictor involves disconnecting the shower head, removing the mesh filter, O-ring, and restrictor valve, then reassembling the shower head.
- Handheld shower heads may have the restrictor located in the handle, hose, or behind the shower head itself.
- Keep in mind that removing the flow restrictor may increase water usage and bills, and could potentially void the warranty on your shower head.
What Does a Flow Restrictor Look Like?
The flow restrictor is usually plastic, circular, flat, and has a star-shaped metal center. It is generally located behind a metal component that screws off in a fixed shower head. They can vary in color and have open inserts near their edges.
In a handheld shower head, the restrictor is often at the edge of the handle where it attaches to the flexible hose, behind the shower head, or inside either end of the hose. The manufacturer’s instructions should tell you where to find it.
How to Remove the Restrictor Valve
You will need:
- An adjustable wrench
- Cloth or towel
- Paper clip
- Plumber’s tape
- Needle-nose pliers
- Screwdrivers
Removing a Fixed Shower Head Flow Restrictor
1. Disconnect the Shower Head from the Arm
To remove the shower head from the arm that connects it to the wall, unscrew it. You will often be able to do this by hand; if not, use a wrench.
- Cloth: To protect the finish of your shower head and arm, wrap a cloth or towel around them.
- Secure: Secure the nut before using the wrench, to avoid unscrewing the arm as well.
- Unscrew: Use the wrench to turn the shower head counter-clockwise and unscrew it.
2. Remove the Mesh Filter
There might be a mesh screen inside the shower head to remove any sediment or impurities from your water. If your unit has one, remove it. You might need to lightly tap the shower head to dislodge it or use your needle-nose pliers.
3. Remove the O-Ring or Gasket
Inside the shower head, there should be a rubber O-ring (gasket). Unfold your paperclip and then use it to carefully pry out the O-ring.
Warning
4. Take out the Flow Restrictor
You should now be able to see the star-shaped metal restrictor inside the plastic ring.
Place your unfolded paper clip under one part of the flow restrictor. Twist it and pry it up to remove it.
Quick Tip
5. Replace the O-Ring and Shower Screen
With the restrictor removed, take the O-ring you removed earlier, or a new one if necessary, and place it into the shower head. Make sure it fits back into the spot you removed it from.
If you also removed a filter, reinstall that too.
Tips
- Clean: Clean the shower filter screen by holding it under running water to remove any gunk before replacing it. If there is any scale build-up, soak it in a mixture of one part white vinegar and four parts water to remove it. Then, rinse the screen before reinstalling it (2).
- Lubricate: You can lubricate the O-ring with some silicone grease such as this one from Trident. This will reduce the wear on your O-ring and help it form an effective seal.
6. Reattach the Shower Head
- Remove tape and clean: Before screwing your shower head back into place, remove any old plumber’s tape from the shower arm threads. To do this, wipe them with a damp cloth. Remove stubborn deposits by scrubbing the grooves with an old toothbrush.
- Apply new tape: Wrap some new plumber’s tape around the threads of the shower arm. Make sure you wrap it clockwise so it doesn’t unravel when you screw the shower head back on. Apply a few layers to ensure a watertight seal, and make sure all the threads are covered.
- Reattach shower head: Screw the shower head back on by turning it clockwise until it is hand-tight, then turn the water on to check for leaks. You can always tighten it more by using a wrench over a cloth to move it a further quarter turn — but be careful not to over-tighten it as you could damage the connection.
Quick Tip
Removing a Handheld Shower Head Flow Restrictor
Before proceeding, check your owner’s manual as the manufacturer will usually highlight where the flow restrictor is located. This means you won’t waste time and effort by disconnecting the wrong component.
Method #1: If the Restrictor is in the Handle
- Remove handle: Cover the shower head and nuts with a cloth to avoid damaging the finish, then use a wrench to unscrew the handle from the hose.
- Remove components and reattach handle: Follow steps 2 to 6 of the previous method to remove the shower filter screen, O-ring, and restrictor, then screw the handle back on.
Quick Tip
Method #2: If the Restrictor is in the Hose
This method is largely the same as if it were in the handle, except you will need to remove it from the holder at the top or bottom of the hose. Remember to protect the finish of the hose and nuts with a cloth, and replace any existing plumber’s tape with fresh tape.
Method #3: If the Restrictor is Behind the Shower Head
Removing a restrictor located between the shower head and handle follows the same order as removing one from a fixed shower head as described above.
FAQs
Increase Your Water Flow
A water flow restrictor is integrated into showers to limit their flow rate and reduce water waste. In the United States, this means they cannot exceed 2.5 gallons per minute, but this can have the adverse effect of reducing your shower’s water pressure.
The methods listed in this guide have shown you how to remove the flow restrictor from your shower head and potentially increase its water pressure. This is a relatively simple process but, if you aren’t confident in your DIY abilities, you can always ask a professional to do it for you.
It can be tempting to simply remove your flow restrictor when you install the shower head for the maximum pressure possible. However, it is worth testing it with the restrictor first. Modern shower heads are designed to operate effectively at 2.5 GPM and you could significantly increase your water bills by removing this component. Depending on the model, removing the restrictor could also void your warranty, so check this first.


