Shower heads are frequently exposed to water, which means they are usually one of the first parts of your home to become dirty. Dirt doesn’t only look bad; hard water can leave mineral deposits on your shower, clogging its nozzles and reducing its flow rate.
If you have noticed your shower working less effectively, or crusty deposits around the nozzles, you should be able to clean it without too much effort. Still, if you have never done it before, there are a few tips and important pieces of advice to keep in mind before you start.
In this guide, we will explain how to clean a shower head using the quickest, easiest, and most effective methods available. Most of these techniques use products that you might already have in your kitchen, so you should be able to start immediately.
Key Takeaways
- Use white vinegar and baking soda to clean a shower head by soaking it in the solution for at least an hour, then scrubbing and rinsing.
- For attached shower heads, use a watertight plastic bag filled with vinegar and baking soda, and secure it over the shower head for at least an hour before removing and rinsing.
- Commercial cleaners can also be used, but follow the instructions carefully and wear protective gear such as gloves, goggles, and an apron.
- Clean your shower head regularly, at least once every month to every three months, to prevent mineral build-ups and potential health risks.
How to Clean Shower Head Using Vinegar
Before cleaning your shower head using vinegar, make sure you have the following items to hand:
- White vinegar
- Baking soda
- Deep sink or bowl
- A cloth or toothbrush
- Gloves (optional)
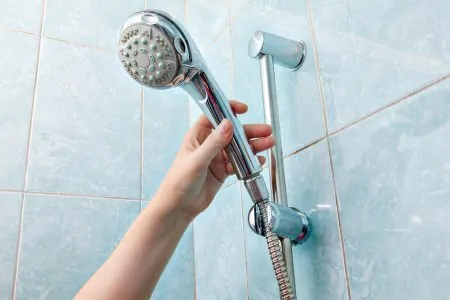
1. Remove the Shower Head
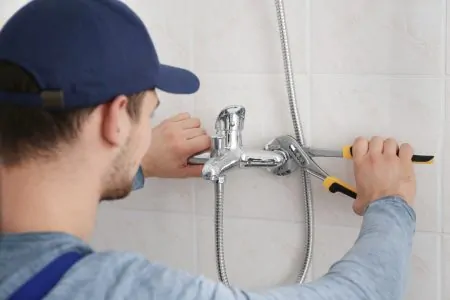
Start by disconnecting the shower head from its hose. Most can be released by simply turning the connecting nut. However, if you haven’t done it before, check your owner’s manual as you don’t want to do anything that might void the warranty.
2. Prepare the Vinegar Bath
- Measure: If you have a deep sink, plug the drain and pour a generous amount of white vinegar into it. Use a cup to measure how much you use, as you will need to balance it with baking soda.
- Enough to submerge: Pour enough vinegar to submerge the shower head completely. If you don’t have a large enough sink, you can use a deep bowl or bucket instead.
- Add baking soda: Once you have enough vinegar, add a third of a cup of baking soda for every cup of vinegar. As the baking soda is added, the vinegar should start bubbling and sizzling.
3. Immerse the Shower Head
Once the mixture is ready, submerge your shower head in it. Even if the entire head won’t fit, make sure the nozzles are completely submerged, and then leave it for an hour. If you have severe mineral build-ups, you can leave it for longer. You can even allow it to work overnight, as this natural solution won’t damage your shower head.
Try to make sure it will stay immersed in the solution for the whole duration. If it floats to the surface, weigh it down with something heavy.
4. Rinse and Test
- Remove from the solution: When enough time has passed, remove the shower head from the solution and rinse it under running water.
- Wipe or scrub: Most modern nozzles can be easily rubbed clean with a cloth or even your hand. If the deposits are stubborn, use an old toothbrush to scrub the holes.
- Reconnect: After rinsing the shower head thoroughly, reconnect it to the hose.
- Test: Turn the shower on and see if its flow rate has improved. If it still appears to be clogged, you can repeat the process or try a commercial cleaner.
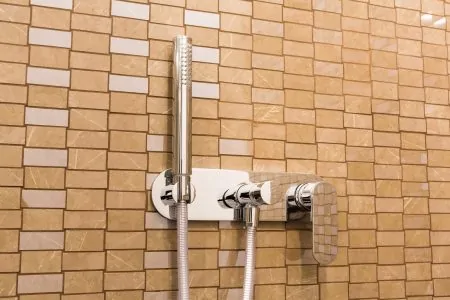
How to Clean an Attached Shower Head
If your shower head is fixed in its position, it might not be possible to remove it easily for cleaning. You should still be able to submerge it in a white vinegar solution by using this method.
Before you start, have these items ready:
- Watertight plastic bag
- White vinegar
- Baking soda (optional)
- A zip tie, elastic band, or any other string
1. Fill the Bag
Fill the plastic bag with enough vinegar to cover the shower head — use a cup to measure how much you pour in. Make sure your bag is watertight and strong enough to hold the weight. Then, mix in a third of a cup of baking soda for every cup of vinegar you have used.
2. Attach the Bag
This is the tricky part — if possible, it is worth getting someone to help you to prevent spilling any vinegar.
- Immerse in the solution: Place the bag full of vinegar over the shower head so the head becomes submerged in the solution. Try to cover the head completely but, if you can’t, ensure the nozzles are covered.
- Tie: Use a zip tie, strong elastic band, or other string to secure the bag. This is where an extra pair of hands will come in handy. Make sure the bag is secured tightly and won’t fall off the shower head when you release it.
- Wait: Once secure, leave the solution to work for at least an hour. For a more comprehensive clean, leave it overnight.
4. Remove and Rinse
- Remove the bag: When the solution has had enough time to break up the scale, carefully remove the bag.
- Wipe: You can use an old toothbrush or cloth on the nozzles if there are any stubborn deposits.
- Run the water: Run the shower for a minute to test it and remove any residual vinegar odor.
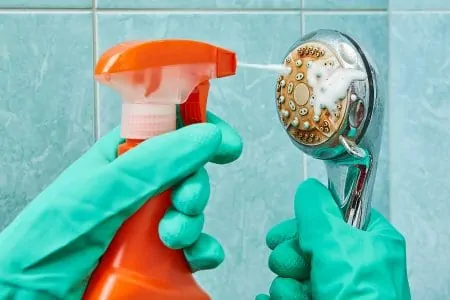
How to Clean a Shower Head Using Commercial Cleaner
If a natural solution of vinegar and baking soda doesn’t work, you can use a commercial cleaner instead. Check that your chosen cleaning product is suitable for your shower head, as you risk damaging the finish if you use an abrasive cleaner.
To use a chemical cleaner, you will need the following items:
- Gloves, protective goggles, and an apron
- Your preferred commercial cleaner, such as Simple Green or CLR.
- An old toothbrush
Warning
1. Grab Your Cleaner
After choosing a cleaner, read its instructions thoroughly before starting and then follow them carefully. Most cleaners will be sprayed directly onto the problem area. Be careful if you are spraying upwards onto a shower head, as you don’t want the cleaner to land on your face or in your eyes.
Once the area has been covered with the cleaner, leave it to work for as long as instructed.
2. Scrub
When enough time has passed, use an old toothbrush to scrub the holes. You might be able to skip this step if you aren’t dealing with stubborn mineral build-ups.
3. Rinse with Water
Run the shower head for about a minute to rinse away the chemical cleaner. Make sure you do this before you take a shower, to avoid spraying the chemicals onto yourself.
How Often Should You Clean Your Shower Head?
It is easy to assume that modern shower heads will largely keep themselves clean but even the best units will eventually show signs of dirt and hard water stains. Thankfully, cleaning a shower head is very straightforward and should be inexpensive.
Depending on how hard your water supply is, you should clean your shower head at least once every month to every three months. If you notice a reduction in water flow or the appearance of mineral deposits around the jets, you should clean it as soon as possible to prevent the issue from getting worse.
Prevention Is Key
Can a Dirty Shower Head Make You Sick?
Cleaning your shower head could protect you from being exposed to dangerous bacteria. Research has found that domestic shower heads could be harboring a bacteria known as Mycobacterium avium (1). This is the cause of nontuberculous mycobacteria (NTM), a lung disease transferred via the environment (2).
Fortunately, regularly cleaning and replacing your shower head will prevent this bacteria from settling in the unit (3).
Disinfect With Bleach?
FAQs

What Is the Green Stuff on My Shower Head?
A blue-green sludge on your faucet is “lime scale deposits.” This limescale, also known as a scale deposit, arises from the “hard” water in your home, which contains dissolved minerals.
In its purest form, limescale appears white and can sometimes be seen in kettles and other cooking pots. However, the presence of copper pipes or fixtures might cause limescale to take on a green color.
The scale accumulation on your faucet can be removed, which will temporarily help your faucet shine again but only for a short while. To make fixtures to look their very best, you’ll need to tackle the issue where it all started: with the water coming out of your taps.

Does WD 40 Clean Shower Heads?
You can use WD 40 to clean shower heads. Most shower heads have a screw located close to the outlet holes’ center. If the screws were undone, the shower head would become more accessible.
After allowing it to dry completely, spray it with a generous dose of WD-40. This would cause the dirt to become loose, making it much simpler to remove it afterward.
Utilize a used toothbrush to give the interior of the outlets a good cleaning. Repeat the process of rinsing it with WD-40 to remove any remaining dirt and grime from the shower head.
You should avoid using WD-40 in the shower. The best way to ensure that the part is free of any residue is to wash it in a dish with sudsy water.

How Do You Clean a Shower Head with Coke?
Coca-Cola has three types of acid: phosphoric, tartaric, and citric. Phosphoric acid is particularly useful since it has a higher acidic content than is typically found in natural cleaning products.
Although each of these acids contributes to the overall process of removing rust and other deposits, phosphoric acid is particularly effective.
You need to give Coke time to act, so allow your shower head to soak in the liquid. Either put the Coke in a plastic bag and tie it around the shower head or remove the shower head and allow it to sit in a container filled with Coke.
Rinse the shower head properly after soaking and wipe it with a clean cloth. Rinse thoroughly because the high sugar content of Coke can leave a sticky residue.

Will Lemon Juice Clean a Shower Head?
You can clean a showerhead by making a paste that contains lemon juice. Lemon juice is an acidic substance that aids in the dissolution of mineral deposits. You can mix baking soda with lemon juice if you don’t have any white vinegar.
After scrubbing, you should then flush the shower head with hot water. If possible, you should disassemble the shower head to clean the fixtures inside and outside.

What Is the Fastest Way to Clean a Shower Head?
The best and fastest way to clean a shower head is by soaking it in white vinegar. Using commercial cleaning solutions is also a good way to do it.
However, know that a shower head usually has to soak in the cleaning solution first because the mineral buildup isn’t something you can easily scrub off (at least not without damaging the shower head’s finish).

What Is Best for Cleaning a Shower Head?
Many use white vinegar or a commercial cleaning solution for bathroom fixtures. The concept is to use an acidic solution that could dissolve the mineral buildup, which is likely clogging the shower head and reducing water pressure.
Key Takeaways
- Use white vinegar and baking soda to clean shower heads, soaking them for at least an hour.
- For attached shower heads, use a watertight plastic bag filled with vinegar and baking soda solution, and secure it around the shower head.
- Commercial cleaners can be used if natural solutions don’t work, but follow safety precautions and instructions carefully.
- Regularly clean your shower head every 1 to 3 months to prevent mineral buildup and maintain good hygiene.