Welding brass needn’t be complicated. It is a handy skill to learn for a wide range of low friction applications. Follow the right steps, take the necessary precautions, and with a bit of practice, you will learn how to solder brass in no time.
We show you how to weld brass in easy to follow steps.
Key Takeaways
- Preparation and cleanliness are crucial for a strong weld.
- Be cautious of zinc content in brass, as it can release harmful fumes when heated.
- Brass can be welded using MIG, TIG, or oxyacetylene methods, depending on the project requirements.
- Ensure proper safety equipment and ventilation are used when welding brass to avoid health risks.
Is Brass Easy To Weld?
Welding brass is relatively simple as long as you use the correct welding technique, and you know the zinc content of the metal. Brass is an alloy of copper and zinc, with typical values of 20 to 40 percent zinc content.
Higher zinc values can be volatile because a high-current welding process might release noxious fumes that bring on metal flu and lead to permanent lung damage. Metal flu occurs when you inhale the zinc gasses, and you suffer the same flu-like symptoms such as headaches, nausea, aches and dizziness.
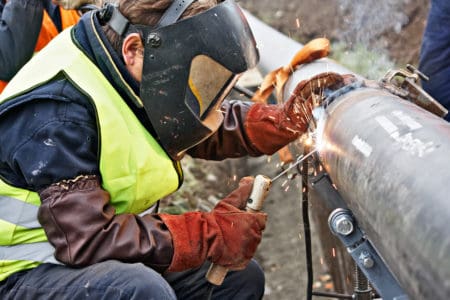
The best method for welding brass is the oxyacetylene welding process. Using low-fuming rods, you can work in many different applications, even overhead work.
Best Welding Techniques for Welding Brass
There are several ways to weld brass effectively. Here are some of the best methods.
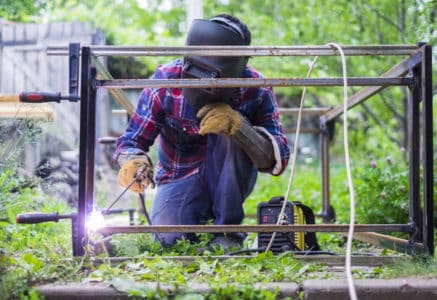
Gas Metal

This is more commonly known as MAG or MIG welding. This method works well when you want to join thicker sections of brass or for phosphor bronze applications. To do this, argon shielding, electrode positive and direct currents are the most commonly used methods.
Gas metal welding is not without its challenges. Keeping a smaller welding puddle while working rapidly is tricky. Stringer beads give the best results.
Pros
- Easy to master.
- Cheap to set-up.
- Has a deeper penetration.
Cons
- Tricky to manage the welding pool.
- Requires rapid speed.
- Risk of zinc fumes.
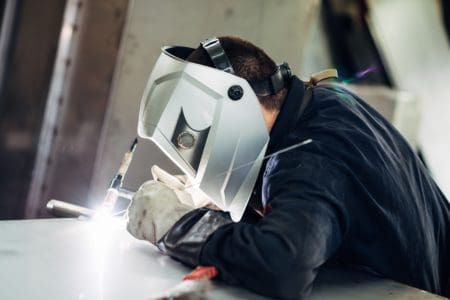
TIG
You would most likely use the TIG welding method when making repairs or joints. You can use a direct current or a stabilized arc. Use argon or helium gas, but remember that helium is more expensive. Also, helium has a lower density than argon and requires a higher flow rate.
TIG is not the easiest method for welding brass because brass contains zinc, which has a low melting point. As it melts, it tends to attach to the welding rod, which means you have to stop continuously to remove it.
Top Tip
Pros
- Precise.
- Neat welds.
- Ideal for repairs and smaller jobs.
Cons
- Requires gas.
- Tricky to master.
- Preheating required.
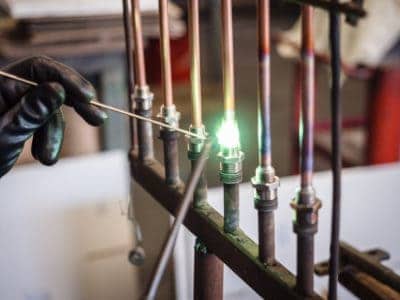
Oxyacetylene
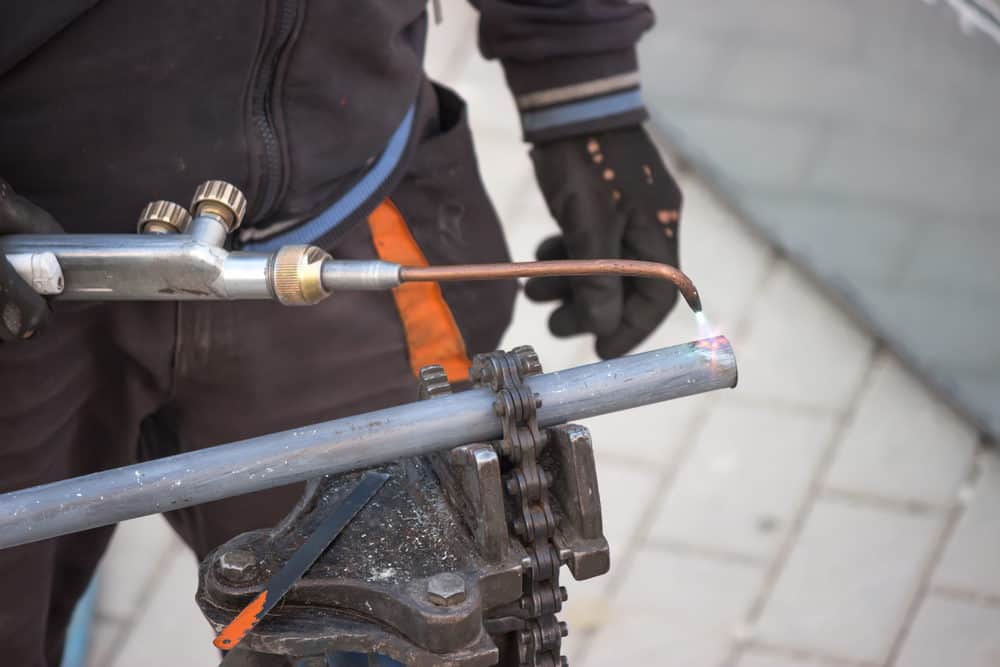
This process suits piping tasks thanks to the multi-position flexibility it gives. With oxyacetylene, you always want to use a low-fuming rod, like brass or silicon. They have a similar composition to high brass.
Ensure the flame is adjusted so it creates slight oxidation to give you more control over the fuming. Sometimes an auxiliary heat source is needed.
Pros
- Ideal for multi-positional work.
- Works well with piping.
- Cheap to perform.
- Easy set-up.
Cons
- Precise flame adjustment.
- Less precision welding.
- Requires low-fuming rods.
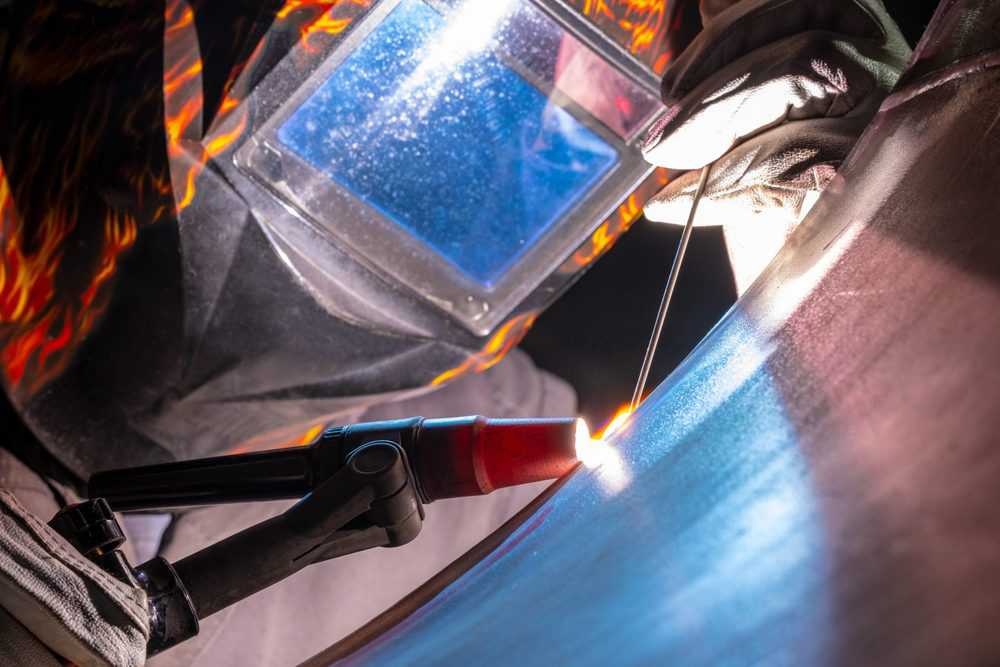
How To TIG Weld Brass
It’s worth remembering that TIG welding brass is not the easiest method and only suitable for repairing cracks and joints, rather than large-scale projects. You would be better using oxyacetylene for heavy-duty applications.
Before we get to the method, we need to gather the right equipment and ensure that personal safety is the number one priority.
Here’s what you will need to keep you safe:
- Welding respirator or safety mask.
- Work boots.
- Leather welding gloves and sleeves.
- Welding jacket.
- Welding helmet.
- Fire extinguisher (not water-based).
Here’s the equipment you will need:
- Tungsten electrode.
- TIG welding machine with foot pedal.
- Torch.
- Shielding gas supply (argon or helium).
- Tungsten rod (located in the electrode).
- Ground clamp.
- Filler metal.
- Blowtorch.
1. Prepare the Brass
Make sure the surface of the brass is clean and free from any debris. Use a grinder to remove blemishes, because the cleaner the surface of the base metal, the better the quality of the weld. It’s also a good idea to preheat your metal using either a blowtorch or a furnace.
Don’t heat the brass above 350 to 400 degrees as this might change the structure of the metal and cause it to distort. Preheating prevents the brass from fracturing with the shock of a blast of sudden and extreme heat.
Another way to increase the strength of the weld is to bevel the brass to 45 degrees.
2. Set Up Your Working Area
Find a welding table with enough space to work, which has sturdy legs. Make sure it is on a flat surface and will not move. If the table has a metal top, even better because it gives you something to attach the ground clamp to, creating the circuit.
If it doesn’t have a metal top, put a sturdy sheet of metal down. Grab a stool and place the foot pedal within easy reach.
3. Set Up the Welder
Find the correct amperage setting for brass and make sure the gas is set to a flow of 15 to 20 cubic feet per minute (CFM). Make sure you insert the electrode, and you have all the component parts set up.
If you want to TIG weld in AC and have a welder with an inverter that operates at 30 pulses per second, set the welder to about 50. This allows for the lowest heat to work the bead along the seam. It also minimizes the puddle thanks to the hot and cold variations of the pulser.
Make sure the tungsten rod within the electrode has the correct tip. It can be either balled or pointed. You can do this using a diamond-coated grinding wheel because tungsten is a tough material. It should protrude by an 8th of an inch.
4. Put on Your Safety Equipment
Put on your safety equipment, making sure that you can still operate the welder controls with your gloves on. Also, make sure the work area is free of hazards and fire risks.
5. Check the Foot Pedal
Hold the torch away from your body and press and release the foot pedal. You should hear the gas flow engage as you press down.
6. Clamp Your Brass
Using the ground clamp, either clamp the base metal or the metal table surface to complete the circuit.
7. Start Welding
Remember that the torch melts the base metal, and the molten base then melts the filler. If you are right-handed, hold the torch in your right hand and move from left to right. For left-handed people, you would work from right to left.
Hold the torch an 8th of an inch away from the base metal. Don’t allow the tip of the rod to touch. Tip the torch so that it is 15 to 20 degrees away from the direction of travel. This angle gives you a better view of the weld and the molten puddle, as well as your filler metal.
Move your torch along the center of the seam. If you need to add filler material, use as low an angle as possible, and avoid touching the tungsten rod. Progress along the seam, adding filler material as you need it.
Take Note
8. Power Off
When you reach the end of your seam, remove the torch and place it in the holder to keep it safe while it cools. Power off and unplug the welder from the power supply. Allow the brass to cool gradually (the longer, the better) for a high-tensile joint.
Remove your safety equipment and admire your handy work.
Brass Welding Tips
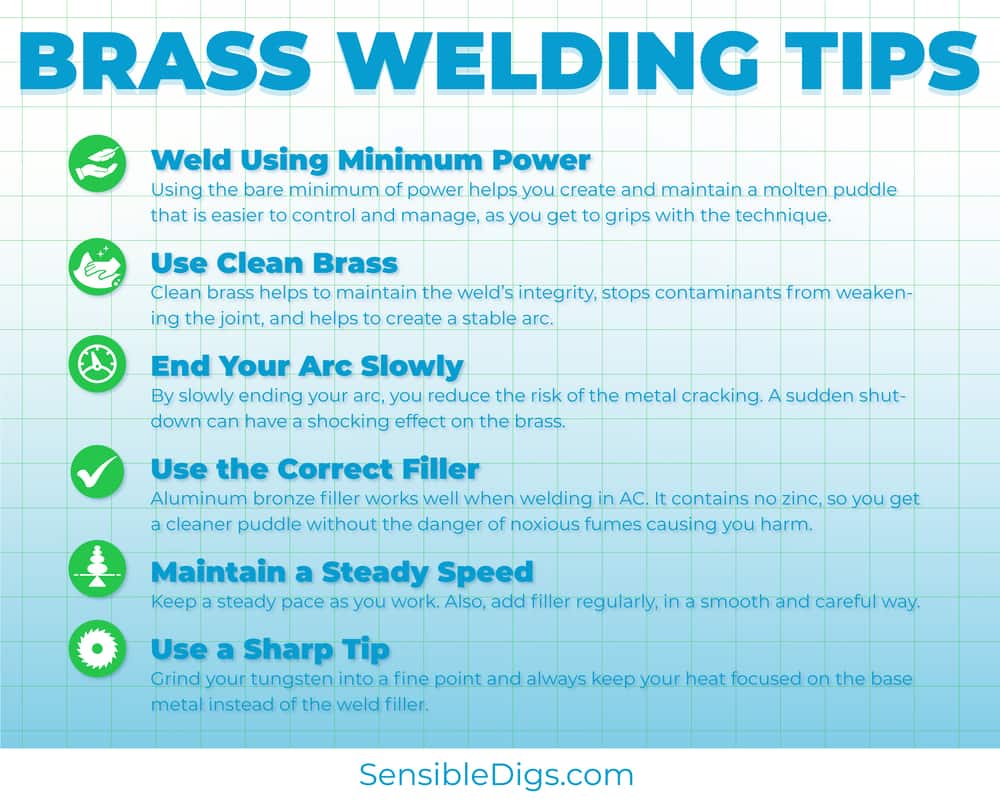
Weld Using Minimum Power
Using the bare minimum of power helps you create and maintain a molten puddle that is easier to control and manage, as you get to grips with the technique.
Use Clean Brass
Clean brass helps to maintain the weld’s integrity, stops contaminants from weakening the joint, and helps to create a stable arc.
End Your Arc Slowly
By slowly ending your arc, you reduce the risk of the metal cracking. A sudden shutdown can have a shocking effect on the brass.
Use the Correct Filler
Aluminum bronze filler works well when welding in AC. It contains no zinc, so you get a cleaner puddle without the danger of noxious fumes causing you harm.
Maintain a Steady Speed
Keep a steady pace as you work. Also, add filler regularly, in a smooth and careful way.
Use a Sharp Tip
Grind your tungsten into a fine point and always keep your heat focused on the base metal instead of the weld filler.
FAQs

Can Solid Brass be Welded?
Solid brass can be welded and is safer to work with than regular brass.
Brass in itself is usually made from an alloy of zinc and copper. Solid brass is made entirely out of brass without other materials. That’s why some people think it’s more challenging to work with.
However, the zinc found in brass alloys releases toxic fumes when exposed to the high temperatures of a welding machine and could potentially lead to metal flu. In turn, this causes headaches, dizziness, and nausea.

Do You Weld or Braze Brass?
You can weld and braze brass, depending on the requirements of your project. As you already know, brazing is a process that involves melting filler materials to join two larger pieces together.
Much like welding, brazing brass requires you to clean the surface. Then, you can apply flux to the material parts that will be joined together.
The trickiest part about brazing brass is that you have to work very carefully to heat both sides of the material evenly, making sure that no part is ever hotter than the other. If this does occur, you will end up with a warped braze.

Is Welding Brass Harmful?
Welding brass is harmful, so make sure you use safety equipment when working with this material. Brass releases toxic fumes, so a respirator and a properly-ventilated working area are vital. Brass can also harm you if you don’t use an auto-darkening helmet.

What Type of Welding is Used for Brass?
Brass is welded using MIG, TIG, or Oxyacetylene, but the exact method you should use varies based on what you’re working on.
MIG welding works when you have thick brass sections to put together. Thanks to the deep penetration of this method, you can use it for more heavy-duty projects.
However, MIG welding is trickier to pull off, and you risk zinc fumes contaminating the work area (this is where respirators come in to save the day).
TIG welding is often a go-to method when making joints or repairs. The results are usually cleaner, making TIG welding ideal if you are a DIY enthusiast. This welding method is also challenging to master and requires gad to work.
The Best of Brass
As we said, there are easier ways to weld brass than using the TIG method. And TIG is only ideal for repairs and crack mending. But, it has its uses and can be a very precise and neat way to weld.
Welding brass is incredibly useful, as it has so many applications in everyday life. If you are about to undertake a project which involves welding brass, try the TIG method. You might love it.