TIG welding is harder to master than MIG welding but is a lot neater and more precise. If you are attempting to TIG weld for the first time, get some tuition. It isn’t the easiest method of welding and should only happen under the guidance of an experienced welder.
This article shows you the basics of how to TIG weld and talks you through the steps one by one.
Key Takeaways
- TIG welding is best for working with awkward angles and curves, and it can join different types of metal together.
- Always prioritize safety when TIG welding, using a facemask, welding gloves, and other protective equipment.
- For TIG welding, use the push method to create a wider and flatter weld, suitable for thinner sheet materials.
- Practice and dedication are necessary to master TIG welding, but the process can produce strong, precise welds.
What Is TIG Welding?
TIG stands for Tungsten Inert Gas. The gas is created through the arcing process and is sometimes referred to as “Plasma.”
TIG is a method of welding best suited to working with awkward angles and curves. It can even join two pieces of dissimilar metal together to create a strong weld.
TIG welding is better suited to sheet material, thinner sections of mild and stainless steel, as well as non-ferrous metals like aluminum, magnesium and copper alloys.
How Does TIG Welding Work?
TIG welding uses extreme heat (typically 11,000 degrees Fahrenheit), generated from an arc of electricity, jumping from a tungsten metal electrode in the welding torch to the surface of the metal you intend to weld.
A constant power supply creates an arc of electrical energy, conducted through a column of ionized gas and vapors. It uses non-consumable tungsten electrodes to produce the weld, and the area is protected from oxidation and other contamination by the inert shielding gas.
To create a good TIG weld takes practice. The color of the weld should be the same as the base metal, and it should be neat and consistent in width and depth. Keeping the torch at an even distance from the surface will ensure a smooth outcome. Try and aim for a gap of 0.125 inches to 0.50 inches for the best results.
Pros
- Welds more metal types than any other process.
- Great for thinner metals.
- Ideal for welding challenging shapes and curves.
- Neater.
- More precise than other welds.
- Greater flexibility of working position.
- Fewer fumes and smoke.
Cons
- Harder to master than other methods.
- More expensive than other methods.
- Requires two hands.
- Overheating is more common with TIG welding.
- Technique is the key to a successful weld.
What You Need
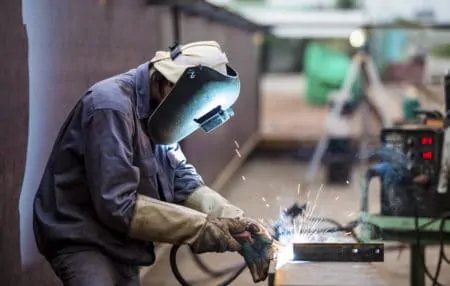
As with all risky applications, you need to take safety seriously. When it comes to welding, there are dangers at every turn, so make sure PPE is top of your priority list.
- Suitable facemask.
- Welding gloves.
- Welding respirator (if you are working in confined spaces or with limited ventilation).
- Fume extractor if so desired.
- Weld jacket or leather jacket.
- Weld sleeves.
- Enclosed, hard-wearing work boots.
Other equipment you will need:
- TIG welding machine.
- Argon gas canister.
- Helium gas canister (if welding steel).
- Power supply.
- Gas regulator.
- Ground clamp.
- Filler metal.
How To TIG Weld
Here is our basic guide to using the TIG welding method. For this instructable, we are focusing on welding 6061 aluminum.
1. Select the Electrode
For aluminum, choose a pure tungsten rod. This gets the best results. Other tungsten alloys are available to suit different alloy materials.
2. Grind the Electrode
Brand new rods have a flat tip, so it needs grinding into a point. Even older rods flatten during the welding process, so before you start any task, always check the condition of your rod tip.
Try using a balled tip for AC welding and a pointed tip for DC. A tapered tip gives a more direct arc, whereas a balled tip causes the arc to jump a little.
3. Insert the Electrode Into the Torch
The rod fits into the electrode holder by unscrewing the back. The tip should be about 0.25 inches long. If you have an electrode inserted already, skip this process.
4. Choose the Right Settings
You will typically see 3 settings on a TIG welding unit. AC is the one we want for welding aluminum. The DCEP option, or DC Electrode Positive, is used for stick welding, and the DCEN, or DC Electrode Negative, is for welding steel.
Set the penetrating level to around 7 on the dial, remembering it is on a sliding scale of 0 to 10. If your rig allows it, set the “Air on” to 5 seconds, to set the time the gas stays on after the arc has stopped. This preserves the quality of your weld and reduces instances of oxidation.
The maximum amps setting should be around 250, which is pretty high.
5. Turn the Gas on
For welding aluminum, we need pure argon gas. If you were welding steel, the mix would include carbon dioxide or helium. Always hold the wheel at the top of the canister by the sides rather than on top. If a pressure build-up occurs, it could detach violently, causing you severe hand damage.
The gas regulator should read about 20 to 30 PSI, and the flow rate (cubic feet per minute) should be somewhere around 15 to 25.
Aluminum oxidizes at rapid rates in excessive welding heats, so the gas prevents that from happening.
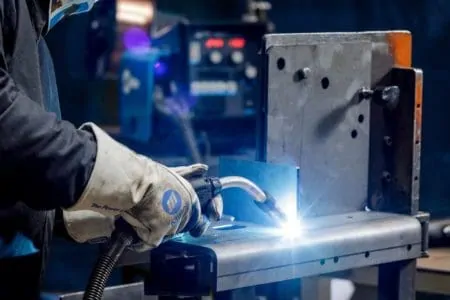
6. Prepare the Workpiece and the Table
The welding table should be metal to attach the ground clamp to complete the circuit. If you don’t have a metal surface, a sheet of metal will do as a temporary fix; just make sure it is flat. Keep a wire brush handy to clean away any debris that might hinder the connection and make sure the metal workpiece is also dirt-free.
Clamp the metal to keep it in one position. Use an anti-spatter spray to stop any leaks sticking to the surface of the metal.
Top Tip
7. Put on Your Safety Gear
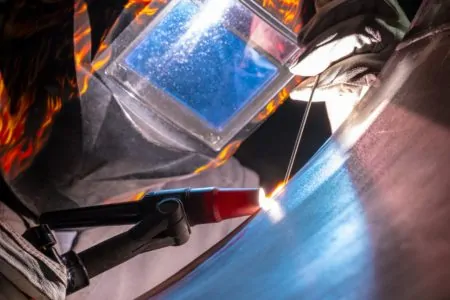
TIG welding is dangerous. It induces blindness, skin conditions and it is highly flammable, so putting on protective equipment is imperative for safety. Use a dark welding helmet, safety gloves, and make sure your arms are covered with either a welding jacket or leather coat or, at the very least, welding sleeves.
Footwear should be hard-wearing work boots, and you might want a flashlight to highlight the work area when you have the dark helmet on. It saves you lifting the lid to get a better view.
As a final resort, put on a respirator if you think the ventilation is poor where you are welding.
8. Check for Impediments
Does the torch move unhindered and the lead is free from snagging and obstruction? If it isn’t, you need to make sure the welding area is suitable for the task.
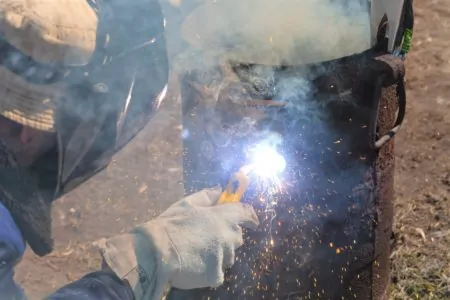
9. Let’s Weld
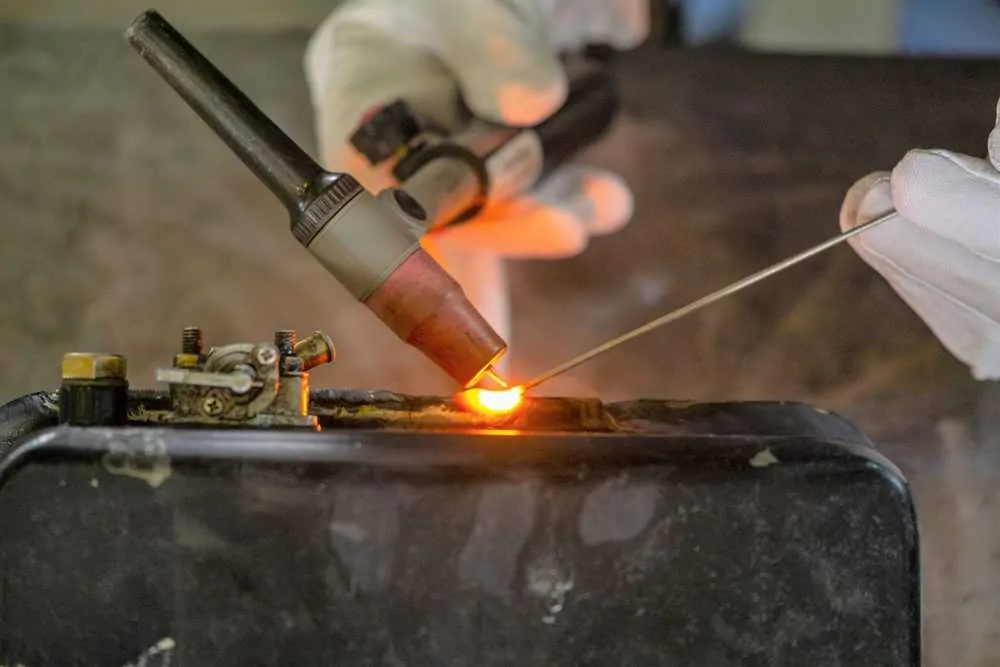
Hold the electrode about half an inch away from the metal surface, taking care not to let it make contact. Molten aluminum will clog the electrode if you do touch it, meaning you will have to stop and grind the electrode end clean.
Depress the foot pedal to get an instant hit of current to the metal, heating it. As the metal becomes fluid, a weld pool starts to form. Always begin on the edge and apply the rod to the pool.
This is a tacking weld to hold the pieces together to make it simpler to perform the final weld.
10. Ease Up a Little
Once the pool starts, you can ease up with the pedal to control the amount of heat applied. Welds shrink as they cool, so try alternating sides of the metal to stop one side from getting too hot. Metal warps when it overheats, and this causes a whole heap of other problems.
11. Start a Bead
Press down on the pedal to generate a surge of power. This creates a weld pool. Ease off the pedal if you see the metal forming holes and melting away. If the metal looks flaky without a liquid resemblance, apply more pressure to the pedal.
As we are welding aluminum, run the electrode towards the feeding rod to create a pool. The rod should be to the electrode’s side that the weld forms, a bit like holding a soldering iron. This is called “leading” the electrode.
Welding steel involves the electrode traveling down the weld line with the filler rod following after.
12. Types of Weld
The easiest to perform is the “fillet” where two metal plates are welded together at right angles. Next is the “lap” weld. This involves joining two metal plates side by side. The hardest to master is the “butt” weld, where two pieces join together end to end, like pipework.
13. Power Off
When you are done welding, close the gas cylinder and tighten the regulator adjustment nut if required. Switch off the welder machine and unplug it from the wall. Place the torch somewhere safe like a dedicated holder or a bucket of sand to allow it to cool. Now you can remove your safety equipment.
TIG Welding Safety
As we’ve already said, welding in any format is dangerous, so adopting the best practices should become second nature.
Check and Double-Check
Before starting any new welding job, take a moment to run through all the cables and connectors on your welding rig. This ensures that you eliminate any loose connections that could cause you issues later when it counts.
Keep a Clean Area
Keep the area you work at free from debris or flammable materials. Paper, plastic, even some clothing is highly flammable. Sparks of molten metal are not uncommon when welding, so to avoid increased fire risks, remove rubbish from the area.
Also, don’t have any trip hazards. You should be able to work safely and not worry about knocking or tripping.
No Water Allowed
Welding is hot work, especially in warmer climates. Don’t be tempted to keep a glass of water near your work area. Also, make sure your fire extinguisher is appropriate, because should a fire break out, water will not help you.
You run the risk of electrocuting yourself because we all know that water and electricity don’t mix.
Avoid Fumes
While it is widely accepted that TIG causes far fewer fumes than MIG welders, they are still present. Always weld in well-ventilated areas, and if possible, wear a respirator or use a fume extractor.
Pro Tip
Top Tips for TIG Welding
Get a New Ground Clamp
Ground clamps can become damaged, corroded and lose their clamping abilities. Clamps are important because, without them, a circuit could not form. So, why not consider upgrading your ground clamp?
Increase the Heat Slowly
Metal changes properties when you apply extreme changes in temperature too quickly. This affects the quality of the material and the weld. Try warming the metal using a blowtorch, or even the coals from a lit BBQ.
Anything that increases the metal’s temperature gradually will preserve the integrity of the material.
Decrease the Heat Slowly
The flip side of the same coin is reducing the heat gradually once the weld is applied. Too fast and you risk a weak joint. There is no limit on the amount of time a weld can cool. In fact, the longer the better.
Try immersing the metal into a lit BBQ, just like you did preheating it. Or, have a bucket of sand handy to plunge the metal into. It is an effective way of post-heating the metal.
Always Clean the Workpiece
You may not care how the weld looks aesthetically, but you do when it comes to strength. If there is dirt in the weld, that leads to weakness and a poor weld. Keep the metal clean and brush away any corrosion or rust. A wire brush is an excellent tool to have for this purpose.
FAQs
Is TIG Stronger Than MIG?
It depends what you are welding. TIG welds are more precise and neater, making them a favorite with the aerospace industry. In that sense, you could argue that TIG welds are stronger. However, MIG is better for thicker material and industrial uses.

Do You Push or Pull TIG Welding?
For TIG welding, you should use the push method rather than the pull technique. Pushing creates a wider and flatter weld, which is better for thinner sheet material that TIG welding suits so well.

Can You TIG Weld Without Gas?
Argon gas protects the weld from oxidation and rusting, as well as preserving the purity of the joint. Without gas, you would have a weak weld.

How Do You Add Filler To TIG Welding?
You can either chase or lead the weld, depending on what material you are working with. Feed the filler material from the side that the weld forms when welding aluminum and this is known as “leading the weld.”
For steel, as the electrode passes along the line of the weld, the filler rod follows behind, tracing the same line. This is called “chasing the weld.”
Why Are My TIG Welds Black?
It means that the weld is exposed to oxygen while still hot. It could be due to insufficient gas flow, a damaged or ill-fitted shroud or pipework incorrectly fitted. It’s always advisable to run through a checklist before you start welding to nip any issues in the bud.

Is TIG Welding Easy to Learn?
TIG welding is no walk in the park to learn, but it can be mastered with dedication and practice.
It’s a highly precise form of welding which uses a non-consumable tungsten electrode that delivers current to the welding arc, and usually requires more intricate welding processes and knowledge than other sources.
But, TIG welding can also produce sound welds at higher speeds than other methods.
Even though this method does require specialized skills and knowledge, with a commitment to practice, even beginners can become proficient in TIG welding over time.

Is TIG Welding as Strong as Stick?
TIG welding can offer a stronger, more precise weld than stick welding. The process is much slower and requires greater skill and practice to achieve good results; but, it can reduce the warping of the base materials due to its lower heat input.
This welding also produces jobs with better overall aesthetics, as no slag is produced, and the bead has consistent edges. When properly carried out, TIG welding equipment can create strong connections that rival those made with other processes.
Since this technique yields relatively clean welds that require less post-weld cleanup, it’s often preferred in projects where appearance is a priority, such as hobbies or fabrication projects.
Despite being slightly more complex, TIG welding offers excellent advantages over traditional stick welding methods and may produce stronger connections depending on the materials used.

Can I TIG Weld Without Gloves?
No, you can’t TIG weld without gloves. While the heat from welding is usually directed away from your hands, sparks and particles of burning metal can still potentially cause a burn. Not to mention that a hot metal may fly toward your hand, causing even more danger.
So, gloves are an important part of welding safety, no matter your type of welding. Unlike MIG or stick welding, TIG welding requires precise control, so it’s especially important to wear something like high-dexterity gloves when working with it.

What Is the Hardest Metal to TIG Weld?
Titanium is the hardest metal to TIG weld. Its high strength, combined with its chemical reactivity, makes it one of the most difficult materials to learn how to weld, as titanium tends not to form strong joints and has a low tolerance for error.
But with enough practice and knowledge, titanium can be successfully TIG welded, making it attractive for use in aerospace applications where strength and durability are paramount.

What Metals Cannot Be TIG Welded?
Not all metals can be TIG welded, notably titanium, aluminum, and copper being the most commonly used metals incompatible with this welding technique.
These materials require specialist techniques such as electron beam welding or laser beam welding to create and maintain successful welds, which must be professionally inspected for accuracy.
While some attempts have been made to make these metals TIG-compatible recently, it is still considered difficult and has experienced limited success in many instances.
It’s All About the TIG
TIG welding may be tougher to master than MIG welding, but once you do, you won’t look back. TIG is neater, more precise and easier to control once you know how. Just like MIG welding, make sure you take safety seriously and get the right protective kit.
Once you have all the gear you need, you are set to go. Get TIG welding!