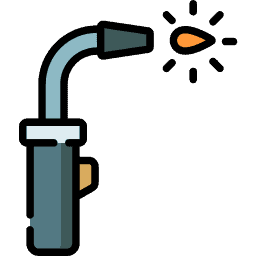
Have you ever wanted to know how to MIG weld? MIG welding is frequently referred to as the “Hot Glue Gun” of the welding world, and the good news is it is relatively easy to learn.
This guide uses step-by-step instructions to show you how to weld using the MIG method. But first, let’s start with some basic questions.
Key Takeaways
- MIG welding is an easy-to-learn method for joining metal using an electric arc, suitable for various metals and applications.
- Proper safety equipment and well-maintained tools are essential for successful MIG welding.
- Preparation of the weld area, correct settings, and technique can help ensure a strong and clean weld.
- Practice, patience, and adherence to safety guidelines are crucial for mastering MIG welding and avoiding accidents.
What Is MIG Welding?
The principles of MIG welding were first developed in the early 1800s with the discovery of the electric arc (1). By the end of the century, MIG welding had advanced with the advent of electrodes.
MIG stands for Metal Inert Gas, and it bonds mild steel, stainless steel, cast iron and aluminum. It also welds copper, magnesium, nickel, silicon bronze and other alloys. MIG welding accounts for almost 50 percent of all metal welds (2).
It is widely used in construction, automotive construction, factory and other industrial settings, as well as machinery and infrastructure repair.
How Does MIG Welding Work?
MIG welding is an arc welding process that creates a short circuit between the metal and the welding torch with a continuous feed of the wire electrode. The heat produced, and the inert gas, locally melts the metal to fuse it with other metals, and the cooling process solidifies the joint.
Most MIG welds rely on a mix of either 100 percent argon gas, or a split of 20 percent argon and 80 percent carbon dioxide. The gas preserves the purity of the weld, stopping contamination that could cause the joint to rust. Rust damages the integrity of the weld, making it weaker.
A good weld should have even beading with uniformed waves. There should be no cracks or gaps, and the weld should be left to cool slowly, because the longer it cools, the stronger it bonds.
Advantages of MIG Welding
- Works on a wide range of metals.
- Welds medium thickness metal and thinner sheet material.
- Easy to master.
- Creates a good welding bead.
- Minimal splatters.
- Flexible welding capability.
Disadvantages of MIG Welding
- Not suitable for thicker material.
- Requires an external source of gas.
- Gas canisters make this a less portable method of welding.
- Not ideal for outdoor use.
- Messier weld quality compared to TIG welding.
What You Need
As with all jobs that involve risk, you should make safety the number one priority.
- Suitable facemask.
- Protective gloves.
- Welding respirator (if you are working in confined spaces or with limited ventilation).
- Fume extractor (if desired).
- Weld jacket or leather jacket.
- Weld sleeves.
- Enclosed, hard-wearing work boots.
Now that you’ve taken care of the safety aspect, let’s look at the equipment you will need.
- MIG welder and torch.
- Argon gas canister.
- Carbon dioxide canister.
- Power supply.
- Gas regulator.
- Ground clamp.
- Wire feed.
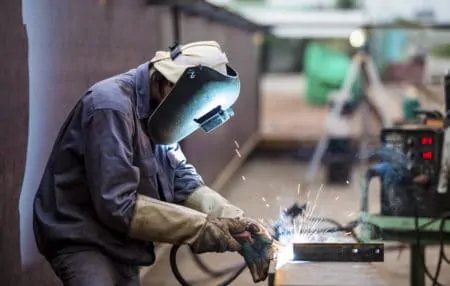
How To MIG Weld
This is a basic guide, not a definitive instructional. We will talk you through the various stages of MIG welding steel to give you a rudimentary understanding of what the process involves.
Before we get to the method itself, there are some housekeeping practices we need to run through. The setup is crucial if you want the best outcomes.
1. Setting Up the Machine
Take the time to familiarize yourself with the welding machine. The first thing to check is the spool of copper-colored wire inside the welder. Make sure it is secured with the tension nut, but that it is free to rotate as the feeder rollers pull the wire through the welding gun.
If you are welding aluminum, the wire should be silver in color.
2. The Gas Tanks
The gas tank is located behind the MIG. It is either 100 percent argon or a mixture of argon and carbon dioxide. Open the main valves of each tank to check they are full. The gauges should read between 0 and 2,500 PSI. Set the regulator at 15 to 25 PSI, depending on what you are welding.
3. The Welding Gun
Ensure the feed wire is inside the welding gun, with a small piece protruding through the metal tip. The tips are sacrificial and vary depending on thickness and what type of metal you are welding.
Depress the trigger to make sure there are no problems and that the wire feeds through.
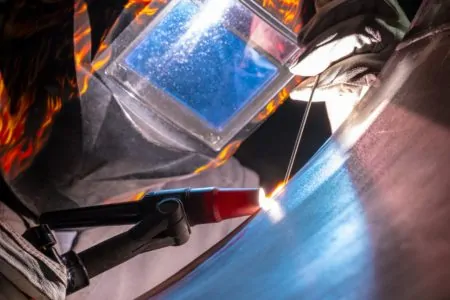
4. The Ground Clamp
The ground clamp is the cathode in the circuit and completes the circuit between the welding gun, the welder and the workpiece. Make sure it is attached to the project, and the connection is clean, with no rust or debris to hinder the operation.
Once you are happy that everything checks out, it’s time to begin.
5. Prepare the Weld
You cannot underestimate the importance of preparing the weld. Removing blemishes and grinding away rust spots will all help to increase the integrity of your weld.
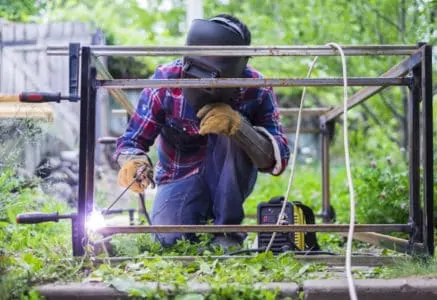
6. Prepare the Area
Molten metal can spit quite a distance, so making sure there are no flammable materials within the welder’s spitting distance is crucial. Remove any plastic, paper, or cloth material that could smolder and ignite.
Keep a carbon dioxide fire extinguisher handy in case of mishaps. Never use water to douse the flames as you are standing next to a powerful machine throbbing with deadly electricity. We all know that water and electricity are a recipe for disaster.
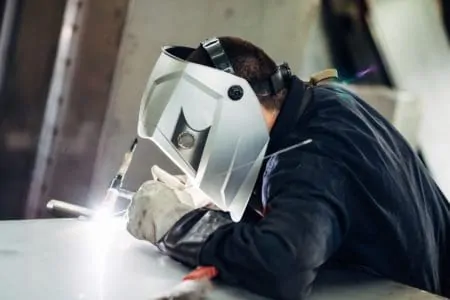
7. Put on Your Safety Equipment
Place the facemask on your head, but at this stage, there is no need to flip the mask down while you are preparing the weld area. Put on welding gloves and make sure your arms are protected with the welding sleeves.
If you work in a confined or poorly ventilated area, put on the respirator to avoid suffering asphyxiation.
Never weld galvanized steel as the zinc in the galvanization process heats and gives off poisonous gas. If inhaled, it causes flu-like symptoms that can last a few days. This is sometimes referred to as “metal shivers.” While the symptoms are temporary, more prolonged effects can be catastrophic on your lungs.
8. Attach the Ground Clamp
This can be attached to any metal surface to complete the electrical circuit. The metal project or the welding table will suffice.
9. Open the Gas Cylinder
Loosen the adjusting nut on the gas regulator and turn the wheel on top of the canister to release it. Make sure your hand is located around the edge of the wheel and not over it in case there is a build-up of pressure and the wheel flies off.
Also, don’t hunch over the canister as you open the valve. Stand opposite it and at arm’s length. You will notice the PSI on the gauge start to rise. You can begin welding when you get above 1,000 PSI.
Now it’s time to tighten the adjusting screw on the regulator until the PSI reads between 15 and 25.
10. Find the Welding Settings
A lot of MIG welders have the welding settings located on the underside of the lid. This chart is a handy guide for determining voltage and speed. For this exercise, we will use a wire thickness of 0.035 inches, and the gas composition is 75 percent argon and 25 percent carbon dioxide.
The only other variable to determining the settings is the thickness of the material.
11. Power Up the Welder
Plug the welder into the power supply and switch it on. Make sure there are no objects or debris that will hinder your progress or place you in danger.
12. Set the Wire Speed and Voltage
Using the same chart from step 4, adjust the wire speed and voltage to the desired settings. In this example, we will assume you are welding 18 gauge metal, so the wire speed should be 16 and the voltage 120.
If the settings are too high, you will experience holes in your workpiece as it melts through the weld. If the settings are too low, the weld will form in spurts because too much wire is feeding and splattering to form a weak weld.
You will know when the settings are spot on when you start to lay smooth and even welds without hindrance. Also, listen for the sparking sound, a bit like an over-enthusiastic bee. This should tell you that the voltage and speed settings are correct.
Top Tip
13. Check the Wire in the Welding Torch
There should be about an inch or so of the welding wire protruding through the welding torch’s tip. If there is too much, snip it to size.
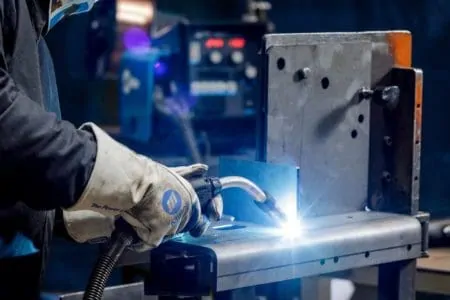
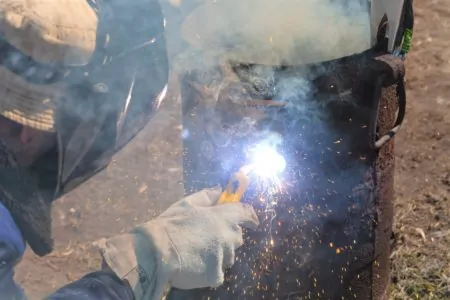
14. Weld Away
Lower the facemask and start to weld the metal. You can use either the push or the pull techniques. Pushing produces shallower but wider welds while pulling creates narrower and deeper weld penetration.
Try and lay the beading in either a zig-zag pattern or concentric circles that create a wavy, swirling pattern. Also, the angle that you work at is dictated by the type of joint you are welding.
Move the torch from the top of the weld downwards. Make sure the beads are about an inch or two long. Any longer and you risk heating the metal, which could warp and weaken. Weld one spot, then move to another and so on. You can then finish up by joining each section at the end.
When you reach the end of the workpiece, turn the wire feed to its lowest setting.
15. Close the Cylinder Valve
Turn the gas canister valve by hand, until it is tightly shut.
16. Bleed the Regulator
Depress the trigger on the welding gun as this bleeds the regulator. Watch as the cubic feet per hour (CFH) level drops to its lowest possible level. The wire will still feed as you do this because the wire feed is higher than zero.
You can also unscrew the adjusting screw on the regulator until it is loose.
17. Turn Off the Welder
Switch off the welder both at the machine and the power supply. Remove your welding helmet and safety equipment but keep your gloves on. Please don’t touch the metal as it may still be hot, and the trick is to allow it to cool naturally for the best weld.
You can now remove the ground clamp and neatly coil away any wires. Now remove your gloves.
Top Tips for MIG Welding
There are always techniques and tricks that the professionals use to make their lives easier. Here are some of our top tips.
Get a New Ground Clamp
Ground clamps deteriorate over time, losing their grip and rusting. The worse condition your clamp is in, the less effective it is at completing the circuit. A poorly made circuit could have consequences when it comes to the quality of your welding.
Keep It Clean
MIG welding hates dust and dirt. It hates grease too, so keep the area you are welding as clean as possible, taking great care to remove any debris. Dirt is your enemy when it comes to MIG welding and seriously compromises the quality of your weld joint.
Avoid Anti-Spatter Spray
Why buy an anti-spatter spray that could be more poisonous than the fumes created from the welding process when cooking spray does the same thing, and costs a whole lot less?
Keep Spare Tips
While the tips are not supposed to clog with slag, they gunk up over time. Keep spares handy, so you are not stopped in your tracks when the tip fails, or you are unable to feed the welding wire.
Which Wire To Use?
If you are a general hobbyist, a 0.035-inch wire is generally considered to be the best all-rounder.
Relax Your Grip
Novice welders understandably grip the welding torch like it was flowing with lightning itself. Try and relax, because the more fluid your grip, the greater control you have over the weld. Think of it like painting. You would ever clamp the brush in your hand so tight you couldn’t paint accurately, and neither should you when it comes to welding.
Practice Your Beading
Before getting stuck into your actual welding project, lay down some beading on scrap metal to get the hang of the technique and also how the welding torch handles. It also allows you to try out different patterns to see what works for you.
Preheat the Metal
Metal changes properties when subjected to violent changes in temperature. It can become brittle and crack under the stress. To avoid this, use a preheating method of warming the material using a blow torch. You want this to be as gentle a process as possible to heat the metal gradually.
When you start to weld, it won’t be such a shock to the system, and the material will better cope.
Post-Heat the Metal
The same principles apply when you have finished welding. Metal is like a good steak. Once cooked, it needs time to rest and cool. It needs to settle. Take as much time as you need cooling the metal, using hot coals from a BBQ to gradually reduce the temperature or even a bucket of sand.
FAQs
Do You Push or Pull MIG Welding?
You can do both. It depends on what kind of weld you want. Pushing creates a fatter weld with a shallower penetration, so it is better suited to sheet material. Pulling the weld increases the penetration depth while narrowing the weld line. This method is better for thicker materials.

How Long Does It Take To Learn MIG Welding?
It takes about 6 to 8 months to learn how to MIG weld. You should take a minimum of 3 classes, but as with all trades, the more you educate, the better you become. There is no substitute for practice, so the more you pick up the welding torch, the fewer mistakes you will make.
How Do I Stop My Spatter From MIG Welding?
The most common causes of excess spatter are incorrect wire feed rate and excessive speed. Get the feed rate right, and you will reduce the instances of wire feed melting into a weld pool. Also, make sure you have the correct voltage setting because if the machine is running excessively hot, it will melt faster and create pools, which cause a spatter.
Make sure you have properly cleaned the metal because contaminated material also increases the chances of a spatter.

Can You Cut With a MIG Welder?
It is possible to use a MIG welder to cut through metal like a plasma cutter. It requires voltage and a fast feed rate for the welding wire. Be careful when you do this, as it creates a brilliant light as the arc is formed. Make sure you have the helmet turned to 13 to avoid arc-eye or retinal damage.
Also, ensure appropriate ventilation for the area as it produces a high volume of fumes.

Is MIG Welding for Beginners?
MIG welding is a commonly used welding process due to how easy it is and the wide range of applications.
Although it may initially appear overwhelming for beginners, with some basic knowledge and practice, MIG welding can be a great starting point for newer welders. It allows for using multiple wire materials and shielding gases, so practitioners can precisely adjust their settings to achieve the desired properties in their welds.
Learning to accurately configure these elements will open up new possibilities while allowing you to safely complete your projects in less time.

Is MIG Welding Harder Than TIG?
Generally speaking, MIG welding is often considered easier than TIG because it’s a much faster process and doesn’t require a high level of precision due to the use of filler wire.
But, TIG welding requires greater attention to detail on account of its lack of filler material which can make it much more challenging.

Is MIG Welding Possible Without Gas?
While it’s impossible to perform traditional MIG welding without gas, a type of “gasless” Mig welding exists. Known as Self Shielding Mig Wire, this form of welding utilizes special flux core wire that produces its shielding gas when the arc is struck and melts the wire on contact.
This type of welding is well-suited for maintenance work and repair thanks to its portability and lack of need for a shielding gas cylinder.
However, Self Shielding Mig Welding is generally not recommended for critical welds due to the difficulty in controlling burn-throughs or porosity arising from deficiencies in technique or materials.

Can You Get Electrocuted MIG Welding?
MIG welding can indeed result in an electric shock, so it’s important to take precautions to stay safe while carrying out this activity. Although the process involves electricity and potentially hazardous materials, proper safety measures can help protect welders from injury or worse.
It’s essential to wear protective gear like insulated gloves and leather boots throughout your welding session, and always ensure that the work area is properly grounded.

What Should You Not Do with a MIG Welder?
When operating a MIG welder, it’s important to observe safety rules. One of the essential safety precautions that shouldn’t be overlooked is not to overload an electrical circuit.
This not only damages both the welder and other electrical appliances in the vicinity, but it can also put you at risk for electrocution.
Ensure the welding area is properly ventilated, as gas and electrical sparks may cause explosive, flammable fumes if not removed from the space. Don’t take any shortcuts when welding, and follow proper welding processes.

What Is the Most Challenging Part of Using a MIG Welder?
Using a MIG welder can be a daunting task. Without the right technique, it can lead to incorrect contact tip recess within the welding nozzles and even greater issues within your project.
This issue can be caused by anything from low-quality parts to improper equipment setup before use.
When troubleshooting why one is having an issue with incorrect contact tip recess in their welding nozzle, they should first ensure that the machine is set up properly; this includes all pertinent connections made securely, coils at the correct tension, etc.
Job Weld Done
MIG welding is very satisfying, especially when you know you’ve made a neat and strong weld. It is also easier to master than you might think. If you have a project that needs some welding, MIG is your best option.
And it needn’t cost the earth to get started. MIG welders begin at around $150, and the accessories and safety equipment are affordable too. So, what are you waiting for? Get started, and soon you will be a welding pro.