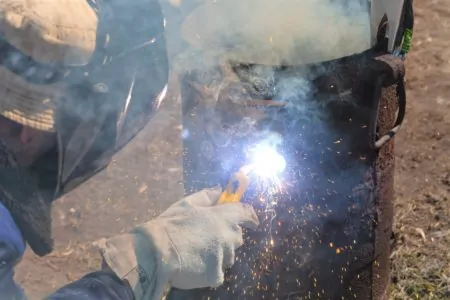
You have to adapt when it comes to welding different types of metal. Welding copper, for example, requires a whole new technique. It can be joined using soldering, but for this article, we are going to focus on welding.
So what is the best way to weld copper?
Key Takeaways
- Preheat copper before welding: Preheating reduces cracking and helps maintain the weld’s integrity.
- Use TIG and MIG methods: These methods provide the best results when welding copper.
- Choose clean, unpainted copper: Clean copper helps avoid toxic fumes and ensures a better weld.
- Wear safety gear and work in a ventilated area: Protect yourself from potential hazards and toxic fumes by taking proper safety precautions.
Properties of Copper and Its Alloys
When working on a job-site, you need to know that the material you are using is fit for the job. Copper has many properties that make it an ideal metal to use, especially if you are welding copper tubing with a large or small diameter.
Methods of Joining Copper To Copper or To Copper Alloys
There are various ways you can join copper to copper or copper alloys. Determining which method you use is a balance between strength and maximum temperature. Here are the 3 options you have.
Soldering
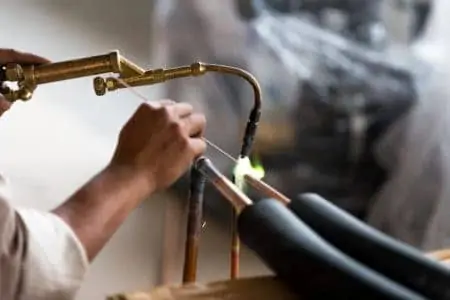
Soldering differs from welding because you don’t melt the base metal to make the seal; you use a third material called solder, primarily a mix of mostly tin and nickel. This metal melts at 840 degrees Fahrenheit and is applied to the joint, causing it to harden when it cools, forming a strong airtight bond between the two copper pieces.
If you want the strongest joints, silver is the best material to use. The amount of silver in solder metal varies from 15 to 30 percent, and the higher the silver content, the better the joint.
Solder with a higher silver quantity will cost you more, but you also get a higher tensile strength. Another advantage of soldering is the lower heat requirement, which saves the copper pipe from oxidizing on the inside. It saves you having to use nitrogen to purge your pipework.
You would use the soldering method when you are working on thinner material that requires less heat. HVAC units often call for soldering because you are working close to plastic couplings and rubber bushes. Soldering operates at far lower temperatures compared to welding. It is kinder to the base material and easier to control for more detailed work.
Pros
- Easy to learn.
- Better control.
- Operates at lower temperatures.
- Better for thinner material.
- No oxidation at lower temperatures.
- No need to use nitrogen to purge pipework.
Cons
- Limited uses.
- Not effective with large scale projects.
- Doesn’t work with thicker material.
- Welding and brazing are stronger.
Brazing
Brazing is the same method as soldering and involves the same materials and principles. Where it differs is in the temperatures required to melt the solder. Unlike soldering, the filler metal in brazing melts above 840 degrees Fahrenheit, meaning that the increased heat creates a stronger seal.
Brazing is a bit like industrial-strength soldering and is more effective when used with thicker copper. You can minimize the risk of oxidizing the copper by running a mix of neutral nitrogen through the pipework while you are brazing. This removes any oxygen.
Brazing is also better for bridging larger gaps compared to soldering and welding.
Pros
- Creates a stronger joint.
- Uses a higher temperature.
- Has industrial applications.
- Greater control than welding.
- Neater.
- Bridge larger gaps.
Cons
- Not as strong as welding.
- Has limited uses.
- Slow process.
- Expensive materials.
- Requires increased heat.
- Higher temperatures risk weakening the copper structure.
Welding
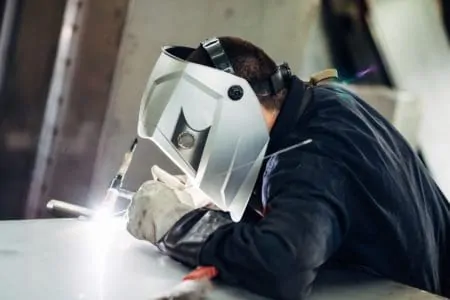
Welding melts the base metal as well as a filler material to create robust joints. Because of the extreme heat involved, welding is the best way to ensure the strongest tensile joint. The cost of materials increases with each method, making welding the most expensive option.
The two most common welding styles for copper are MIG and TIG. MIG welding is easier to master, but less precise. It also limits you on the thickness of the copper you can work with. TIG welding is more accurate and penetrates deeper for thicker material, but it is infinitely harder to master. It requires two hands, so the welder machine is typically controlled using a foot pedal.
Welding is the most industrial form of joining copper pieces and best reserved for the thickest material where a high tensile weld is most needed. You wouldn’t want to use a welder to repair a HVAC or refrigeration unit due to the delicate nature of the mechanics and the extreme heat involved with the process.
Also, welding is the most dangerous to undertake, requiring expensive specialist equipment to protect you from harm.
Pros
- Creates the strongest joint.
- Ideal for larger projects.
- Fast and efficient.
- Better for bulk welding work.
- Penetrates deeper for thicker material.
Cons
- Expensive.
- TIG welding is hard to master.
- Not recommended for HVAC and refrigeration.
- Requires protective equipment.
- Dangerous.
How To TIG Weld Copper
Follow our simple step-by-step guide to TIG welding copper.
1. Take Precautions
Whenever you undertake a dangerous pursuit, you should always protect yourself. What you need is the following:
- Safety goggles.
- Safety helmet.
- Protective welding jacket to protect you from flash and arc fire.
- Flame-resistant welding gloves. Leather is one of the best materials for protection.
- Heavy-duty work boots with protective toe-caps.
- Welding respirator if working indoors.
- Fire extinguisher.
This is not a wish list of protective items. It should be the number one priority and the first thing you should think about before welding. It’s the reason we made it the first point in our guide.
2. Work in a Ventilated Area
Wherever possible, you should work in a ventilated area. If you struggle to do this, you should take precautions and wear an N95 face mask. These differ from ordinary face masks because they remove 95 percent of all pollutants, which means you protect your lungs.
Brass has a high zinc content, so avoid it where possible. Zinc fumes are noxious and can give you flu-like symptoms. At best, the effects pass, but prolonged exposure could lead to permanent health issues.
3. Electricity Kills
Avoid electric shocks. It kills lots of people every year and is entirely avoidable. Make sure you wear insulated boots and inspect your gloves to make sure they have no holes. Welding equipment should be adequately grounded and never left switched on. Always disconnect the power when the welder is off to avoid accidents.
Also, make sure that the conditions are dry. Welding in damp conditions can be deadly.
4. Choose the Right Copper
Try and choose copper that is clean and unpainted. Paint and other surfaces can produce poisonous fumes, especially if the paint is lead-based. If you must do this, always wear a respirator.
The best course of action is to clean the copper as best you can. Try and choose oxygen-free copper. It helps to protect the copper from oxidation, and it will keep its color after welding. The good news is that oxygen-free copper is the most commonly available.
5. Avoid Alloys
Alloys can be welded, but they react differently depending on their ingredients. Only experienced welders should weld with copper alloys. Zinc-based copper alloys reduce weldability and also boil at lower temperatures, producing toxic gasses that can cause long-term health defects.
6. Get the Ratios Right
Gas ratios and temperatures vary on the style of welding and the thickness of the material. If the copper is under 2 mm, you should use argon gas and 160 amps. For thicker copper, up the amps and add helium to the gas mix.
7. Make Sure You Preheat
Thanks to copper’s high thermal conductivity, preheating is necessary. Preheating can range in temperature from 50 degrees Fahrenheit to over 700 degrees Fahrenheit, depending on the thickness of the metal.
Insert the copper into a furnace until the right temperature is reached. Alternatively, you can use a blowtorch. Preheating helps the copper to cool steadily and reduces cracking.
8. Put on Your Safety Gear
Now is the best time to put on your safety gear. You are ready to initiate the arc.
9. Initiate the Arc
Hold the arc steady for a few seconds until the puddle forms. Keep the torch at about 70 degrees from the base metal.
10. Add Filler
Now the puddle has appeared, prod the filler into the pool of molten metal. As the filler melts, it mixes with the two melted coppers and forms a seal as it cools.
11. Be Quick
If the puddle lingers for too long, it increases the risk of the copper oxidizing. This prevents a clean weld, so be quick with the welding.
12. Slow the Cooling Process
Speeding the cooling process increases the risk of cracking and weakens the weld. When it comes to cooling, the slower the better. The longer the weld reduces in temperature, the higher the tensile strength of the joint. It’s a bit like allowing a steak to rest after cooking.
This is where preheating helps to maintain the integrity of the metal. If you are indoor welding, air-cooling is acceptable. Avoid splashing water on the weld. Moisture weakens the weld and could increase oxidation.
Once you finish, turn the welder off and unplug at the wall. If it is safe, remove your safety gear. Don’t try and pick up the copper unless you are sure it has cooled completely.
Top Tips for Welding Copper
Add Helium
If the welding isn’t smooth, up the helium to 100 percent. It has a higher power than argon and allows you to apply higher heat values to the copper.
Protect Your Feet
Use metatarsal guards over your laces to protect your upper foot and ankle from falling objects. Also, make sure your boots are insulated to reduce instances of electric shock.
Stay Dry
Wet clothes increase the chances of electric shocks and rising moisture levels will compromise your weld’s integrity. Wear dry clothes and avoid moisture, even perspiration.
Insulate the Copper
If you are welding in cold conditions, insulation for the welded metal might stop it from cracking. Fiberglass blankets are the easiest way to stop the copper cooling rapidly. You could also stack sandbags around the copper to help it cool slowly.
Welding Copper FAQs
Why We Love Copper
Copper is a great material to weld with. It is versatile, formable, easy to work with, and it doesn’t corrode. It’s the reason why copper is always in demand, both as a building material and as an HVAC and refrigeration stalwart.
But that doesn’t mean that copper is easy to weld. Far from it! It takes skill, the right temperature and gas mix, and the right choice of copper.
