How to paint trim is a question asked by many people. It’s not the same as slapping some paint on the walls because it takes care and precision, plus a lot of prep work. Trim painting is a skill, and knowing how to get super smooth results is beneficial for a room finished to perfection.
If you are ready to start painting moldings and baseboards, check out our easy-to-follow guide for the best method, along with hints and tips.
Key Takeaways
- Choose the right paint: Use semi-gloss or satin paint for trim, with oil-based paint for high-traffic areas and latex paint for interior surfaces.
- Prep the room: Clean and sand the trim, fill holes, and apply primer before painting.
- Paint trim first: Paint the trim before the walls to achieve a clean, straight line.
- Use proper techniques: Apply paint in long, steady strokes, and don’t leave painter’s tape on too long to avoid paint peeling or bleeding.
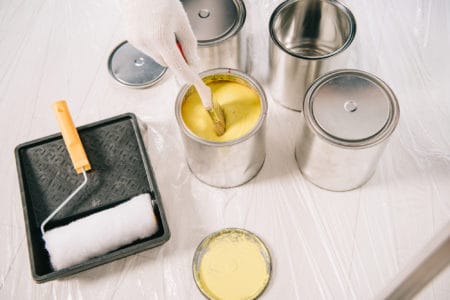
What is the Best Paint to Use on Trim?
A lot depends on the style and look you are trying to achieve. Most trim paint is either semi-gloss or satin because matte paints are coarser, making them a challenge to wipe clean. Also, you should choose the paint based on placement: for example, baseboards get a lot more punishment than ceiling moldings.
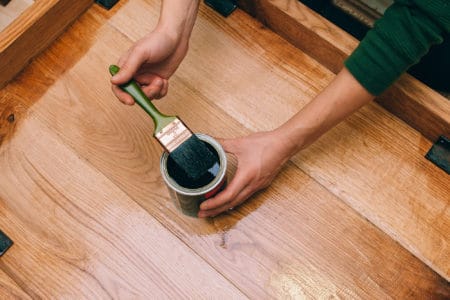
Oil-Based Paint
Oil-based paint is thicker and has a longer drying time than water-based products. It ensures the paint fills cracks, dents, and imperfections on the surface of your trim.
It also means that oil-based paint doesn’t sag and has more settling time to dry without brushmarks. Oil paint also contains alkyd binders that make the paint more resilient in high-traffic areas like near baseboards and door frames.
Solvent or oil-based paints contain VOCs (volatile organic compounds), which are bad for the environment because as the paint dries, it releases low-level ozone. Also, oil-based paint has a powerful odor that can leave you with temporary health side effects like nausea and stinging eyes.
When using these paints indoors, always open windows and doors to get good airflow. Also, wear a face mask and safety goggles.
Pros
- Contains alkyd binders for extra resilience.
- Covers better without brushmarks.
- Fills cracks and dents more effectively.
- Better for high-traffic areas like baseboards.
Cons
- Releases low-level ozone.
- Strong odors could have health implications.
- Not environmentally friendly.
Latex Paint
Latex paint is easier to work with because it goes on smooth and dries in less than two hours. That’s a lot faster than the standard six to eight hours for oil-based paint.
Latex paint is better for trim in low-traffic areas of a room like window frames and crown moldings because it lacks the same binders that make oil-based paints so resilient. While you can buy gloss latex paint, you are more likely to get eggshell or satin finishes because gloss contains resins and binders associated with oil-based products.
The main advantage of latex paint is it cleans up with soap and water and contains minimal VOCs, making it better for the environment. It also releases fewer odors, so it is better suited to interior surfaces.
Keep In Mind
Latex paint is not a good option when working outdoors because it lacks the toughness of oil-based products.
Pros
- Goes on smooth and dries faster.
- Ideal for interior surfaces.
- Washes clean with soap and water.
- Better for the environment.
- Low VOCs and odors.
Cons
- Not as durable as oil-based paint.
- Not suitable for exterior use.
- Unsuitable for high-traffic areas.
Do You Paint Walls or Trim First?
This largely depends on your skill levels. But the general rule is that you paint the trim first because it gives you a straight line to apply the painter’s tape when tackling the walls. Also, it doesn’t matter if you get a little paint on the walls because you can cover them with paint.
How to Paint Trim
Painting trim is pretty straightforward, providing you’ve done the prep work first. Because it frames the room, your trim needs to look pristine, and that means taking the time to get the surface as perfect as possible before picking up a paintbrush.
What You’ll Need
To get the best results, you need the right tools and materials.
- Painter’s tape.
- 5-in-1 decorator’s tool.
- Drop cloths.
- Tack cloth.
- 2.5-inch paintbrush.
- Medium, fine, and extra-fine sandpaper.
- Sanding block.
- Shop-vac.
- Caulk and gun.
- Spackling paste.
- Face mask.
- Goggles.
1. Prep The Room
Before you do anything, you need to remove all the obstacles in the room and lay down the drop cloths to protect the floor. The next step is to tape off the window and door frames as well as the baseboards.
Painter’s tape is excellent at stopping paint from bleeding onto other surfaces, and it gives you a straight line to work with.
2. Clean the Trim
If you are cleaning trim in the bathroom or kitchen, you will need soapy water to wipe down the greasy areas. Using the vacuum cleaner in the other rooms in the house should be sufficient to clean off the dust.
Wipe over the trim a second time to clean away soap residue, and then use a cloth to dry the surface.
3. Fill Holes
Your trim gets a lot of abuse, especially baseboards and door frames. Fill in any nail holes or dents and divots using the spackling paste. It is easy to use and sands really smooth when it sets.
Filling gaps is crucial if you want the trim to look ultra-smooth, especially when using white gloss.
Take Note
Only fill holes on the trim’s surface. The gaps where the trim meets the wall should be sealed using a flexible caulk. Wait until you have primed before using the caulk.
4. Sand the Trim
Before making a start, don your face mask and goggles. Sawdust contains carcinogens that are harmful to your lungs and eyes.
Sanding your trim is helpful on several levels because it smooths the spackling paste and removes blemishes on the trim’s surface.
It also takes off old paint or treatment, and it provides a key (abrading the material surface) for the primer to adhere to. Medium sandpaper is best for the first round of sanding.
Use the shop-vac to remove sawdust from the trim and the rest of the room. As a final precaution, wipe the trim with the tack cloth.
Use a sanding block to give you a better grip and protect your hands from slithers of wood.
5. Priming the Trim
Primer seals the trim’s surface and gives the base coat better adherence. The type of primer you use depends on the base and topcoat. If you opt for oil-based paint, use an oil-based primer.
However, while oil-based products are robust and offer excellent protection for your trim, it is more suited to exterior wood and high-traffic areas.
Water-based paints are better for interior surfaces because they are low in VOCs and odor, which is better for painting indoors.
Brush on the primer in long and steady strokes that run the length of the trim from top to bottom. The better your strokes, the better the outcome. Load the brush with just enough paint to get decent coverage but not enough that it drips or runs.
Once the primer has dried, grab the fine-grade sandpaper and run it over the surface of the primer. This removes any imperfections and smooths out any visible brushstrokes. Use the shop-vac to remove the sawdust and wipe the trim using a tack cloth.
You are now ready for the second coat of primer. Repeat the process, ensuring that you sand after the second layer has dried. Remove the sawdust, and now you are ready for caulking.
6. Caulking the Gaps
The reason you caulk after priming is to highlight the gaps against the white paint. Once the primer dries, the cracks become obvious and really stand out. It also means the caulk goes on in thin lines because the trim has been sanded twice and is really smooth.
Plus, caulk is non-porous and paintable, so it doesn’t need any surface preparation. Grab the caulk tube, load it into the caulk gun, and squeeze the trigger until the tube is secure.
Cut the tip off the nozzle at 45 degrees to give you a better angle to apply the caulk. Start at the top, running the gun along the edge to ensure the caulk squeezes into the gaps. Stop every 10 inches and run a wet cloth along the caulk to smooth it into the gaps.
When you are done, release the trigger and remove the pressure using the clip at the end of the gun. This stops more caulk from coming out after you have finished.
Caulk requires no sanding once dry, meaning it can be painted over with the first layer of topcoat if you followed the instructions about drying times.
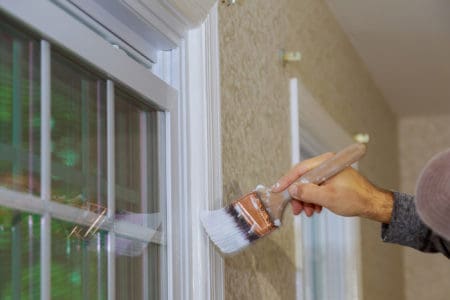
7. Painting the First Topcoat
Now it’s time to apply the first color coat. Brush on the color using long and steady strokes, starting at the top and working towards the trim base. The same rules apply: load the brush with enough paint for good coverage but not too much that it drips and runs.
Once the base coat has dried, sand it using the extra-fine sandpaper and remove the dust using the shop-vac and tack cloth. Now you are ready for the second topcoat.
8. The Final Coat
Now that you have a super smooth surface, you’re ready for the topcoat. The technique for this layer of paint is the same as for the first coat. Use long and steady strokes, working from the top, and load the brush with the exact amount of paint (this takes trial and error).
The paint will cover better and move easier because you have already created the perfect surface condition over the previous three layers.
Tips and Tricks for Trim Painting
It’s time to take a leaf out of the professional’s handbook and use those handy tips and tricks that make your life easier. If it’s good enough for them, it’s good enough for you. Let’s get started.
Don’t Leave the Tape on Too Long
Once the paint is touch-dry, it is time to remove the painter’s tape. If you leave it on too long, the paint cures, and you risk removing chunks of paint from the trim when you pull it off. Do it too soon, and the paint could still be wet enough to bleed onto the walls.
Plus, if any drips have penetrated underneath the painter’s tape, they will be more challenging to remove if they have dried.
Score the Tape
Scoring along the top edge of the painter’s tape makes it easier to remove without taking paint off your trim. When the paint dries, it forms a connected film between the tape and the trim, so scoring along the edge with a knife breaks that seal.
Use Gloss or Semi-Gloss
Gloss paint is better at protecting trim because it contains higher levels of binders and resins that dry to form a hard shell. In high-traffic areas like door frames and baseboards, gloss withstands the rigors of footfall; plus, it is wipeable.
Add Conditioner to Latex Paint
You can buy conditioners to add to your latex paint to improve the coverage and reduce brushstrokes. Conditioners make the latex paint act more like oil-based alternatives by slowing down the drying process to allow you more time to spread the paint.
FAQs

Should You Paint Trim With Brush or Roller?
You can use both, but a brush is better for rounded or irregular-shaped trim. A roller can do the bulk of the work for a baseboard, but use a brush to finish off the detail.

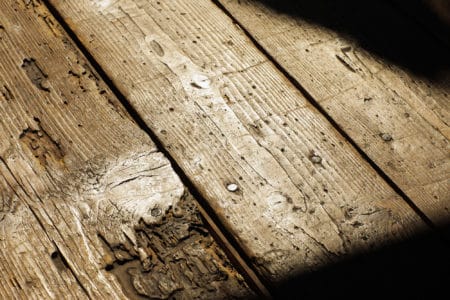
Can I Paint Trim Without Sanding?
You can use liquid deglosser instead of sanding. It takes off the layers of old paint and stain treatments, leaving you with a paintable surface. However, nothing beats the smoothness of sanding the wood to remove imperfection and surface stains.

Is It Ok to Cut In One Day and Paint the Next?
If you have a lot of trim to paint, it is perfectly acceptable to paint all the edges in one go and then proceed with the walls the following day. Besides, the drying time of latex paint is so short; it will dry in a matter of hours anyway.

Should You Use White or Clear Caulking on Trim?
White caulk is better for white painted trim, and clear caulk works better when using non-white colors. Caulk is paintable, so no matter what type you use, you can still get an even coating; however, white caulk blends better with white paint.

Can You Paint Trim Before Installing?
You can, but it would be difficult. You would have to be so careful about damaging the painted and sealed trim, which would slow you down considerably.

How do You Paint Trim That has Been Stained?
The easiest way is to use graduating grades of sandpaper to remove the top layer of stain and then use a stain-blocking primer to stop the stain from bleeding through. It is a long process, but the results are well worth it.
And Finally
Trim painting is one of the most intricate decorating tasks you can do and one of the most rewarding. Knowing how to paint trim provides your room with an immediate impact that lifts the space and frames the floors, walls, and ceiling.
Get it right, and you richly deserve the compliments from friends and family, but get it wrong, and it will be the first thing people notice.