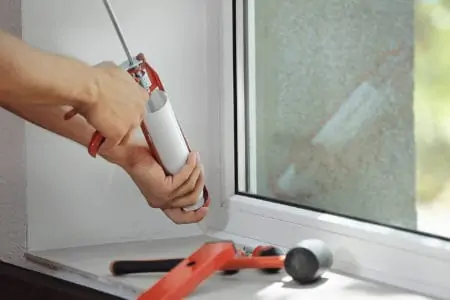
Knowing how to load a caulk gun is useful, especially if you want to seal gaps around window frames, bathtubs, and trim. Learning how to use a caulk gun correctly helps you get the job done accurately and saves you time and effort.
We show you the best way of loading a caulking gun and give you hints and tips to help you get the best results.
Key Takeaways
- Types of Caulk Guns: Standard, Dripless, HDX, Two Canister, and Pneumatic.
- Parts of a Caulk Gun: Canister Tray, Trigger, Plunger, Puncture Tool, Hook, and Tip Cutter.
- How to Set Up a Caulk Gun: Cut the tip off the tube, break the seal, unlock the gun, insert the tube, and practice on cardboard.
- Tips for Caulking Like a Pro: Use quality caulk, start with a small cut, clean off old caulk, and store open tubes correctly.
Types of Caulk Guns
As you would expect with popular tools, there are several variations to suit different applications. For the most part, you will use a standard caulk gun like the Workforce 60:25, but sometimes you need options.
Dripless Caulk Gun
These guns have a ratchet mechanism that locks when you apply pressure using the trigger. It ensures a consistent pressure level to keep the caulk flowing.
However, rather than the inevitable drips when you finish laying down a line, this gun has a release clip that removes the pressure to stop the caulk from escaping.
A great example of a dripless caulking gun is this orange smooth rod model by Bates.
HDX Caulk Gun
Standard caulk guns hold around 10 ounces of caulk, but a heavy-duty HDX model holds a massive 29 ounces. Aside from the capacity, everything else is the same as a standard gun.
Two Canister Caulk Guns
Having two canisters is the best way to dispense two-part sealants used in waterproofing. It is also perfect for two-part epoxy resin that requires a base component and an activator.
Pneumatic Caulk Guns
These guns use air pressure to remove the caulk. You need an air compressor to operate a pneumatic gun, and you would only ever use one for industrial applications.
Parts of a Caulk Gun
Before we show you how to load a caulk gun for the first time, understanding the gun itself and its components will help you when the time comes to use it. Luckily, caulk guns are pretty simple tools to master, so it shouldn’t take you long. Here are the main components of a caulk gun:
- Canister Tray
- Trigger.
- Plunger.
- Puncture Tool.
- Hook.
- Tip Cutter.
How To Set Up a Caulk Gun For the First Time
So, you’ve come to the point in your projects where you need to use the caulk gun, and you want to get it right. Before we start, you need to gather a few things together.
What You’ll Need
- Caulk Gun.
- Caulk tube.
- Wet rag.
- Scissors or sharp knife.
1. Cut the Tip off the Tube
There are two ways to remove the tip on your tube of silicone sealant: with scissors or using the tip cutter on the caulk gun.
We prefer to use scissors or a sharp knife because you can get a more accurate 45-degree angle. Cutting the tip at 45 degrees makes the gun more comfortable to hold and easier to control.
You will notice ridges on the tip that denote different thicknesses. Where you make the cut depends on the size of the gap you are filling because the caulk line should match the diameter of the hole.
2. Break the Seal of the Tube
At the end of the caulk tube is a foil seal. Use the puncture tool or scissors to make a hole in the foil, so that when you squeeze out the caulk, it breaks the seal. Now screw the tip onto the opening until it is tight.
3. Unlock the Caulk Gun
The caulk gun plunger will be pushed in, blocking access for the caulk tube. Release the ratcheting mechanism on the base of the gun and pull the plunger out using the hook.
FYI
You will need to keep your finger pressed on the locking clip while you do this.
4. Insert the Tube
Start by inserting the nozzle end into the canister tray, pushing it all the way to the end. Now you can swing the rest of the tube into the tray. Squeeze the trigger until the plunger rests firmly against the base of the tube. You are now ready to start caulking.
5. Do a Caulk Test
Before attacking the gap you want to fill, it’s time to get familiar with how the gun feels and operates. Good caulking is about knowing how much pressure to apply, as this affects the flow speed of the caulk.
Grab some old cardboard and practice laying down a line of caulk. Once you get a consistent thickness, you are ready to be let loose on the wall.
Caulking Gun Not Working?
If you don’t keep your caulking gun clean, it could malfunction. While we like our tools to show their battle scars, there is a world of difference between well-used and abused. The good news is that caulk guns are pretty heavy-duty tools, so they rarely go wrong.
Why Won’t Caulk Come Out of The Tube?
Once you open the caulk tube, it starts to set. While the material is still usable inside, the nozzle blocks because the caulk dries hard. Grab a wire coat hanger and stretch it out so that you have a straight tip.
Unscrew the nozzle, insert the end of the coat hanger, and push the caulk out. Another method is to wind a long screw into the caulk and pull it out using a pair of pliers. Now the nozzle is unblocked, use the screw to scrape off any excess caulk still attached inside.
Keep In Mind
Cleaning the nozzle is crucial if you want the caulk to flow freely without obstruction.
Why Is The Trigger Not Working?
When you squeeze the trigger, the ratchet mechanism kicks in and engages the spring. If the spring is stretched, it could affect the way the plunger operates.
Be Aware
If the spring is the issue, it cannot be replaced, and you will need a new gun.
The best way to fix defects on your caulk dispenser is to keep it clean using a rag dipped in mineral spirits. After use, always wipe it clean to remove the excess caulk that could harden and affect the mechanisms.
Tips for Caulking Like a Pro
Now that you are familiar with a caulk gun and how it works, it’s time to take it to the next level. Caulking like a pro requires some top tips straight from their “How To” handbook. Here are a few to get you started:
Use a Quality Caulk
Quality caulk is non-porous, paintable, and contains mold and mildew inhibitors that protect your sealant from fungal growth. Cheaper versions may look the same, but they are cheaper for a reason.
A quality caulk should last about five years, whereas cheaper caulk will perish sooner, so while you are initially making savings, it is a false economy.
Start With a Small Cut
If you start with a small cut first, you can always scale it up later when you need a thicker caulk line. You can’t do it the other way round.
Clean Off Old Caulk
If you look after your tools, they keep functioning as intended and last longer. Keeping your caulk gun clean ensures the mechanisms are in full working order.
Store Open Caulk Tubes Correctly
Opened caulk has a limited shelf life, but correctly storing it will delay the curing process. Store the tube upright, and use a nail or screw to seal the end of the nozzle to stop air from getting in. You could also wrap the nozzle in aluminum foil to create an air-tight seal.
The Final Word
Caulk guns are not the most technologically advanced devices you’ll ever see, but they are satisfying to use. Many tools require in-depth knowledge and years of experience to master, but it’s a simple process with a caulk gun.
Learning how to load a caulk gun improves your DIY skills and, with a little practice, delivers neater results. They are affordable, robust, and last the distance if properly looked after.