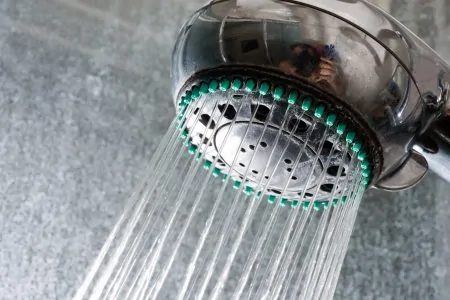
Mold and mildew just love the warm and damp conditions of your shower room. Once it establishes itself, it can be difficult to get rid of mold in shower caulk.
This article shows you how to remove mold from caulking using 7 different methods, and we give you hints and tips to keep mold at bay.
Key Takeaways
- Mold thrives in damp and humid conditions, making shower caulk a perfect breeding ground.
- Removing mold from shower caulk can be done using various methods, including ammonia, bleach, vinegar, hydrogen peroxide, baking soda, borax, or EC3 Mold Solution Spray.
- Preventing mold growth involves proper ventilation, controlling humidity, regular cleaning, and using mold-resistant caulk.
- When shower caulk is beyond cleaning, it may be time to replace it, ensuring all old caulk is removed before applying the new one.
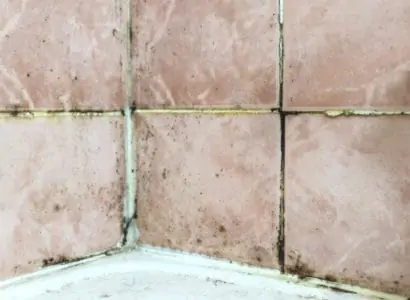
Why Does My Shower Caulk Get Moldy?
Mold loves damp and humid conditions. It thrives in areas of low light because sunlight dries surfaces which removes the moisture that mold feeds on. You are creating the perfect conditions for mold and mildew to prosper.
And once the mold sets in, it can be a struggle to get rid of it. It is resilient and can survive extreme conditions, which is why you might think it’s gone, but then it comes back.
So, the next time you take a shower, it would be a great idea to open windows, turn on the bathroom fan and get the air circulating. And don’t leave damp towels in the room, as this encourages mold growth.
Can Mold Cause Health Problems?
Mold is bad news for people with respiratory problems. Those tiny black spores get into the atmosphere, and you can potentially inhale them. People with asthma are particularly susceptible, with mold causing flare-ups.
Plus, mold multiplies at an alarming rate, with colonies taking hold in a week or two if the conditions are right. Once established, it grows, increasing the number of spores in the air, so doing nothing will only increase your health risks.
If you have a weak immune system, you might experience rashes, itchy eyes, and even yeast infections. So, mold is unhealthy as well as unsightly.
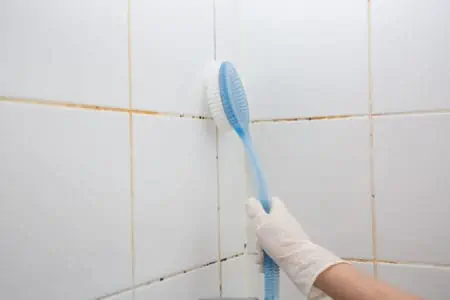
7 Ways To Get Rid of Mold in Shower Caulk
Before we get into the details, first, you will need to take some safety precautions.
Think Safety
Using chemical and even natural solutions to remove mold growth is dangerous work. Bleach and ammonia are unpleasant products that burn and give off heavy fumes, so protecting yourself is paramount before you begin. You will need:
Now that you are protected, we can begin.
1. Ammonia
Ammonia is damaging to the lungs, so to avoid inhalation, wear your face mask. Bathrooms are often the smallest room in the house, so good airflow is tricky, but if you have a window or extractor fan, use them.
Mix one-part ammonia to one-part water and pour it into the spray bottle using the funnel. Apply a generous coating to the surface of the caulk and leave it for 10 to 15 minutes while the ammonia gets to work. Pay particular attention to the corners and hard-to-reach spaces.
Now use the scrubbing brush and run it vigorously over the surface of the mold, and it should lift off. For the tight spots, use the toothbrush. Now grab the towel and dry off the surface.
2. Bleach
Treat bleach with caution because it reacts in the same way as ammonia. Don a facemask, safety goggles, and gloves in case it splashes. Also, don’t mix bleach with ammonia because it causes a chemical reaction that gives off toxic fumes.
Here are the 3 ways you can apply bleach:
Spray
This is an excellent method when you want to cover larger areas. Pour some bleach into your spray bottle and apply it liberally to the affected area. Leave it for 20 minutes for the bleach to eat away at the mold.
Now rinse it away with water, and dry the treated area with a towel.
Sponge
Using a sponge is an excellent tool if you have stubborn mold spots, or the growth has really taken hold.
Soak the sponge in the bleach solution and press it onto the surface of the caulk. Allow the bleach to soak in, and then wipe it clean with water and a dry towel.
Cotton Coils
Cotton coils are a great way of accurately applying bleach to small spots of mold. Soak the tip in the solution and press it onto the affected area. They are also useful for getting to hard-to-reach areas.
Soak the tips of multiple coils and lay them onto the affected areas. Leave them overnight, and in the morning, wash the caulk clean with water.
3. Vinegar
White vinegar works the best because it doesn’t discolor the caulk. Mix equal parts of vinegar and water in a spray bottle and apply it to the mold. Wait for 15 or 20 minutes and wipe it clean with water and a dry cloth.
You can use neat vinegar, but it has a strong odor, so mixing it with water removes most of the smell. You can also add baking soda to the mix if you think it needs extra punch.
However, avoid using vinegar if you have natural stone because it damages and stains.
4. Hydrogen Peroxide
Hydrogen peroxide is an effective way to remove mold. Your mixture should be 3 percent peroxide and 97 percent water. Pour it into a spray bottle and apply it to the mold. Leave it to sit for 10 minutes or so, and then rinse it clean with water. Finally, dry the affected area with a towel to stop the mold from coming back.
5. Baking Soda
There was a time when baking soda was a kitchen favorite, and when it comes to mold removal, it is pretty hard to beat. It is often called sodium bicarbonate because it has high sodium levels in the crystals. You can apply it in two ways:
Spray Solution
If you want to cover larger areas, a spray application is better. Add a quarter of a teaspoon to a bottle of water and mix it until the crystals have dissolved.
Spray it over the affected area and scrub at the mold using the scrubbing brush. Wipe it clean and then apply a second coat, this time leaving it to sit and dry. This prevents the mold from growing back.
Paste
If you have stubborn mold, you may need to use the baking soda in a more concentrated way. Add a small amount of water to the baking soda crystals and mix it until it forms a paste. Spread the paste over the mold and leave it to sit for 30 minutes to an hour.
Use the brush and scrub at the mold and then rinse it off with some water. Make sure you dry the area with a towel to remove all traces of moisture.
6. Borax
Borax shares many attributes of baking soda but works in very different ways. Borax is a natural ingredient, so it doesn’t damage the planet. So, how does it work? It converts water molecules into hydrogen peroxide, which eats away at the mold. You can spray it on or mix it into a paste to deal with stubborn mold growth.
Leave it to sit for 20 minutes and then scrub the mold away using the brush. Rinse the area clean with water when you are happy the mold is gone, and dry it with a towel.
7. EC3 Mold Solution Spray
EC3 is a natural formula containing plant oils, citrus seed extract, and distilled water. You can use this solution on many surfaces, including fabrics and soft furnishings. Apply a liberal layer to the surface of your shower caulk and leave it for 10 minutes, then rinse it off using cold water.
For added protection, dry the surface of the caulk and apply a second coat of EC3 and leave it to dry naturally. This prevents mold from growing back.
Top Tips for Efficient Mold Removal
Protect Yourself and Gather Supplies
A face mask is crucial to avoid breathing in mold spores and to block out the fumes of some of the cleaning agents. The second thing you’ll need is a pair of protective goggles just in case you splash caustic cleaning solutions on your face.
Finally, you will need protective gloves if you are using bleach because it burns when it makes contact with your skin. You’ll also need a scrubbing brush and an old toothbrush for those hard-to-reach areas.
Grab a microfiber cloth to dry the caulk after you have rinsed it clean, and keep a dry towel handy too. Also, don’t forget a spray bottle and a funnel so you can fill it.
Ventilate the Bathroom and Remove Towels To Prevent Spots
Ventilation is the key to keeping mold at bay. With good airflow, moisture cannot sit for too long because it dries naturally. Circulating dry air instead of damp air improves your chances of mold removal immensely. If you have windows, throw them open after a shower.
And don’t leave wet towels in the bathroom because this is another breeding ground for mold, as well as increasing the moisture content in the air. Also, anything the towel touches becomes damp too.
Clean and Disinfect the Shower and Bathroom
A clean shower is a mold-free shower, and adopting a regular cleaning schedule is the best way to combat fungal growth. After you finish using the shower, dry it down to remove moisture. You should clean it every week with a solution of water and white vinegar. If you can’t stand the smell, use water and baking soda.
You could also add tea tree oil to the vinegar mix to improve the fragrance.
Control Humidity
Humidity is the enemy of shower caulk. The damper the air, the more moisture you have sitting on the surface of your caulk. Using bathroom fans to remove steam is a great way to reduce humidity, and opening windows and doors works too.
The perfect balance of humidity in your bathroom should be between 30 and 50 percent. Below 30 percent, and the air is too dry, and above 50 percent, and the air is too wet.
Use Mold-Resistant Caulk
Mold-resistant caulk is impregnated with mold-killing agents to prevent growth. However, this only works if you are fitting a new shower or resealing your old one. And even though it is mold-resistant, mold will eventually come back unless you maintain the shower cleaning regime listed above.
How To Prevent Shower Mold
There are effective ways to prevent mold from growing in the first place. Here are some tips.
Add a Dehumidifier
Placing a dehumidifier in your bathroom is a great way to extract damp air. It helps you control the humidity levels, even when the bathroom is not in use, keeping the fine balance between too wet and too dry. Remember that mold loves damp spaces, so the more moisture you can remove, the better.
Spray Vinegar Daily
Because white vinegar is a natural product, you can spray it onto your shower caulk and leave it because it is perfectly safe for pets and children. Daily spraying keeps that protective layer topped up, so mold will not grow.
Turn On the Bathroom Fan
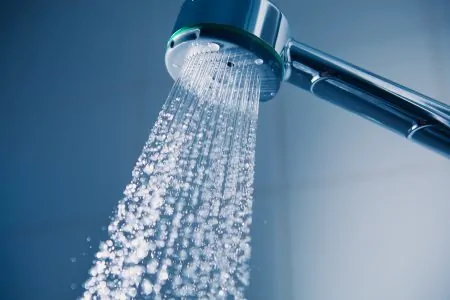
If you have an extractor ceiling fan in your bathroom, switch it on while showering, and it will magically remove the steam from the room. Steam is the friend of mold and the enemy of shower caulk.
Keep the shower running for a few minutes after you leave the room to make sure that all the moisture is gone, but don’t forget to return to switch it off.
When Is It Time To Replace the Caulk and How To Do It?
If you see the caulk peeling and cracking and the spread of black mold increasing, it may be time to replace it. As a rule, shower caulk lasts about 5 years depending on how heavy it gets used, so it may be an idea to schedule a caulk change before the mold sets in.
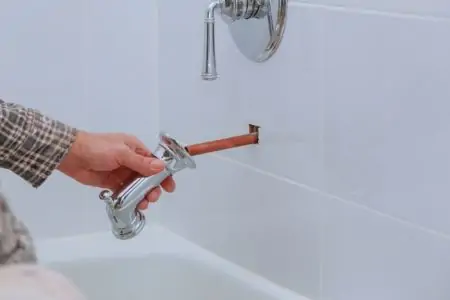
Removing caulk is easy enough; you just need to ensure that all of the old caulk is gone before applying the new one.
The easiest way to remove the old caulk is to score it down both sides with a craft knife and heat it using a hairdryer to make it more flexible. Slide a putty knife under the caulk and lift it so you can grab the end.
Slide the knife along the line of the caulk and pull it with the other hand. It should come away in a long strand. Once the caulk is out, use a scraping tool and remove the residual bits of caulk left behind.
Wipe the tiles down with mineral spirits to clean the surfaces. Now you need to load the new caulk into the caulk gun and work a new bead along the seams at a 45-degree angle. Make sure you proceed with a steady hand and move the gun slowly.
When you reach the end, wet your finger and gently press the caulk into the gaps, running along the length of the caulk line.
Don’t Ignore Black Mold
Whatever method you choose to get rid of the mold in your shower caulk, don’t ignore the problem, or it will only get worse. Once the mold takes hold, it spreads, and if left unchecked, might even grow to other areas of your home, and that spells disaster.
The earlier you deal with the problem, the better the outcomes and the less chance you have of the mold returning.