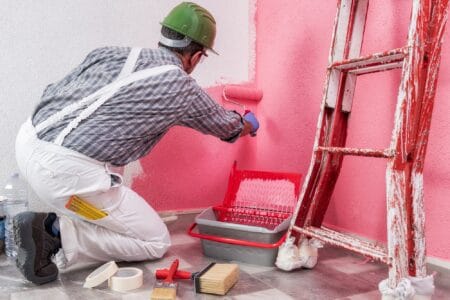
When it comes to priming walls, you might be tempted to skip this process and get on with the painting. If you pass on the priming, untreated walls remain porous and absorb more paint, but applying one or two coats of primer seals the surface and helps the paint adhere better.
Knowing how many coats of primer to put on your walls and ceiling depends on several factors, which we explore in more detail; plus, we give you hints and tips on how to apply primer.
Key Takeaways
- Primer seals surfaces and helps paint adhere better.
- One coat of primer is needed for painted wood, white walls, glossy paint, metal, and tinted primer.
- Two coats of primer are needed for bare wood, new drywall, unfinished plaster, covering dark paint, and exterior walls.
- Proper surface preparation and using quality primer ensures a smooth and even paint finish.
What is the Purpose of Primer?
Paint primer is a vital part of the painting process because it creates a smooth surface for the paint to cover more evenly, and it seals the surface making it less porous. Ultimately, primer saves you wasting paint, and it protects the topcoat from chipping and flaking.
Primer costs a lot less per tin than colored paint, so why waste money using a topcoat to seal the surfaces of interior walls when a primer is cheaper, better at sealing, and provides an even surface.
Unlike paint, primer contains fewer pigments but more resins. Resins help the primer stick to multiple surfaces, as well as cover stains to prevent them from bleeding through the layers of paint.
Some primers have mold inhibiting ingredients that prevent the growth of mold spores in damp environments like the kitchen and bathroom.
It’s not just a question of using primer but knowing how many layers to put down that makes a difference to how the primer and paint perform. Too little, and you risk the surface remaining porous, which absorbs more topcoat.
This is a problem on bare wood and new drywall, and it also means the paint is at risk of peeling and cracking prematurely.
Laying on an excessive amount of primer risks cracking and chipping; plus, it takes longer to dry, unnecessarily delaying your project.
When you want to cover dark paint, primer lets you paint over it with a lighter color, especially if you use a tinted primer that matches your topcoat.
How Many Coats of Primer do you Need?
If you ask a professional being paid by the hour, they will tell you multiple coats are needed. But someone being paid per job will likely recommend fewer coats, especially if the primer is included in the price.
In truth, it all depends on the surface porosity and whether the material is already treated.
When to Use One Coat of Primer
Sometimes you need to paint treated surfaces, making it easier to use one coat of primer instead of two. Remember that primer creates a seal for the paint to adhere to, but there is already a protective coat on treated walls and on cabinets.
For Painted Wood
Painted wood already has a treated surface, making it less porous. After a light sanding with fine-grit sandpaper, the surface should be ready to take one coat of primer. The sanding process removes any imperfections and gives the primer better adherence.
Take Note
Painting straight onto the old paint could leave you with uneven surfaces and affect the way the paint adheres.
On White Walls
White walls are sealed with the old layer of paint. Also, white is the easiest to cover with any other color, which is why most primers are white. The best technique is to check for imperfections and use fine-grade sandpaper to provide a key for the new primer to adhere to.
One layer of primer should be enough to seal the surface and mask any stains on the wall that sanding couldn’t remove.
Over Glossy Paint
Glossy paint is as good as a layer of primer because it contains many of the same resins. For this reason, the primer should adhere well, as long as you remember to rough up the paint to give the primer a bonding surface.
Keep In Mind
Gloss paint contains resin and binding agents so that it dries to a hard shell, just like primer. The fresh, top layer of paint might peel off with your fingernails, which means it has failed to bond.
On Metal
Painting directly onto metal is easier because it is non-porous, so one coat of primer is all it needs. The resins in the primer will bond with the metal surface and help the topcoat spread more evenly.
Painting the topcoat directly onto bare metal will give you the same headaches as painting straight onto gloss paint: it will adhere, but you can scrape it off using your fingernails.
In Bathrooms
Bathrooms are damp environments, so you need to lay down a primer for painted walls and ceilings. The secret is to use paint with mold and mildew inhibitors, as well as stain blockers. Look at the label on the tin, and it should state that it is suitable for bathroom use.
If you use standard interior paint, it will peel and flake because it doesn’t cope with extreme moisture and humidity levels.
When Using Tinted Primer
Tinted primers are excellent for covering dark wood. You only need one coat to lessen the impact of the darkened surface because the tint in the primer matches closely to the colored topcoat.
Tinted primer speeds up the process because you only wait for one layer to dry, and you get a deeper color finish.
Tinted primers are more expensive, and it can be tricky to match the paint colors exactly.
When to Use Two Coats of Primer
Two coats of primer are better for untreated surfaces because you want to reduce surface porosity to make the topcoat adhere better. Not having enough primer results in a patchy finish on the topcoat.
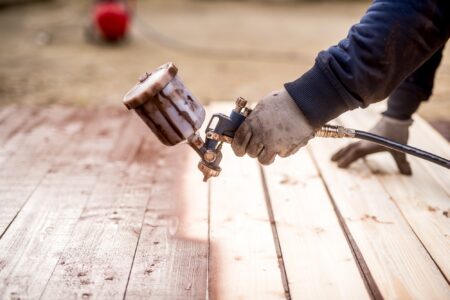
On Bare Wood
Bare wood is incredibly porous, so applying two layers of primer minimizes the number of topcoats and gives the colored paint greater adherence. Sand the wood surface with a fine-grade sandpaper to provide a key for the primer to bond with the wood.
Take Note
Without two layers of primer, the topcoat soaks into the wood fibers, which is costly because you need to apply more layers.
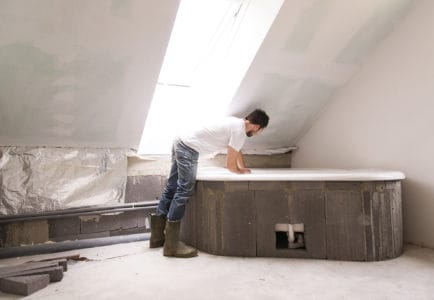
On New Drywall
New drywall is also extremely porous because it consists of a layer of gypsum sandwiched between two sheets of backing paper.
Two coats of primer-sealer will tame the absorption, leaving you with a sealed surface to apply the paint. Without it, painting drywall would be expensive and frustrating.
Unfinished Plaster
Unfinished plaster acts like a sponge, sucking up paint. It needs two coats of primer to seal the surface and reduce absorption. Thanks to higher resin content and reduced pigments, primer seals the plaster surface, leaving you with a better surface for the paint to adhere to.
To Cover Dark Paint
Dark paint is particularly challenging to cover because it shows through lighter shades, requiring several coats of the new color. Use a tinted primer that best matches the topcoat color.
The alternative is to use white primer and lay down two coats. The darker paint will stay hidden beneath the primer, and the topcoat has a sealed surface to adhere to.
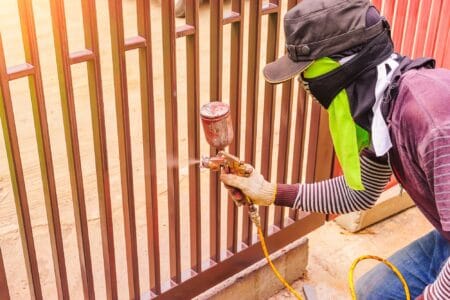
On Exterior Walls
Exterior walls get more punishment than interior surfaces, which means they need two primer layers to protect against the elements. Also, UV radiation dries paintwork, causing it to flake, so the primer needs to be specifically for use on exterior walls.
Bear In Mind
UV and rain will cause the paint to flake, fade, and peel faster, so expect to repaint exterior projects more frequently than interior surfaces.
When to Skip Primer
There are occasions when you can skip the priming altogether. You would only do this if you were confident that the surface is sealed well enough to allow the paint to dry without absorbing into the material.
When Using a Self-Priming Paint
Self-priming paint is unique because it lets you paint the topcoat straight onto treated and bare surfaces without going through the priming stage. Because it is a primer and paint in one, it contains enough resin to bind to the material surface and create a non-porous seal.
There is also a higher solid content than standard paint, so the layers tend to be thicker and take slightly longer to dry. Self-priming paint is generally more expensive, but the bonus is you only have to buy one tin instead of two.
It might be better to use primer and paint separately because self-priming paint is not the best product for exterior and high-traffic areas.
When Repainting the Same Color
There is no need for a primer because you would have applied two coats of primer in the original preparation work.
Here’s a handy guide to give you information on how many coats to use on different surfaces:
| Surface Type | Number of Coats | Tips |
| Bare wood | 2 | Sand the surface before applying the primer |
| Drywall | 1-2 | If using a high-quality primer, one coat may be enough |
| Plaster | 2 | Oil-based stain blockers are better to prevent lime staining |
| Paint (light) | 1 | Self-priming paint works well here |
| Paint (dark) | 2 | Try using a tinted primer for better coverage |
| Bare metal | 1 | Enamel primer is excellent when painting metal |
Tips For Applying Primer
Prepare the Surface Properly
The more effort you invest in surface preparation, the better the primer covers and the more evenly it coats. For wood, you should always use 150-grit sandpaper to remove imperfections and provide a key for the primer to bond.
Walls need to be smooth, with holes and gaps filled and sanded. If the surface has a treatment already, remove any flaking paint and smooth uneven surfaces. If you are painting over darker surfaces, you will need to lay down two coats of primer or use a tinted primer that matches the topcoat color.
Use a Quality Primer
There is no substitute for quality primer. Products like this KILZ Stain-Blocking Primer is suitable for interior and exterior use, and it helps to block stains from bleeding through the paintwork.
For different surfaces, this Zinsser Bulls Eye 1-2-3 primer is hard to beat. It sticks to almost all surfaces, and it has mold and mildew inhibiting agents that restrict the growth of mold spores.
Quality primer has a higher resin count, so it bonds better. It also takes fewer coats to get the same results as a cheaper primer.
Sand After Priming
Sanding after the first and second layers of primer ensures that the topcoat is smooth because it removes imperfections and brush marks that would otherwise show through.
Primer FAQs

Is Primer Supposed to Cover Completely?
Primer doesn’t need to cover entirely or dry to a consistent finish. It is there to help the paint adhere, so even if you have a slightly blotchy finish, it will still do its job. However, the primer should not have drips or runs because that affects the smoothness of the surface.

How Long Do You Wait Between Each Coat of Primer?
You should wait for 24 hours before applying the base coat. Don’t apply the paint if the primer is tacky, as this will cause the brush to drag and lift the primer layer, ruining the overall smoothness of your paint finish.
If you are still unsure, check the label on the tin to get the manufacturer’s recommendations.

Should I Sand Between Coats of Primer?
Absolutely! Sanding between each primer coat ensures the base coat and topcoat go on super-smooth, giving a perfect finish.

What Happens if You Don’t Paint Over Primer?
The longer you leave the primer exposed and unpainted, the more porous the surface becomes. When you finally paint over it, the pigments soak into the surface and create an uneven finish.

Do I Need Two Coats of Paint If I Use a Primer?
Ideally, you should use two coats of paint on a wall, even if you use a primer. The first layer covers the primer and bonds, while the second coat creates a smoother finish that dries in a uniform block of color.
Take the Time to Prime
Hopefully, you have realized the importance of priming your surfaces before painting. Sure, you can paint straight onto drywall, plaster, bare wood, and a host of other surfaces, and the paint will eventually adhere, but it will take several layers to get there.
Primer seals, making the surface less porous, which means the paint goes on easier, and you use a lot less to achieve perfect results. Aside from the cost implications of not priming, why would you want the process to take longer than necessary?