Knowing how to paint kitchen cabinets without brush marks is crucial if you want the smoothest finish possible. It can be done, but it is more challenging than you might think.
We show you the best way to paint kitchen cabinets without brush marks and explain what causes brush marks in the first place.
Key Takeaways
- Prep work is crucial: Clean, sand, and prime surfaces for better paint adhesion.
- Use quality tools: A microfiber roller and a good-quality brush help achieve a smooth finish.
- Apply thin layers of paint: Work in the direction of the wood grain, using a brush for intricate areas and a roller for flat surfaces.
- Lightly sand between coats: This ensures a smooth finish and eliminates brush marks or drips.
What Causes Brush Strokes After Painting?
The most significant reason your paintwork has brush strokes when you’ve finished is that you have not loaded enough paint on the brush. It spreads too thinly, exposing the stroke marks when it dries. Another reason could be not enough paint layers. You should lay down one layer of primer and two topcoats to get a factory finish.
Get the best-quality brush money can buy, or try using a foam brush. The easiest way to a smooth finish is to use a microfiber roller.
Choose the right temperature when painting because if it’s too hot, the paint dries before it has time to spread to create a smooth finish. It could be the cause of your brush marks.
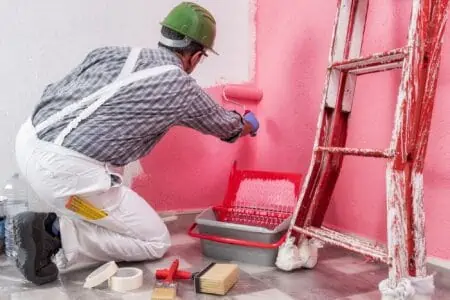
The Best Way to Paint Cabinets: Brush or Roller?
A brush is better for intricate parts of the door, like panels and moldings, and a roller is better for flat surfaces like panel centers and edges. You need to choose the right roller to get a finish without streaks.
This microfiber roller set is an excellent choice because it is small enough for tight spaces, and the thinner nap means the paint spreads more evenly.
Always choose the best-quality brush, preferably one that doesn’t shed bristles. This Bates brush set is of professional quality and comes in various sizes and shapes.
There is no reason why you can’t use both techniques for the best results. Use the brush for the smaller fiddly bits and the roller for the flat parts of the door.
How to Paint Kitchen Cabinets Without Brush Marks
Before we get into the nitty-gritty of painting kitchen cabinets without brush marks, we must gather the right tools and supplies.
What You’ll Need
- Paintbrush.
- Microfiber roller.
- Screwdriver.
- Paint tray.
- Drop cloths.
- Painter’s tape.
- Wood putty.
- Putty knife.
- Sandpaper (100, 150, and 220-grit).
- Primer.
- Paint.
- Degreaser.
- Clean cloth.
- Tack cloth.
- Shop vac.
- Two sawhorses.
- Two lengths of wood.
1. Set Up a Prep Area
Once you’ve gathered all your supplies and tools, you will need an area where you can work and leave the doors to dry. You can create a raised workstation if you have two sawhorses and two lengths of wood.
If you don’t have a sawhorse, you can lay the doors on a drop cloth and paint on the floor.
Top Tip
Raising the doors off the floor makes it easier to paint edges and corners.
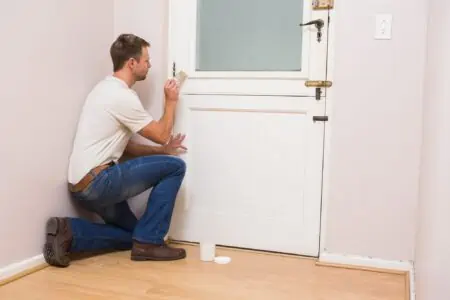
2. Remove the Doors and Drawers
Before you unscrew the doors from their hinges, use painter’s tape to label each door. That way, when you replace them, you know the correct order. Also, don’t forget to tag each cabinet and drawer recess, so the numbers correspond.
Don’t skip this part because if you do, you’ll spend hours getting each door back in the right location like a jigsaw puzzle.
Now you can remove the doors with a screwdriver and take them to your work area.
3. Protect Surrounding Surfaces
Now would be a great time to tape off the surrounding areas where you want to avoid paint splatters. Use painter’s tape and plastic sheeting to cover the floor and work surfaces you want to keep clean.
Take Note
Don’t forget to cover appliances and walls with drop cloths to protect them from unwanted paint stains.
4. Remove Door Hardware
If you want a professional finish, you’ll need to remove all the door hardware and drawer handles. Once the hinges are removed, move the numbered painter’s tape to the hinge location because you don’t paint that bit. It saves you moving it later when you start painting.
5. Time to Clean
If you want the primer and paint to adhere, you will need to remove any grease, dust, or other debris that gathers on cabinet surfaces. Use a degreaser like this Easy Off Spray Kitchen Degreaser.
Ensure you cover the entire cabinet surface, including drawers and drawer boxes. Wipe the degreaser off with a clean cloth.
6. Fill Holes and Blemishes
The neatest finishes start with the prep work, so don’t skip this part. The smoother the wood, the better the paint adheres and spreads. Use putty or filler, like this Minwax Stainable Wood Filler. It dries without shrinking and can be stained any color.
The best way to apply putty is to use a putty knife. Push the putty into the cracks, dips, and blemishes, and use it to scrape away the excess material. This Red Devil Flexible Knife is the ideal tool for a smooth application.
If you are updating your door hardware, you may need to fill holes that don’t line up. Wait until the recommended drying time before moving on to the next step.
7. Time to Sand
Rub the cabinet surface with 100 or 150-grit sandpaper. It removes the gloss surface and prepares the cabinet for better paint adhesion. If you miss out on this part, the paint will peel off or scuff at the slightest knock.
Take Note
You don’t need to remove all of the old surfaces. Just scrape off enough to create a sufficient surface for the paint to stick. This is crucial if you have cabinets covered in laminate.
8. Second Clean
Remove sawdust with the shop vac, and then wipe the surfaces with the tack cloth to get the microscopic particles of debris you might have missed.
9. Time to Prime
With the surfaces clean and sanded, it’s time to break out the primer. Use a quality primer like this Zinsser Bulls Eye 1-2-3 Primer. It is suitable for all surfaces and creates a seal for the topcoat to adhere.
Use the brush or roller to apply the primer, ensuring no drips or air bubbles will affect the finish when dry. Wait for the recommended drying time before moving on to the next phase.
10. Lightly Sand
Once the primer is dry, lightly sand the surface with 220-grit sandpaper. Pay attention to areas of the cabinets where primer might pool and dry, like in the corners or where vertical and horizontal surfaces meet.
Use the shop vac and drop cloth to clean the cabinets one more time.
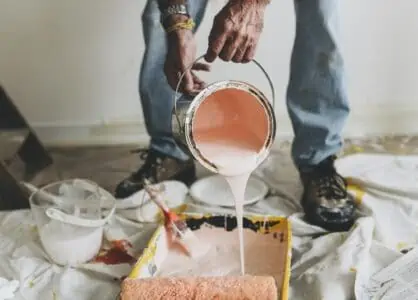
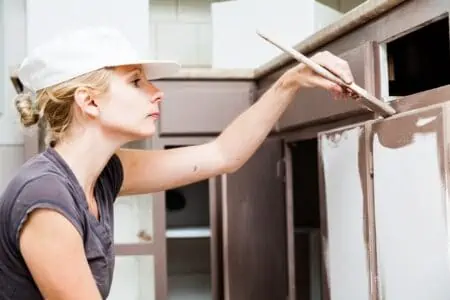
11. Time to Paint
Start with painting the doors and drawers. You can stand them to dry while working on the cabinets. Leave the paint to dry for 24/48 hours, then give the other side a fresh coat.
Always work in the direction of the grain, using smooth continuous strokes. It’s better to lay down a thinner layer, especially in areas with more detail, like recesses and moldings.
Use the microfiber roller for the flat areas of the cabinet, again working with the grain. You can also use the roller to smooth out the brush strokes. It reduces the risk of pooling and drips that gather in the more ornate areas of the cabinet.
12. Lightly Sand (Again)
Grab the 220-grit sandpaper and gently scuff the first paint layer. This ensures zero brush marks, and drips and pooling are dealt with before the second coat goes on.
When you’ve finished sanding, suck up the excess dust with the shop vac and run a tack cloth over the surface.
13. Apply the Second Coat
Work in the direction of the wood grain, using the brush for the intricate bits and the roller for flat surfaces. Do the doors and drawers before moving onto the cabinets and drawer boxes.
Allow the paint to dry for another 24 hours before doing the other side of the doors and drawer fronts.
14. Reattach the Hardware
Screw the handles and hinges back onto the doors before you reinstall them. It makes the process easier and quicker.
15. Attach the Doors and Drawers
Following the numbers on the cabinets, match the doors and drawers to the correct label. Once you’ve completed this task, pat yourself on the back and admire your handy work.
How to Paint Kitchen Cabinets Without Sanding
It is possible to paint kitchen cabinets without sanding, but only if the woodwork is in good condition. If there are dents and blemishes, you will need to use a filler, which requires sanding before painting.
Chalk paint is “no prep,” so you can use it without sanding. It dries flat to hide blemishes and dents, and it can be distressed to create a shabby-chic look, which hides imperfections.
How to Eliminate Brush Marks on Cabinets
Sometimes you do all the prep work, and still, you have brush marks when the paint has dried. Never fear because there is always a solution.
Using 220-grit sandpaper, gently rub the surface with 220-grit sandpaper. Don’t rub too hard; just enough to remove the brush strokes. Once you’ve cleaned the surface, apply a thin coat of paint and wait while it dries.
The good news is that you can repeat this procedure as often as you like until you get the desired finish.
Painting Techniques for a Smooth Finish
What special techniques and tips do the pros use to get the smoothest finish? Let’s take a look.
Don’t Skip the Prep
The prep work is crucial. Full stop. Not up for discussion. If you try to cut corners, you will end up with a substandard finish and rue the day you allowed yourself to be lazy.
Oil or Acrylic
Oil-based primer is more robust, creates a better seal on the cabinet surface, and covers better. However, it is banned in some states, so you may be forced to use an acrylic primer.
Oil-based primers contain higher levels of VOCs (volatile organic compounds), which are bad for the planet. As the primer dries, it emits low-level ozone into the atmosphere.
Dark to Light
If you paint darker cabinets a lighter color, get the primer tinted to match the final color better. Alternatively, white primer neutralizes the dark color so you can paint directly on top. However, you will need two or three primer coats to cover the darker color.
Gloss or Semi-Gloss
The more resilient the paint finish, the longer the cabinets stay looking good. Gloss and enamel paints are the most robust and the easiest to keep clean.
Use Quality Paint
The better the paint quality, the longer it lasts and looks good. Don’t be tempted to get the cheapest paint because you will end up laying down more layers and touching up frequently.
Cheap paint contains fewer binders, resins, and pigments, so they are watery and thin. Quality paint has more of these ingredients, so it applies better and sticks to the surface.
FAQs

What is the Average Cost to Have Kitchen Cabinets Painted?
The average price to have kitchen cabinets professionally painted depends on the size of your kitchen, but average costs are between $900 and $3800. Most professionals charge either per square foot, ranging between $3 and $10, or per door or drawer, ranging between $50 and $100.

How Long Does It Take a Professional to Paint Kitchen Cabinets?
It depends on the size of the kitchen and how many cabinets you have. Most pros will take a couple of days to complete the task because the paint needs to cure between coats properly.

What is the Best Roller to Use to Paint Kitchen Cabinets?
The best roller to paint kitchen cabinets is a microfiber roller. They are small and apply the paint in even layers without leaving lint on the surface.

Do You Paint Both Sides of Kitchen Cabinet Doors?
If you want a professional finish, you should paint both sides of the doors and drawers. Otherwise, your cabinets look mismatched when you open them.

How Long After Painting Cabinets Can I Use Them?
It depends on the type of paint you use. Acrylic-based paints dry in 24 hours, whereas oil-based paints may take 48 to 72 hours.
New Lease of Life
One of the cheapest ways of refreshing old kitchen cabinets is to paint them. It breathes new life into a tired kitchen, transforms the space, and saves you money. However, to get that factory-like finish, you must do the prep work.
So, if your kitchen is getting you down, crack open the paint and get to work.