Is the paint on your baseboard old and starting to peel? Are you looking to install new baseboards that need a coat of paint? You’ve come to the right place.
I’ll show you how to paint baseboards and solve potential problems. You’ll learn about choosing the best paint for baseboard, how to paint like a pro, and how to get rid of paint stains.
Key Takeaways
- Choose the right paint: Semi-gloss or high-gloss latex paint is recommended for baseboards due to its resistance to scuffing and easy cleaning.
- Preparation is key: Clean, repair any holes, and sand the baseboards before painting. Apply primer if needed for a smooth, even surface.
- Protect surrounding areas: Use painter’s tape and drop cloths to prevent paint from getting on walls, floors, or carpets.
- Apply paint carefully: Use a brush or roller for precise application, and apply multiple thin coats, allowing ample drying time between coats.
Should You Paint Baseboards Before or After Install?
There is a time and place for both methods. I’ll break it down for you.
When to Paint Before
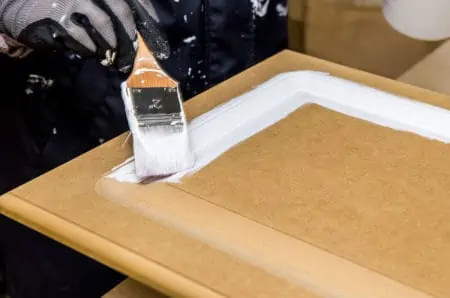
Many experts believe that it’s best to paint the baseboard before putting it on the wall. This simple technique can significantly reduce paint drying times.
Those who choose to paint the baseboard before installing it usually set the boards up on sawhorses. These are A-frame stands that you place under the end of each length of baseboard.
The baseboard can be painted before installation with a paint roller or a spray gun; both are a simple process. With this method, there are fewer chances of getting paint on your walls, floors, or other surfaces in your immediate vicinity.
Once the lengths of the board are fully painted, you can cut and install them. Then you’re only left with a few nail pinholes to fill and paint over. No taping or cutting-in is required.
When to Paint After
Others might suggest painting it after installation. This way works well if you’re comfortable using painter’s tape and cutting in clean edge lines.
Painting it after installation may also be advantageous for those who lack the space or location to paint it beforehand. Sawhorses require a lot of space to work around.
If you’re also painting the walls, this method is great. You can paint the baseboards without having to use painter’s tape. If you get trim paint on the walla, it doesn’t matter; you’re going to be painting them anyway.
Best Paint for Baseboards
You can choose from various gloss levels for oil- and latex-based paints when painting baseboards. However, compared to a flat finish, a slightly glossy finish is generally recommended because it is resistant to scuffing and easier to clean.
Paint Tip
Flat finish paint is only meant for ceilings.
Baseboards are typically painted in a semi-gloss or high-gloss finish depending on the situation. I recommend semi-gloss white by Rust-Oleum.
How to Paint Baseboards
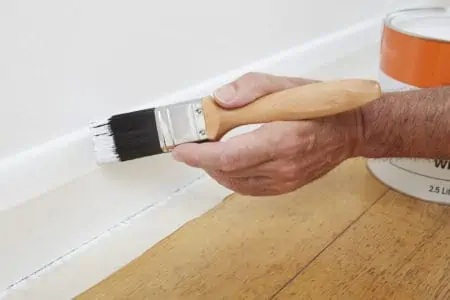
I’ll show you how to paint a baseboard with a brush or roller. Brushes are better because baseboards are usually narrow with little grooves, and you have more control over the tool.
What You’ll Need
- One- or two-inch sash brush.
- Putty knife.
- Sponge.
- Bucket.
- Protective gear.
- Drop cloth.
- Semi or high-gloss latex paint.
- Primer.
- Sanding sponge or fine-grit sandpaper.
- Wood putty.
- Masking film.
- Painter’s tape.
- TSP.
1. Clean the Baseboards
Cleaning the surface you’re going to paint is important regardless of the project. You want to get rid of everything that could stand between you and a perfect paint job.
Begin by placing a drop cloth on the floor. Combine some TSP with water inside a clean bucket. Dip the tip of a sponge in the solution and start wiping the baseboard.
2. Repair the Holes
As you clean the baseboard, you might notice cracks or nail holes that require repairs. Use a putty knife to work the wood filler into the holes.
When the wood filler is dry, sand the surface out. Sanding may also be required if your baseboards are old and require smoothing or have previously been painted.
Note About Finishing
Painting baseboards without sanding can result in uneven coats or peeling paint.
3. Mask the Surroundings
To avoid unwanted paint lines and smudges, start masking the walls and the floor with low-stick painter’s tape. Place it right above the baseboard and at the junction between the baseboard and the floor.
Keep in mind that even if you add masking tape, you still have to be very careful with how you apply the paint. Too much slop on the lower part, and you could end up with paint seepage.
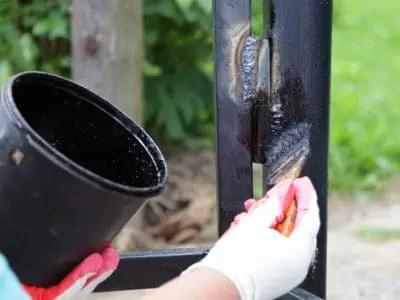
4. Apply the Primer
If the baseboard is being painted for the first time, chances are it has never been primed. But, if they have been painted and you’ve done some filling and sanding, it’s good to prime. A coat of primer ensures the surface will be smooth and even under the paint.
Mix the primer and dip the brush, but avoid overloading it. Use horizontal strokes to apply the primer to the baseboard. Let the primer dry based on the instructions on the label, usually one to four hours.
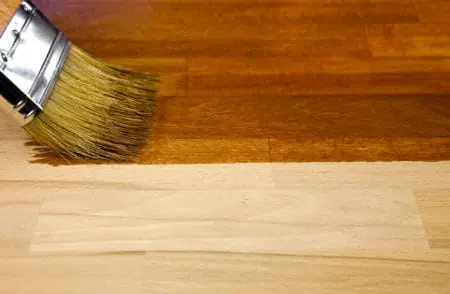
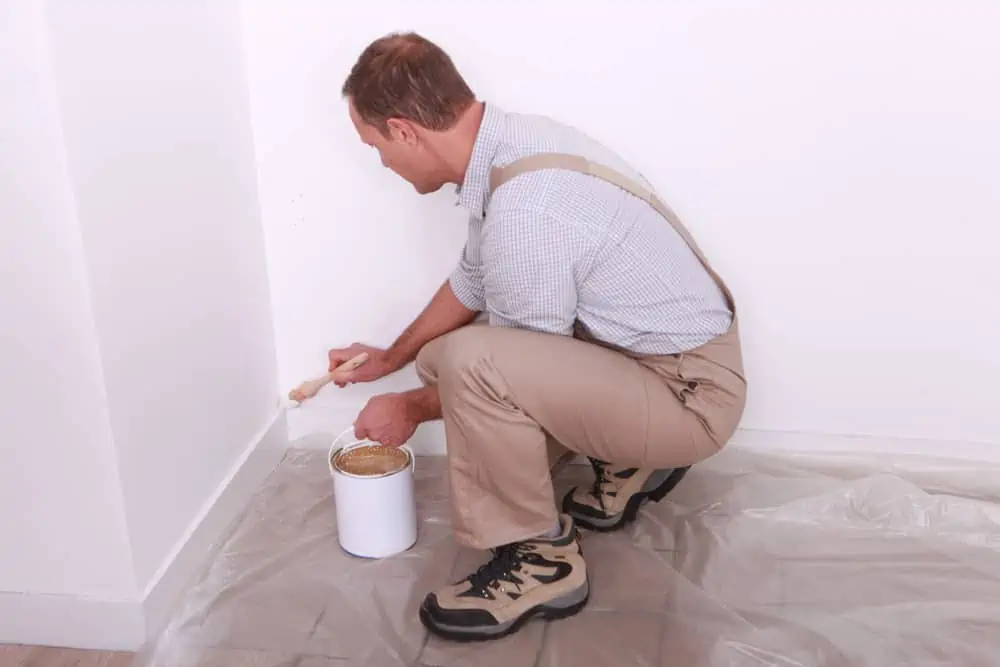
5. Apply the Paint
Stir the paint after opening the can. Dip the brush in the paint, again being careful not to overload it.
When painting the first coat, use less paint than you think you need. Use long strokes to apply the paint to the length of the baseboard.
Allow the paint to dry for an entire day before applying the second coat. If you’re using high-gloss paint, you might want to sand the surface a bit before the second coat application. This gives the second coat a better chance to adhere to the glossy surface.
When the second coat of paint is fully dry (one to two hours), you can remove the painter’s tape.
Pro Tip
You can also paint a baseboard with a sprayer if you use the right tip. This will result in a smoother paint finish, and it’s also much faster.
How to Paint Baseboards with Carpet
If you have carpet in the room where you need to paint the baseboards, you’ll need to find means to protect it. Getting rid of paint stains on the carpet is a nuisance.
Here are some techniques to help you paint without getting paint on the floor:
- Use a putty knife to tuck a portion of the masking tape under the baseboard.
- Use a paint guard or a paint edger to prevent paint from spilling on the floor.
- Master the cut-in technique to avoid any paint spills and paint the baseboard’s edges as cleanly as possible.
Baseboard Painting Hacks
If you want your baseboard paint job to look as clean as possible, here is a list of tips that could help you out:
- After dipping the brush in paint, scrape it lightly against the edge of the bucket. This helps even the brush load.
- Use a separate metal pail for the paint. This allows for more precise brush dipping and helps avoid paint overload.
- Use a few strokes to apply the paint and smoothen it using a single stroke. This helps to avoid overworking the surface.
- Start your brush strokes in unpainted areas. This allows you to paint without brush marks.
How to Remove Paint from the Floor
If you spill paint on the floor, you have to get rid of the stain as soon as possible. The best route will depend on what type of floor you have. Let’s look at some potential situations and how to handle them.
How to Remove Paint from Tile
For fresh paint stains, you can heat up a mixture of one cup of vinegar and water. Bring it close to a boil.
Dip a cloth in the mixture and spread the cloth over the paint stain. Allow the paint to soften and scrub it off using a nylon brush.
If the stain doesn’t come off with this method, you will need to use a paint remover. Paint remover should be patch tested on a small inconspicuous area of the floor. This ensures that it will not remove the glaze from your tile.
Make Note Of Tile Type
The importance of this is magnified if your tiles are made of marble, travertine, or any stone that is easily scratched by acid.
How to Remove Paint from Hardwood
When painting a baseboard in a room with hardwood floors, sanding is great for paint stain removal. For large areas, you’re going to need an electric sander.
While sanding, always follow the wood grain. Remove as much of the paint spill as possible. Then, dip a rag into some paint thinner and dab the stain to remove the remaining paint.
You can also use a paint stripper. Follow the instructions on the label on how to apply the product properly. Note that you might have to dilute the solution first.
How to Remove Paint from Carpet
Removing paint from a carpet is a bit more difficult because the fibers quickly absorb it. The exact procedure for removal will depend on the nature of the paint.
- Wet Stains (Regardless of Paint): Use a damp paper towel to blot the stain. Don’t apply pressure to avoid the stain from penetrating the fibers.
- Water-Based Paint: Mix 1 tsp of mild dish detergent with a cup of water. Dab it over the paint spill with a sponge and leave it to sit for three minutes. Use a plastic spoon to scrape the paint out of the carpet.
- Latex Paint: Mix soap and water. Dip part of your sponge in the solution and blot the stain. Repeat this as many times as necessary.
- Dry Oil-Based Paint: A steamer can soften the paint. Use a needle to break apart the stain as you’re applying steam.
Is It Easier to Paint Baseboards or Replace Them?
You can paint your trim or molding if it looks dingy, but the preparation work is critical and might take a long time. Water-damaged, discolored, or warped baseboards should be replaced.
FAQs

Do You Paint Baseboards or Walls First?

Should You Paint Baseboards the Same Color as Walls?
The practice of painting walls and trim in the same color is becoming increasingly common. But, in the end, it’s a matter of personal preference. Some people prefer to have white walls and paint the baseboard in an accent color.

How Do You Paint Air Vents?
Regardless of whether the vents are made of plastic or metal, they can both be painted in the same manner. They will need to be primed and coated twice with two coats of paint each time. I only recommend doing this if you don’t like their color.
Bottom Line
Now you know how to paint baseboards! You have painting hacks, tips for stain removal, carpet protection, and choosing the best paint for the baseboard. Time to get started!