Need to install a new window but don’t know where to begin? Knowing how to frame a window can save you a lot of trouble and money that you would otherwise spend hiring a contractor.
This detailed guide covers everything you need to know about window framing, saving you big bucks in the long run.
Key Takeaways
- Understand window components: Header, Top/Bottom Plate, King Stud, Jack Stud, Top/Bottom Short Support Studs, and Sill Plate.
- Difference between rough opening and actual window size: Rough opening is the space left in a frame wall to accommodate the window frame, while the actual window size is smaller to account for framing components.
- Tools for framing a window: Plywood, shims, staples, stapler, handsaw, framing square, drill, screwdriver bit, flat pry bar, combination square, reciprocating saw, nail set, measuring tape, level, hammer, and stud finder.
- Key steps in framing a window: Find a suitable wall, make the opening, remove drywall, cut studs, frame the rough opening, replace drywall, finish drywall, and install the window.
Window Framing Detail
Knowing how to frame a window implies understanding what its main components are. So, have a look at the below table to familiarize yourself before getting started.
| Component | Description |
| Header | Headers are pairs of 2x4s located on the edge and run the width of the window frame. |
| Top/Bottom Plate | Top and bottom plates are designed as horizontal 2x4s located at the top and bottom, which run the house’s length. |
| King Stud | These form the outer side of a window and connect the top and bottom sill plates. |
| Jack Stud | Also known as the trimmer stud, this element starts at the bottom sill plate and goes upwards to reach the bottom side of the window header. |
| Top Short Support Studs | Short studs that run vertically between the top plate and the header. |
| Bottom Short Support Studs | Short studs that run horizontally between the bottom plate and the sill. |
| Sill Plate | A horizontal stud that connects the two jack studs. |
What is a Rough Opening for a Window?
If you want to know how to frame a window, you should first understand the difference between a rough window opening and the actual window size. The rough opening is the space left in a frame wall to accommodate the window frame.
The approximate opening measurements will be critical in determining the correct window frame size. The actual window size is smaller to account for the other components needed to frame the window.
How to Frame a Window in an Existing Wall
In this section, you’re going to find two basic tutorials. One that will show you how to frame a window in an exterior wall. And one to teach you how to frame the inside of a window.
What You’ll Need
- Plywood.
- Shims.
- Staples.
- Stapler.
- Handsaw.
- Framing square.
- Drill and screwdriver bit.
- Flat pry bar.
- Combination square.
- Reciprocating saw.
- Nail set.
- Measuring tape.
- Level.
- Hammer.
- Stud finder.
How to Frame an Interior Window
First, let’s take a look at the proper way to frame an interior window. Then we’ll talk about exterior windows.
1. Finding a Suitable Wall
Before beginning any demolition for framing a wall for a window, you must assess whether your wall is load-bearing.
A load-bearing wall runs perpendicular under the roof trusses. It takes most of the weight from the roof and should never be entirely removed.
Safety First
The safest method to do this is to consult a building specialist. It may be costly but essential, especially since you do not want to cause significant damage to your home’s structure.
2. Making the Opening
Identify a non-bearing wall for your window framing. Then carefully mark out the opening on both sides of the wall using tape or pencil.
Utilize a level or some measuring tape to ensure that your rectangles are perfectly balanced and matched. Caution should be exercised when measuring from sloped floors or floors with different heights on either side of the wall.
3. Removing the Drywall
Use a drywall router to remove the section of the wall based on the outlines. Following that, using a pencil, sketch the top and bottom margins of the drywall opening onto the exposed stud faces on both sides of the wall.
Because you’ll be framing the final opening with 2×4’s, you’ll need to remove some drywall to make room for maneuvering. Using your drywall router, cut and remove an extra six inches of drywall above and below your current aperture.
4. Cutting the Studs
Use the pencil marks you made on the exposed studs as a reference. And move another 1.5 inches upwards from the top and three inches down from the bottom. Make another mark. Take a jigsaw and cut along these new lines to remove these stud segments.
5. Framing the Rough Opening
This is the distance between the inside faces of the studs that are parallel to the drywall opening. Cut three pieces of 2×4 to match this width.
Raise one of them horizontally to the opening’s head. Make sure it’s secured with a hammer and nails to the right and left-most studs and to each intersecting one. Do this again with two 2x4s laid flush at the opening’s sill.
6. Replacing the Drywall
Calculate the area of drywall that needs replacement. If the interior walls of the finished opening will be lined with drywall, you should also measure this space.
On a sheet of drywall, trace and score the required pieces using a metal straight-edge plus a utility knife. Snip or cut the parts. Then, using screws at regular intervals, fasten the drywall to the exposed studs.
7. Finishing the Drywall
Cover the screw heads and seams with joint compound, knives, and drywall tape until flush. Allow it to dry completely before sanding and sponge-finishing to a smooth finish. Now you’re ready to prime and paint!
How to Frame an Exterior Window and Door Opening
1. Preparing the Area
Put drop cloths on the floor and keep the doors shut to keep dust out before you begin constructing a window. You can also mount a fan on an adjacent window and direct it outside to help with this.
Safety Tip
Ensure there is good airflow in the workspace, so you’re not breathing in the dust.
2. Inspecting the Studs
Proceed to the studs for inspection. Make sure they’re in good enough condition to keep. On one end, you will make use of the existing wall stud as the king stud.
A pair of 2×2 or 2×4 cleats will connect it to the parallel stud. This provides a surface for repairing the drywall, particularly after installing the window.
3. Making the Markings
Make a note on the bottom plate of the jack and king stud locations. Typically, the width of such an opening corresponds to the distance from one jack stud to another.
Select a level above the jack stud. Draw a line across the studs to represent the sole of the header.
Determine the height of the header and specify a position for its top. Also, a mark around 1/8 inch above this measurement should be made. Make incisions about 1/8 inch from the bottom.
Additionally, make marks on the middle stud where the lower stud will be cut. Before making the marks, add 3 inches (for double-bottomed plates). Or add 1.5 inches to the required rough opening size for window construction (for a single bottom page).
Using a square, cut lines across each stud. Before generating these marks, create a temporary wall platform.
4. Scoring the Lines
Take a circular saw and set it to the maximum depth setting. Then check to see if the blade is square to the saw’s base plate. Cut an undesirable piece to evaluate the tool. Finish the cuts with a handsaw.

5. Attaching the Header
Cut two 2×6 or 2×8 pieces to construct the header. They should have a width equal to the cavity’s width plus three inches. Utilize half-inch plywood to create spacers.
Determine the direction of the middle stud’s upward curve. To finish this project, stack the materials and check that the crowns are facing the same way. Maintain an eight to ten-inch gap at the top, position the remaining 2x, and secure with triple three-inch screws.
With the crown facing upward, secure the header to the jack studs. Pound it with a hammer to strengthen security. At this phase, install the header using 16d nails or three-inch screws.
6. Building the Sill
Don’t fret over how to frame a window sill because this is where you’ll learn to construct a new one.
Begin by trimming two pieces max to the desired length. Screw or nail the ledge into place. If using two pieces, attach one to the cripple stud and use the second piece to cover it.
Look for a square in the opening. If the cavity’s height and width exceed the window’s by half an inch, the aperture should be approximately 1/4 inch larger than the square.
Complete the inspection by inserting the window into the cavity and carefully searching for the square.
7. Making Further Cuts
Certain types of walls, like those made of plaster, may be difficult to mend. If this is the case, you will need to slip the replacement window frame in. Cut the completed wall to the size required to suit the opening.
Using a reciprocating saw, sever the top and lower studs. Prior to sawing, keep in mind the header and sill widths. Pry the studs out by slicing them halfway. Clean out the open places to make room for the header and sill.
8. Fixing the Sill and Header
Place the header inside the cavity and secure it in place with jack studs on both ends. The header protects the window from potential damage caused by the roof’s weight. You can proceed to mounting the sill and using screws to secure the framing pieces together.
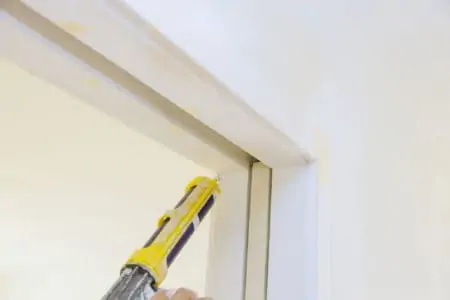
9. Adding the Finishing Touches
Proceed to the inside portion of the window frame and liberally apply external latex caulking. Following that, position the new window structure in the space, ensuring it’s a proper fit.
Drive the screws into the holes in the window framing using a power drill equipped with a screw bit.
How Much Space is Needed Around a Window?
You must take precise window dimensions when considering framing a wall with a window. Otherwise, drafts will enter your home, increasing your energy bills, exposing you to the weather, and reducing your comfort level.
For Replacement Windows
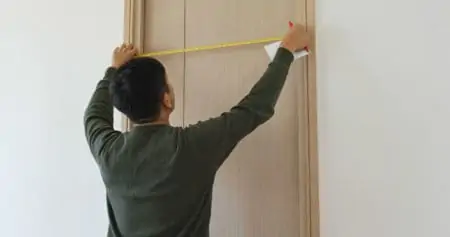
Do you want the measurements for replacement window framing? Assuming the jambs are in place, determine the window opening height on both sides and, one more time, in the middle. Take three measurements of the width and use the smallest reading.
Windows require a little bit of wiggling room. So, subtract ¼-inch from the height and the width you’ve already determined so you can get the replacement size needed.
For New Windows
Window framing for a new window means that you’re going to install it where no window has existed before. The window is typically 2.5 inches narrower and shorter than the rough opening (measured between the innermost studs).
This leaves the same 1/2-inch clearance for the squareness of the window and space for 1-inch-thick jambs to enclose the opening. In comparison, replacement windows utilize the existing jambs, resulting in a reduced opening measurement reduction.
How to Frame a Window in a Brick Wall
Adding a window to a brick wall is easier said than done. That is not to say, however, that it is impossible to accomplish. Plus, you will generate a significant amount of additional usable material that can be used to build a seamless addition to your brick wall.
Ultimately, this would be a three-step process. You would have to prepare your working area by making the walls where buts are needed. Then remove the brick and install the window frame inside the rough opening.
You’ll need a masonry saw blade for sectioning through the brick wall. Hopefully, no cracking or collapse occurs over the gap once the brick is removed and braced before the opening.
Keep In Mind
While possible to complete as a DIY project, the task could be challenging depending on the construction. It’s a good idea to get a structural engineer’s opinion (and maybe even their help).
FAQs

What Size is a Window Header?
Because many windows have a width of 24 to 34 inches, this is a frequently used window header size.

What Do I Do if My Frame is Too Large?
Framing requirements have evolved over time, posing complications for replacement windows. Additionally, you may choose smaller windows. It’s not difficult to reduce the size of existing window frame openings by adding framing.

Can You Put a Window in a Shear Wall?
It is not advisable to try and put windows in shear walls by yourself. A skilled structural engineer can design shear walls that leave the maximum amount of room available for windows.
Final Words
Note that it’s always a good idea to consult a structural engineer in some cases (such as when looking to cut in a brick wall). But for all other situations, knowing how to frame a window might really come in handy.