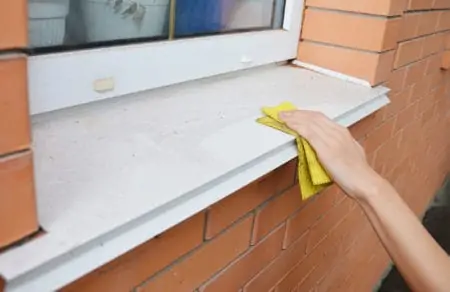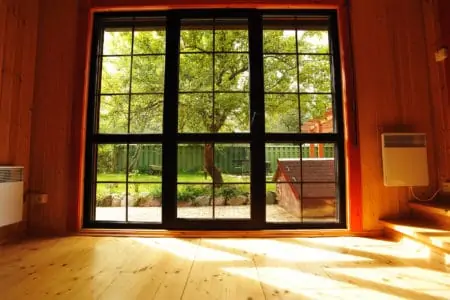
Knowing how to weatherproof a door keeps the heat inside your home and the wind and rain out. It improves your energy efficiency while protecting your home against the constant onslaught from Mother Nature.
So, you can see why weatherproofing doors is crucial on so many levels. We show you some simple fixes and different techniques to keep you toasty warm.
Key Takeaways
- Weatherproofing doors improves energy efficiency and keeps the elements out.
- Simple fixes include tightening hinges, applying weatherstripping, and using door sweeps.
- Expanding foam can fill gaps between door jambs and studs, while window film helps insulate door windows.
- For old or damaged doors, consider replacing them with new, energy-efficient options.
How to Weatherproof a Door
There are several ways to weatherproof a door, and the good news is most are simple and cost very little. Also, knowing where to weatherproof is vital for your door’s energy efficiency. For example, door sweeps are better for door bases, and insulation foam prevents heat loss from top and side jambs.
But before you rush out to the DIY store to spend your hard-earned cash, there is a straightforward technique you could try:
Tighten the Hinges
With a few simple tools, you can reseal your door in next to no time. Tightening the hinges is something we can all tackle without too much trouble.
What You’ll Need
- Flathead screwdriver.
- Phillips screwdriver.
- Door shims.
- Hammer.
- Long nail.
- Three-inch screws
- Drill/driver.
- Driver bits.
1. Examine the Gap Around the Door
The first sign that your hinges need tightening is when you see an uneven gap around where the door fits into the jamb. Most doors require a four or six-millimeter gap.
Another tell-tale sign is the door sticks at the base, which means the hinges have worked loose, causing the door to sag. Lift the door by the handle, and if there is movement, you have loose hinges.
2. Start With the Top Hinge
When tightening hinges, 99 percent of the time, the top hinge is the culprit. The door’s weight (especially exterior ones) pulls at the hinge, forcing the screws from their fixings.
Use the corresponding screwdriver and give them a tighten. When you think they are secure, turn the screws a quarter again to lock them in place. Do this for all three screws.
3. What If the Screws are Stripped
Occasionally, the screws and screw holes get stripped. You could use wood filler, but that will likely work loose again over time. If this happens, you may need a more permanent solution.
It’s time to break out the power tools.
4. Use the Drill/Driver
Plug in the drill and insert the relevant driver bit into the chuck. Grab a three-inch screw and insert it in the middle hole. The added grip of the larger screw should pull the hinge tight against the jamb and lift the door.
Take Note
You may need to drill a pilot hole in the door jamb to prevent the wood from splitting when inserting the larger screw.
5. When All Else Fails, Use Shims
In extreme cases, it may be that the hinge needs additional shimming. A shim is a tapered piece of material that wedges under the hinge to push it forward and close the gap between the door and the frame.
This task may require the door’s removal. Grab the hammer and a long nail and tap the hinge pin free. Do this on the top and bottom hinge (and the middle one if it’s an external door).
Lift the door and lay it up against a wall for safekeeping.
6. Loosen the Hinge
Unscrew the hinge, opening a gap beneath the hinge leaf and the door jamb. Insert the shim and tighten the screws. Take care not to overtighten as this could split the wood.
7. Rehang the Door
Lift the door back in place and reinsert the hinge pins using the hammer and nail. Internal doors are lighter, so you may not need assistance, but wooden front doors are heavy. If you think you will struggle, get help.
8. Test the Door
Open and close the door to ensure it operates as it should, and you have an even gap around the door where it meets the frame.
With Weatherstripping
Weatherstripping, like this Foam Insulation Tape, is an easy and effective way of keeping the elements at bay. They seal around the door frame and create an airtight barrier against heat loss. However, you are unlikely to stop moisture penetration, so don’t use it on the threshold of exterior doors.
What You’ll Need
- New weatherstripping.
- Sponge.
- Fine sandpaper.
- Clean rag.
- Hairdryer.
- Tape measure.
- Hammer.
- Weatherstripping brass nails.
1. Measure the Gap
Measure the gap between the door and the frame. Weatherstrips come in various lengths, widths, and thicknesses. If you purchase the wrong size, you could still leave a gap or make it impossible to shut the door.
2. Clean the Surface
Your surfaces must be clean for the weatherstripping’s adhesive backing to bond correctly. Rub the door jamb with 220 fine-grit sandpaper. Clean the sawdust with a damp sponge and dry it with a clean rag.
3. Use the Hairdryer
Grab the hairdryer and plug it in. Place it on high heat and blast hot air onto the door frame. This ensures that the surface is entirely dry. If any moisture is present, the adhesive will not stick.
4. Peel the Backing Off the Weatherstripping
Remove the backing from the weatherstripping and place it against the door jamb, where the door meets the frame. Grab the hammer and brass nails, and tack the end to the frame.
This ensures it stays in place while you position the rest of the stripping. If you don’t want to nail into the door frame, get someone to hold the end of the weatherstripping while you work.
5. Repeat Around the Frame
Repeat the process around both sides of the door frame and across the header jamb. Don’t fit weatherstripping to the base of the door because you will need something more robust to keep out the weather.
With a Door Sweep
Door sweeps are the best option for sealing the gaps beneath your exterior doors. They block wind, debris, and rain from penetrating under the door. However, a door sweep only works at the base of your door.
What You’ll Need
- Tape measure.
- Hammer.
- Drill and relevant drill bits.
- Nails.
- Hacksaw.
- Screws.
- Metal file.
- New door sweep.
1. Measure the Door’s Width
Measure the width of your door. The great news is most door sweeps, like this MD Building Products Sweep, are 36 inches long, making it easier to get a standard fit.
Top Tip
Always measure twice, so you only need to cut once. Double-checking your dimensions ensures an accurate fit.
2. Cut to Size
Grab the hacksaw and cut the door sweep to size, ensuring it fits the width of your door precisely. Smooth any rough edges with the metal file.
3. Dry Fit the Sweep to Your Door
Hold the door sweep against the base of the door. Ensure the door is closed so you can see if the sweep makes contact with the threshold. Mark the pilot holes with a pencil and remove the door sweep.
Some door sweeps can be nailed to the door, so there is no need to mark pilot holes. Simply grab the hammer and nails and attach them to the base of the door. Others, like this Holikme Draft Blocker, have an adhesive back that sticks to your door.
4. Drill Pilot Holes
Plug in the drill, attach the drill bit and drill the pilot holes along the pencil marks.
5. Attach the Door Sweep
Now hold the door sweep against the door, lining the holes with the pilot holes. Insert the screws with either the Phillips or flathead screwdriver and tighten. Now open and close the door to ensure it doesn’t impede its motion.
With Expanding Foam
Expanding foam is designed to prevent heat loss by plugging the gaps between the door jamb and the studs. It isn’t pretty and stays hidden beneath the trim.
The good news is it is easy to use and sets solid in a couple of hours. It also helps to grip the door frame.
What You’ll Need
- Expanding foam.
- Pry bar.
- Putty knife.
- Finish nails.
- Hammer.
1. Remove the Trim
Use the pry bar to pull the trim away from the door jamb. Be careful when you do this because you will need to reattach the trim when you are done.
2. Fill Gaps
Once the trim around the door frame is removed, you will see the shims and gaps between the door frame and the wall studs. This is where you get drafts, and they need to be filled. Shake the can of expanding foam for a few minutes to agitate the foam solution.
Insert the nozzle into the gaps and press the button. As the foam escapes, it expands to fill the voids.
Word Of Warning
Don’t overfill the gaps because it could push the frame out of square as the foam expands. It’s better to add small amounts at a time.
3. Leave to Cure
The expanding foam sets solid and can be trimmed to make it flush with the door jamb. It takes a couple of hours to set. Use the putty knife to cut away the excess foam.
4. Reattach the Trim
Once you are satisfied that the foam is flush, reattach the trim. You may need to use new finish nails if the old ones are no good. Gently tap the trim back in place with the hammer. Your door is now sealed.
With Window Film
Window film is a simple and effective way to insulate your door windows for winter. It’s easy to install, can be reapplied, and costs next to nothing. This technique not only works if you have a window in your exterior door, but it also insulates your windows.
What You’ll Need
- Insulating shrink film.
- Tape measure.
- Double-sided sticky tape.
- Mineral spirits.
- Clean rag.
- Hairdryer.
- Scissors or utility knife.
1. Measure the Window for Size
Using the tape measure, record the length and width of the window. Window film comes in large sheets that need to be cut to size. You don’t need to be too accurate because there should be a slight overhang.
2. Clean the Frame
It is essential you remove every speck of dirt before applying the double-sided sticky tape. Mineral spirits soaked into a clean rag is an excellent way of getting rid of surface dirt. Wait until the frame dries before moving to the next step.
3. Apply the Tape
Run the sticky tape along the edges of the window frame. Make sure that the edges slightly overlap, so you get a complete seal. Wait 15 minutes while the tape bonds before removing the backing.
4. Cut the Film
Cut the film using the measurements as a rough guide using the scissors. You need to leave a minimum of two and a half centimeters around the edge of the frame as a slight overhang.
5. Attach the Film
Starting with the top of the frame, attach the film, ensuring minimal creases. Now move to the sides of the frame, keeping the film taught to remove ripples. Finally, attach the film to the base of the frame.
Run your thumb along the taped edges to ensure a tight seal. Wait 15 minutes while the tape bonds with the film.
Keep In Mind
If you have creases in the film, don’t panic because they disappear when you blast them with heat from the hairdryer.
6. Shrink to Fit
Plug in the hairdryer, turn it up to full heat, and work the hairdryer across the film’s surface in side-to-side motions. Hold the tip of the dryer about six inches from the surface. As the film heats, you will see it shrink before your eyes.
Switch off the hairdryer and trim the edges to size.
The Cheapest Ways to Weatherproof Doors
While many of the methods used in this article are affordable, there are alternative methods you can use that may cost less. They may not be as attractive, but if they insulate and save you money, who’s complaining.
Duct Tape
Duct tape is ideal if you want to seal window frames that you suspect may be leaky. Simply run a strip along the edges of the frame and press it down to seal.
Bubblewrap
Bubblewrap is full of air pockets, making it the ideal insulating material. Place a sheet against the windowpane on your door and secure it with duct tape. For additional insulation, shrink some window film over the top to seal it.
Heavy Curtain
Hanging a heavy floor-length curtain against your door stops drafts and keeps the heat locked in. It may not be as effective as other methods, but it does make a difference. You can even use it in conjunction with one of the techniques mentioned above.
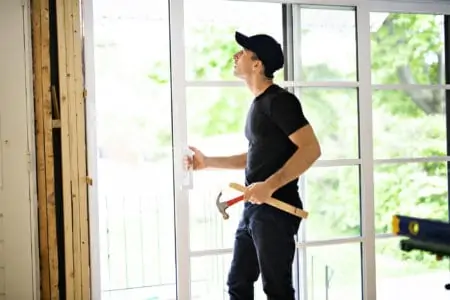
When to Replace a Drafty Door
Sometimes applying a sticking plaster to the problem is not enough. It’s all well and good stopping drafts, but if the door is unfit for purpose, maybe you should consider a new door.
Wooden doors shrink and warp with heat, cold, and UV rays. After years of punishment, your old entry door will show weathering scars. Replace the door if you have splits and gaps too large to fill.
Exterior metal doors are susceptible to rust and corrosion, and if left unchecked, holes will appear. This compromises the door’s integrity and leaves you open to security breaches.
FAQs

What is the Best Way to Weatherproof Old Doors?
The best way to weatherproof old doors is to use the above techniques. Weatherstripping, door sweeps, insulating foam, and window film all block out the wind and trap heat.
You could also splash out on storm doors and windows, but that would be at a considerable expense.

What is the Best Type of Weatherstripping?
Foam is the most economical material, but rubber or vinyl offers the best response to wind and rain. They last longer, rarely perish, and block out drafts.

How Do You Prevent Dogs From Chewing Weatherstripping?
The simplest way to divert your dog’s attention from chewing your weatherstripping is exercise. The more stimulated your pet is, the less likely they are to take notice of your door insulation. You could also try pet repellent sprays that dogs find repulsive, like this Fooey Ultra-Bitter Spray.

How Do You Make a Door Waterproof?
By sealing up the gaps, ensuring the hinges are tight and installing a door sweep. You could also try stripping the door, priming it, and applying two coats of polyurethane.

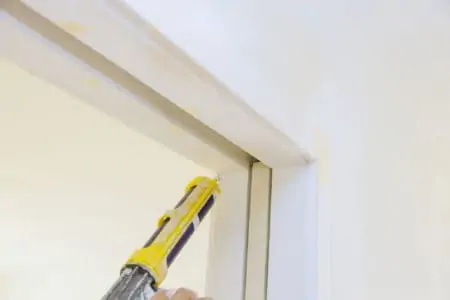
Should You Caulk Under a Door Threshold?
Caulking under your door threshold ensures that you seal it against water ingress. You shouldn’t need to do this, but using a filler may be necessary if it was badly installed.
Keep Out the Rain and Wind
The sooner you weatherproof your exterior doors, the better. They are under 24/7 attack, and if the wind and rain can find a way in, they will. Your mission, should you choose to accept it, is to stop the elements in their tracks.
The good news is it is a relatively simple process and can be achieved in a matter of minutes. So, what are you waiting for? Get weatherproofing.