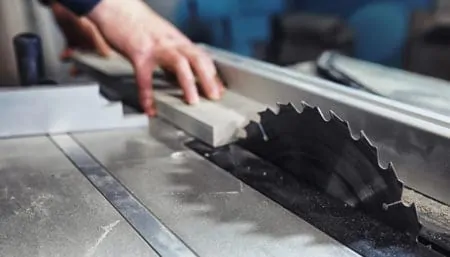
Circular saws are powerful cutting tools. They are ideal for cutting straight lines and, as they are handheld, there is no limit to the length of your cuts.
If you are a carpenter or any other type of woodworker, a circular saw will be an important addition to your tool collection. However, if you have never used one before, you might need some advice on how to do it effectively.
In this article, we will explain how to use a circular saw to make the most of its cutting power and accuracy. This includes learning the different parts of the saw, which cuts you can make, how to stay safe, and answers to some frequently asked questions.
Key Takeaways
- Wear safety goggles and a face mask for protection.
- Mark the cutting line clearly and use appropriate blade for material.
- Set blade depth to 0.25 inches below the material.
- Use two hands for control and let the saw work at its natural pace.
What Is a Circular Saw Used For?
Circular saws are powerful handheld cutting tools that have disk-shaped blades. They are used primarily for cutting long pieces of wood but can also cut other materials with the right blade. These materials include masonry, plastic, and even metal. As they are handheld tools, they are particularly useful on construction sites, enabling carpenters to make cuts wherever they are needed.
Circular saws are ideal for making crosscuts, rip cuts, and slicing through sheet material such as plywood. With enough experience, you will also be able to make miter and bevel cuts.
Parts of a Circular Saw
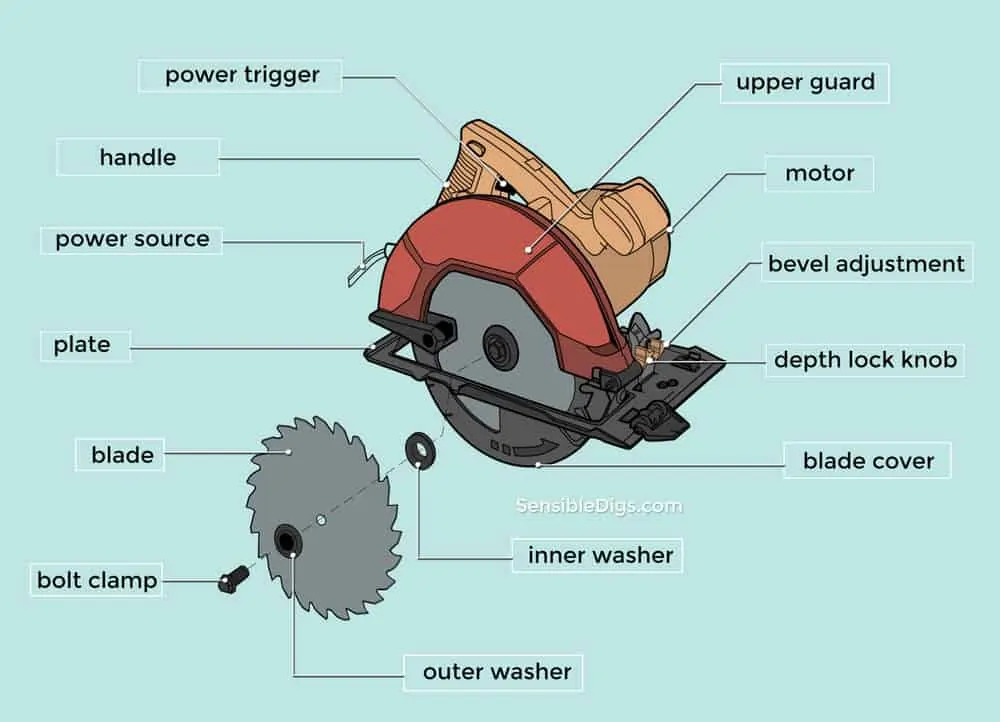
Before you start making cuts, you should take the time to familiarize yourself with the various parts of your circular saw:
Types of Cuts
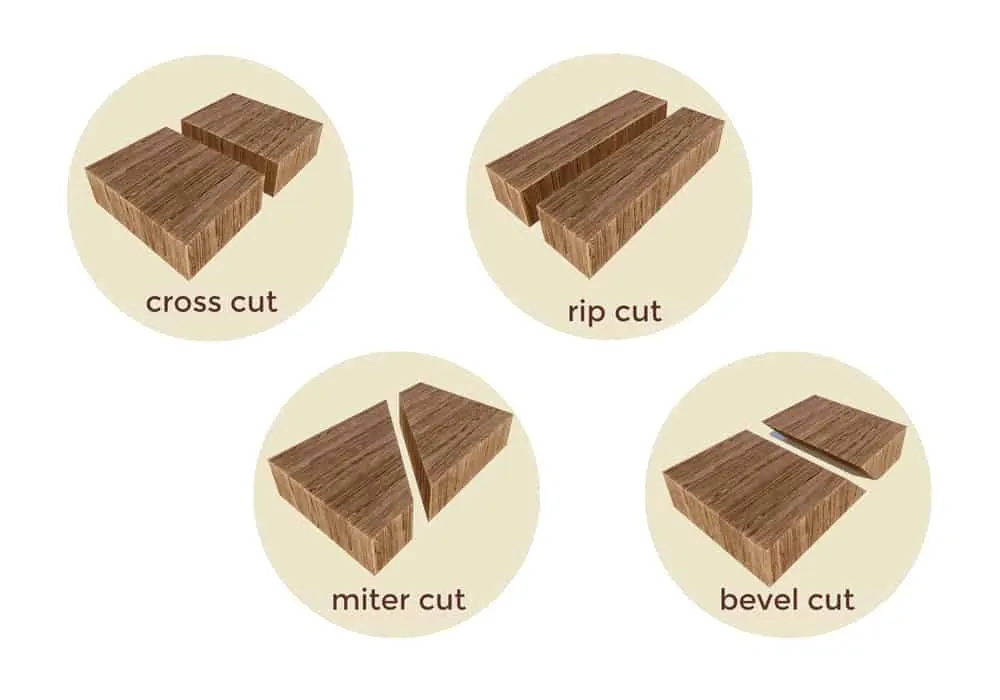
Circular saws are relatively simple tools but they are surprisingly versatile if you know how to use them. Here are the different cuts you can make with one:
Crosscut
A crosscut is when you cross across the grain of a piece of wood. This is used when you need to shorten a board by cutting it down to size, so it will probably be one of the cuts you make most often.
Rip Cut
A rip cut is made along the grain of the wood, splitting its fibers apart to make it narrower. Rip cuts are typically longer than crosscuts, which is why the freedom of movement of circular saws makes them an ideal choice.
Miter Cut
Miter cuts are made at an angle while keeping the blade vertical. This makes them ideal for cutting window frames or door frames, where you need pieces to fit together to surround the opening.
Bevel Cuts
In contrast to miter cuts, where the blade stays vertical, bevel cuts are made with the blade tilted. This is ideal for fitting two straight pieces together, such as when you are constructing wooden furniture.
How to Use a Circular Saw
Now that you are more familiar with circular saws and the cuts they can make, it is time to learn how to make those cuts. This step-by-step guide will show you how to use a circular saw to make a basic cut, which will give you a strong foundation before you move on to more advanced cuts.
You Will Need
Like any power tool, there is an element of danger when using a circular saw. Popular Mechanics magazine reports that about 30% of all saw accidents in Australia are caused by circular saws (1). However, you can minimize these risks by following safety tips and wearing protective gear.
Before you start cutting, make sure you have:
- Goggles
- An N95 face mask
- A circular saw
- A clamp
- Pencil or chalk
- A tape measure
- Dustpan and brush
- Vacuum cleaner if cutting indoors
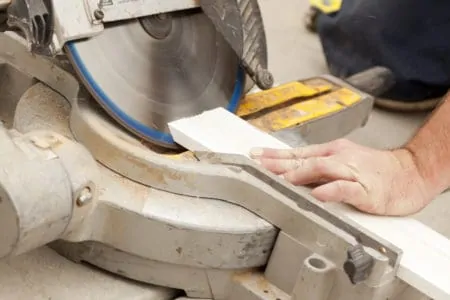
1. Mark the Line
Like any sawing job, measure twice so you can cut once. Marking an accurate cutting line will remove any guesswork and give you a much better chance of achieving accurate results. Mark the line using a pencil or chalk.
Along the line you have marked, draw a few V shapes with the point meeting the line. This should help you cut more accurately.
2. Clamp the Material
Clamp the material in place securely. Otherwise, it could move while you’re sawing and ruin your cut.
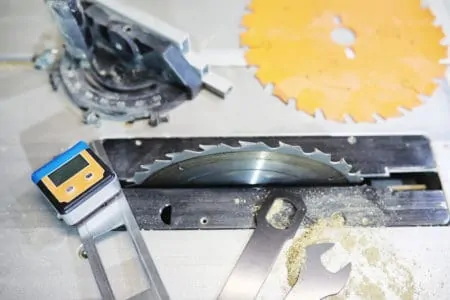
3. Choose the Right Blade
You need to choose an appropriate blade for the material you are cutting. Wood blades have teeth like a standard saw, while blades for masonry and brittle materials have abrasive surfaces that use friction to slice through whatever they are cutting. Always use the right blade for a specific job, as this will protect your saw and improve the quality of your cuts.
4. Set the Depth
Once you have chosen the right blade for the task, set its depth to about 0.25 inches below the bottom of the stock you are cutting. This will ensure the blade exits the material smoothly and you get a clean cut.
5. Protect Yourself
You should now put on your safety goggles and N95 face mask to protect yourself against sawdust and flying debris. Circular saws are powerful cutting tools, which means there is a risk of pieces of material being launched as the blade exits the wood. As with any DIY task, it is better to be safe than sorry.
6. Line Up the Saw
Plug the saw in or attach its battery. Place the saw so the base plate is on the surface of the material, with the front of the blade lined up to the cutting line you marked. Don’t engage the motor yet but be sure to lift the blade guard out of the way.
7. Power Up
At this point, the blade should not be touching the workpiece but the base plate should. Press the trigger and wait for the blade to reach its optimal speed. Then, ease the saw forward slowly, applying consistent pressure.
8. Watch the Blade
Let the saw move at a speed it can handle. Don’t force it as this will place a strain on the motor and make the saw likelier to splinter the material. It might also increase the chances of a kickback occurring as the blade can’t move smoothly. Try to keep the blade on the scrap side of the cutting line you move it, so you don’t accidentally remove too much.
9. Power Off
When you reach the end of your cutting, release the trigger and allow the blade to come to a complete stop. Unplug the saw or remove its battery and sweep away any debris with your dustpan and brush. If you are indoors, you can use a vacuum to capture the finer sawdust. You can now remove your goggles and face mask to check your cut.
Circular Saw Tips
Circular saws are relatively easy tools to use but there are still some important tips that will help you achieve the best results. Here are some of the most helpful:
Good Side Down
If you want the best finish possible, have the good side of your material facing down while cutting. Circular saws tend to splinter the upper side of the wood and leave a neater cut underneath.
Use Masking Tape
A great way to reduce splintering is to apply a strip of masking tape to the wood before you mark your cutting line. The tape will prevent the blade from shearing the wood and help you achieve a neater finish.
Use the Fence
When cutting long sheets of plywood, use the short fence supplied with the saw. It will help you cut a straight line while working more quickly.
Learn Your Blades
Familiarize yourself with what each blade does and look at its teeth per inch, or TPI for short. You will get a good sense of which materials a blade can cut by looking at its tooth count. Blades with more teeth are suitable for harder materials and provide a neater finish, with the toughest materials requiring diamond grit rather than teeth.
A lower tooth count indicates that the blade is better for cutting softer wood and making rip cuts. If you want a general-purpose blade, look for a TPI somewhere in the middle.
Start Over
If the blade veers off the cutting line, don’t try to swing it back while sawing as you could overcompensate and steer too far the other way. This can end up doing far more damage.
Stop the saw and start over. This way, you will achieve a more accurate cut and also maintain control of the saw.
Set the Depth
Always set the blade depth before you start cutting. The bottom of the blade should be about a quarter-inch below the material you are cutting for the smoothest cuts possible.
Don’t Clamp the Off-Cut
Only clamp the wood you want to keep, not the part you won’t use, which is also known as the off-cut. This will allow the off-cut to fall away as the blade reaches the end of its cut, rather than holding it in place, which is known to cause kickbacks.
Use a Chalk Line
If you are cutting sheet material or other longer pieces, a chalk line will provide a quick marker that is very accurate.
Circular Saw Safety Tips
There are dangers when using a circular saw, like any power tool, so safety should always be at the front of your mind.
- Never change the blade while the saw is plugged in. Always disconnect it from the electrical outlet or remove its battery before trying to remove the blade.
- Use an appropriate blade for the material to prevent kickbacks.
- Make sure the blade is sharp. A dull blade will bind and cause kickbacks.
- Always wait for the blade to spin at full speed before bringing it into contact with the material.
- Wear safety goggles and an N95 face mask.
- Wait for the blade to stop turning before removing it from the material.
- Never touch the blade when the saw is connected to its power source.
- Don’t force the saw to move faster when cutting. This places a strain on the motor and could cause a kickback.
- Don’t wear loose clothing or jewelry when operating the saw.
FAQs

What Should You Not Do With a Circular Saw?
Circular saws are powerful tools that make quick and accurate cuts in wood, plastic, and other materials. However, there are some important things to keep in mind when using one.
Don’t try to force the blade through the material quicker than it is capable of – the saw will likely kick back if you do, which could cause an injury. Follow the manufacturer’s instructions regarding any attachments you might want to use, including the right blade for the specific material you are cutting.
Don’t place your hand above the guard or shoe of the saw. You should also avoid interfering with the blade-locking nut (don’t tighten it). Always unplug your saw or remove its battery when it is not in use, to prevent any accidents.

What Are the Most Common Circular Saw Injuries?
Unsurprisingly, injuries to the arms and hands are the most common ones caused by circular saws. These injuries can include cuts and even loss of fingers or hands in extreme cases, due to the blade’s speed and power.
To minimize the risk of injury, always follow the manufacturer’s instructions, wear protective equipment including safety goggles, and keep your hands away from the blade at all times. You can use clamps or a vise to secure the material you are cutting in place. Never try to force the saw to cut more quickly.
You should take extra care when cutting bevels or curves. Maintaining a firm grip on the saw will help prevent any slipping or kickback, both of which pose an injury risk.

Do I Need a Workbench to Use a Circular Saw?
It isn’t required but having a workbench will make using a circular saw much easier. It will provide a strong, stable platform to hold your materials before and during the cutting process, which will improve the accuracy of your work.
Having a workbench means you will have somewhere to store your tools in an organized fashion and provides greater flexibility when positioning pieces of wood or other materials for cutting.
Many workbenches come equipped with clamps and vises, which will help you secure the material you are cutting for greater accuracy.

Is It Safe to Use a Circular Saw With One Hand?
It can be tempting to use a circular saw with one hand but it is not recommended and increases the risk of losing control of the tool while cutting.
Using two hands will help you keep a firm grip on the saw while also maintaining control of the material you are cutting. This will reduce the risk of kickbacks and ensure that your cuts are precise.
Two-handed operation will reduce the strain on your arms, wrists, and shoulders, allowing you to work for longer with less fatigue. Remember to always follow safety advice when using any power tool to protect yourself and make better cuts.

What Is the Benefit of Using a Circular Saw Over a Manual Saw?
Circular saws have several advantages over manual saws. They are more powerful and can cut through thicker material more smoothly. Their blades can spin thousands of times every minute, which makes them much faster than sawing by hand.
Circular saws also have a guard that provides extra protection against flying debris and kickbacks if you use a guide rail. Many modern circular saws have helpful features such as depth adjustment, bevel cuts, laser guides, and even electronic brakes, each of which will make it easier to achieve smooth, accurate cuts.

What Is a Good Circular Saw for Beginners?
The Makita 5007MGA circular saw is an excellent choice for beginners and experienced DIYers alike.
This saw has the power and precision of a 15-amp motor, with magnesium components and durable, lightweight construction. It can be stopped quickly and safely by its electric brake, which will help you work much faster when making multiple cuts.
Its large cutting capacity reaches 2-⅜ inches at 90 degrees and 1-¾ inches at 45 degrees, which is plenty for the majority of circular saw jobs.