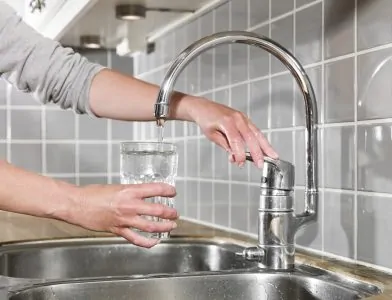
If you are out camping or on an extended hike, one of the major challenges is finding clean, safe drinking water. Although a water source might appear safe, it is difficult to be certain, especially if you are in an unfamiliar area.
There are some tried and tested ways to make water cleaner and safer to drink when out in the wilderness. If you don’t have much experience camping, you might be wondering how to filter water outdoors easily and effectively.
In this article, we will share many ways to access clean water when you’re off-grid. This should leave you with plenty of options to ensure hydration isn’t an issue and you can focus on enjoying your trip.
Key Takeaways
- Filtration and purification are essential for clean and safe drinking water in the wilderness.
- Boiling, chemical purification, and various DIY methods can help remove contaminants from water.
- Commercial filters, such as survival straws and UV water filtration, offer convenient and effective solutions for outdoor water treatment.
- Always use a combination of methods for the best results and ensure hydration while enjoying outdoor activities.
Why Filter/Purify Water Outdoors?

It is easy to assume that the water in lakes, rivers, and streams is clean and healthy, especially when you are far away from the pollution and chemicals predominantly found in urban areas. However, if placed under a microscope, you would likely see a multitude of bacteria and microorganisms in water that is seemingly clear.
Although the majority of this bacteria is safe, some of it can be very harmful and ruin your trip at the very least. Filtering water is relatively easy and will make a significant difference, providing safe drinking water from the majority of sources you will find in the wild.
Depending on what it contains, ingesting even a small amount of contaminated water can make you very ill. Here are some organisms that can be found in water and the negative effects they can have on your health.
- Giardia: This microscopic parasite is often found in water from lakes, streams, or drinking water that has not been properly treated (1). The symptoms can be very unpleasant — they include nausea, stomach cramps and pains, gas, diarrhea, and dehydration. Fortunately, as these molecules are fairly big, they can be filtered out of water very effectively.
- E. coli: If you have ever heard of traveler’s diarrhea, it is usually caused by E. coli bacteria. More dangerous strains can cause severe diarrhea and even be fatal under the wrong circumstances. This type of bacteria can be removed from water by using water filters.
- Campylobacter: This bacteria is found in contaminated water or undercooked poultry. Severe cases will require medical intervention due to symptoms including bloody diarrhea, stomach cramps, and fever (2).
Filtering vs Purifying
Filtration and purification are often used interchangeably, but they are not identical when it comes to decontaminating water. While either process will leave you with cleaner water, a water purifier will make it more hygienic and give you extra protection.
A filter uses a physical barrier, such as charcoal, to remove contaminants from water. With a high-quality filter, you should be able to remove bacteria and protozoa from your water.
Ideally, a filter should have an absolute pore size of 1 micron or less. This will make it highly effective at removing giardia and cryptosporidium (3), so it is a good option for freshening pre-treated water. However, it won’t be able to remove viruses, which can be a concern when traveling.
Purifying water will also remove contaminants, but it does this via chemical means such as adding chlorine or iodine. Purification will remove bacteria and protozoa, but it can also eradicate viruses that are too minuscule to be removed by a filter (4).
In general, purification is the better option, especially with unknown water sources. However, if you don’t have access to the necessary chemicals you need when camping, filtration is far better than doing nothing at all.
How to Filter or Purify Water Outdoors

There are numerous ways to filter or purify water, so you will have plenty of options to choose from. With so many methods, you might not know which are the most straightforward and effective. To help, we have created this list of the most reliable techniques to ensure you can clean your water anywhere.
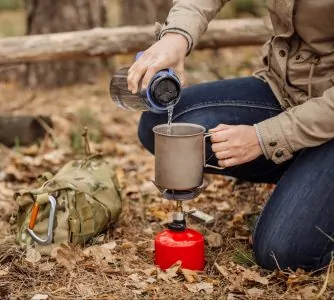
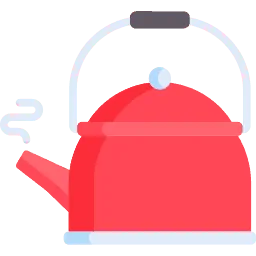
Boiling
If you are stuck without any drinking water in the wilderness, boiling is one of the oldest and most reliable methods to clean it. You won’t need any special tools, just a pot or container and a gas stove or means to start a fire.
Put the water into a heat-safe pot or container. Place it over an open flame or camping stove. Once the water is boiling, leave it on the heat for at least another minute (5).
If you are at an altitude of a mile or more above sea level, you will need to boil your water for at least three minutes. This will kill bacteria, giardia, and cryptosporidia.
If the water is cloudy, you should also filter it before drinking to remove the larger particles and make it safer. You can do this with a coffee filter or use a clean cloth as a makeshift filter.
Pros
- Only requires basic camping equipment
- Very easy
- Effectively eliminates harmful organisms
Cons
- Won’t remove chemical pollutants or heavy metals
- You will need to wait for the water to cool before drinking it
- It can take too long to boil enough water for multiple people
Chemicals
Chemical purification will effectively eradicate smaller contaminants in your water. If you choose chemical purification, cloudy water will require extra chemicals to disinfect. If the water contains visible particles, you should filter it before purifying it to get the best of both worlds.
Iodine
Use a clean container to collect the water and try to do it away from any animal activity. Moving water is generally safer, such as streams and rivers. If you need to take water from a lake, do it as close to the surface as possible.
After filtering your water, you should use an iodine tincture of 2% iodine and 47% alcohol. There are tablets that are designed for this purpose, which will remove much of the hassle. If you use a tincture, an eyedropper will make sure your measurements are precise (6).
You should put 5 to 10 drops in the container for every liter of water. If the water source is still or cloudy, such as a lake, use around 10 drops. If the water looks clear and comes from a moving source such as a stream, you will be able to use less iodine.
After adding the iodine, wait five minutes. Then, take your water bottle or cup and purify the rim by swishing the iodine water onto it. Wait another 30 minutes before drinking it.
Pros
- Cheap
- Lightweight
Cons
- Doesn’t taste very good
- Not recommended for children, pregnant women, or people with thyroid issues
- Too much iodine can be toxic
- Won’t eliminate parasites
Chlorine-Based Disinfection
Chlorine can be used to disinfect drinking water in an emergency situation. To disinfect a gallon of bleach, add one teaspoon of plain liquid bleach, which includes the active ingredient sodium hypochlorite. If the water is cloudy, you can use two teaspoons per gallon (7).
Wait 30 minutes and smell your water. If you can smell chlorine, you’re good to go. If you can’t smell anything, add the same amount of bleach and wait half an hour.
You can also use chlorine dioxide tablets, which are easier to carry than a bottle of bleach. On average, one of these tablets is suitable for a quart of water.
Pros
- Kills bacteria, giardia, and viruses
- Tablets won’t occupy much backpack space
- Can improve the taste of water
Cons
- More expensive than boiling
- Won’t remove chemicals from water
Tablets and Drops
You can use iodine and chlorine in tablet or liquid form, but there are also other agents that can treat water. An active ingredient used in water purification is sulfate mineral salts. After you add the salts, you will need to wait 60 minutes before you can drink the water. Follow the directions on the packaging to determine how many to add to your water.
Pros
- Effective against giardia, viruses, and bacteria
- No chemical taste
- Will also eliminate or reduce heavy metals
- When stored correctly, they have an unlimited shelf life
Cons
- Won’t work on cryptosporidium
- Relatively expensive
- Have to wait an hour before drinking
Do-It-Yourself

Steam Distillation
If you want very pure water, steam distillation is one of the oldest and most thorough methods. It removes biological, radioactive, organic, and inorganic substances.
It involves evaporating water and trapping the steam in another container, leaving the contaminants in the original container. In a sense, you are removing water from contaminants, instead of the other way around (8).
Here’s how to use steam distillation:
- Gather your equipment. You will need a metal kettle, stainless steel funnel wide enough to fit on top of the kettle, coiled tubing, a bucket with a hole in one side for the tubing, a jar, a heat source, cornmeal, flour, and ice. It is also possible to buy distillation kits for camping, which is much easier.
- Place the kettle on your heat source but don’t light it yet.
- Place the funnel on top of the kettle, upside down so it will trap the steam as it rises.
- Attach one end of the tube to the tip of the funnel.
- Coil the tube in a circle, like a Slinky. You want about three feet of coil between the funnel and your bucket. Coil the tube inside the bucket and then pull the end of the tube out of the hole in the bucket.
- Place your jar under the end of the tube that is coming out from the bucket.
- Put some ice in the bucket
- If necessary, mix equal parts flour and cornmeal and make a paste by adding some water. You can use this to seal any gaps between the tubing and funnel or other areas. Leave this paste to dry for several hours.
- Put your water into the kettle and turn on the heat.
- As the water evaporates and turns to steam, it will make its way through the tubing. When it hits the cold of the bucket from the ice, it will condense and turn back into water.
Pros
- Creates very pure water
- Once you have a kit, it is inexpensive to use
Cons
- Can take hours to produce one gallon of water
- Can be expensive if you buy a camping kit
- Requires a lot of setting up
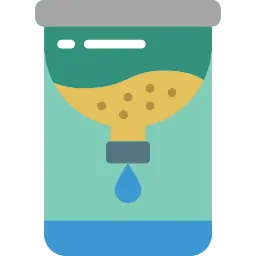
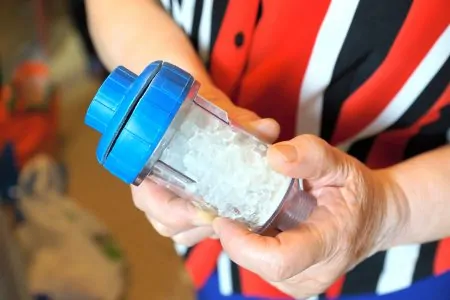
Sand/Charcoal Filtration
If you need a reliable way to filter drinking water outside, you can create a sand/charcoal filter. The sand will prevent larger organisms from getting through, keeping them away from your filtered water.
Activated charcoal is a natural filter that adsorbs toxins and other organics in water, improving its safety and taste (9). If you have been using a campfire and created a good coal bed, this should serve as a convenient source.
There are several variations of sand filters, including the basic one we will describe below. In the more advanced versions, additional filtration is performed by a biolayer with an ecosystem that will remove viruses and other organisms.
Here’s how to make your own sand/charcoal filter:
- Take a bottle (ideally two liters) and cut away the bottom four inches.
- Remove the bottle cap and place a coffee filter over the bottle’s opening, securing it. If you don’t have a filter, you can use a clean piece of cloth.
- Take another bottle of the same size and cut approximately four inches off the top instead of the bottom.
- Turn the bottle with the filter upside down and place it filter first into the second bottle.
- Crush the charcoal into powder and add it to the filter as a first layer. It won’t fall through thanks to the filter.
- Collect some gravel or small stones and place them into the top bottle.
- On top of the gravel, add a layer of sand. If you can find multiple types, you should put the bigger sand at the bottom.
- Slowly pour some water onto the layers of sand and gravel.
- The water will be filtered by the various layers and much cleaner water should drop into the lower bottle.
Pros
- Cheap
- Allows you to reuse empty bottles
- Doesn’t require much space
Cons
- Won’t filter out heavy metals and chemicals
- The filtration process can be quite slow

Wood and Tubing
The wood and tubing filtration method is surprisingly effective at removing bacteria from water — studies show that as much as 99% can be removed.
You will need to cut a piece of sapwood that is approximately two inches long and about an inch wide. You also need plastic tubing that will fit tightly over the piece of wood. If it fits loosely, you can place a clamp around the area where the tube and the wood meet to make it snug.
Place the bottom of the tube into a container. When you pour water into the top of the tube, it will be filtered by flowing through the piece of wood. This is why it is essential that the plastic fits tightly over the wood, as untreated water could otherwise sneak down the sides and mix with the filtered water.
Pros
- Easy to do
- Very cheap
- Removes most bacteria
Cons
- Slow filtration — it will probably take all day to filter four liters of water
- You will need to monitor the filter to refill the tube when the water gets low
Hydrogen Peroxide
This isn’t the best method for purifying water, but it will remove iron and hydrogen sulfide. It works best when used in conjunction with dry chlorine. The chlorine will kill other contaminants in the water, while the hydrogen peroxide removes the chlorine flavor left behind.
You should add two milliliters of household hydrogen peroxide per gallon of water. You must leave the water to sit for at least 15 minutes before you drink it.
Caution
Pros
- Inexpensive
- Easy to use
- Quick treatment method
Cons
- Not the most effective treatment method
- Other methods can remove more contaminants
Sedimentation
Sedimentation involves collecting water from a source, placing it in a container, and leaving it to settle. When the sediment has sunk to the bottom, you can carefully pour the clear water from the top into another container.
This method can remove larger contaminant particles from your drinking water. However, even if it looks clear, there could be invisible microorganisms and bacteria left behind.
If you use this method, you should do it in conjunction with another one, such as boiling, filtering, or chemical treatment. This will help eliminate any unseen hazardous materials in the water.
Pros
- The cheapest way to remove debris from water
- Larger particles sink to the bottom quite quickly
- Helpful for removing the cloudiness from water
- No equipment is required other than two containers
Cons
- You will need to use another purification method to clean water thoroughly

Cloth Filtration
Before drinking water from a lake or stream in the wilderness, you can easily perform basic filtration by using a cloth. You can use anything you have to hand — a spare shirt, a towel, or a blanket. Start by wetting the fabric.
There are two methods you can use. If you need water quickly because you’re dehydrated, simply fold the wet fabric over to make two layers.
Place your cloth over your container, leaving some of the fabric hanging loosely so it can dip down and create a small reservoir for the water.
Slowly pour the water onto the fabric, making sure you don’t do it faster than the cloth can drain to prevent spills. The fabric will strain out the impurities that are too large to pass through the gaps in the fabric. You should use a tightly-woven fabric to catch as many particles as possible.
If you have extra time, a more thorough cloth filtration method involves placing one end of the wet piece of cloth into the dirty container of water. You can then place the other end into an empty container, positioned slightly lower than the dirty container.
Thanks to gravity, the cloth will transfer the water into the empty container, leaving the contaminants behind.
Pros
- A free way to remove some impurities
- Doesn’t require any special equipment
- Doesn’t require an energy source, such as a fire, to use
Cons
- Won’t remove smaller particles from your water, so it might still make you ill
Commercial Filters

Survival Straw
Survival straws are touted as convenient, potentially lifesaving tools that can be taken on wilderness treks. It is a small, lightweight water filter that can be used by simply placing it into your water source and sipping through it.
The hollow fiber membrane in these straws can filter up to 1,000 gallons, which will be plenty for even the longest camping trips. It strips away the vast majority of protozoa, parasites, bacteria, and even microplastics.
To use it, open the caps on both ends and prime the filter by placing the non-drinking end in the water for 10 seconds. Sip a couple of times to get the water moving through the straw. You can then drink as much water as you need through the straw.
When you’re done, blow the excess water out of the straw and replace the caps.
Pros
- Removes almost all bacteria, parasites, and microplastics
- Occupies very little space in your backpack
- Lightweight, quick, and easy to use
- Improves the taste of water
Cons
- Doesn’t remove viruses from water
- Can be difficult to suck water through the straw
- As the straw needs to be placed into the water source, you will either need to collect it in a container or lie on the ground to use it
- Clogs easily

UV Water Filtration
If you want to use technology to make your water safe, you can try a UV water filtration system. With this method, artificial UV light is used to kill bacteria, protozoa, and viruses. It does this in seconds.
One brand of UV light purifier, the SteriPen, requires you to collect a liter of water, place the light into the water, and stir it for 90 seconds.
Pros
- Doesn’t use any chemicals
- Works quickly
- Light and easy to carry
- Doesn’t impact the taste
Cons
- Expensive to buy
- Can’t fully penetrate larger particles so you should also filter the water
- Requires electricity
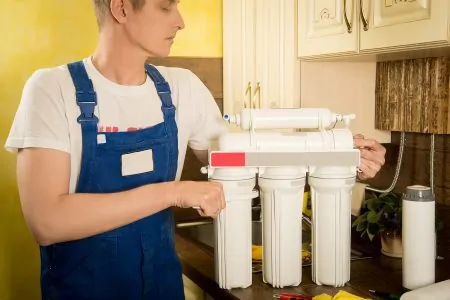
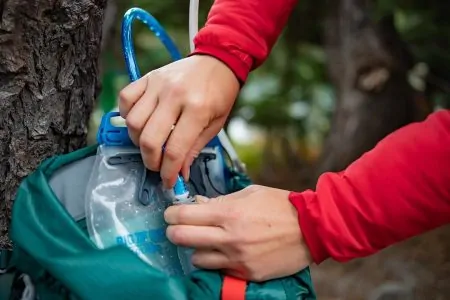
Filtration Water Bottles
With filtration bottles such as BeFree, you simply need to fill the bottle, put on the lid, shake it to filter the water, and then drink.
With a .1 micron water filter, it will remove 99.99% of bacteria and protozoa from your water. One bottle can filter as much as 1,000 liters.
Pros
- Very user-friendly
- A quick way to filter water
- Lightweight bottle
- The soft flask can be folded for packing
Cons
- The soft flask is great for packing but can tear
- Won’t stand on its end without support
- Some reviews mention a plastic taste
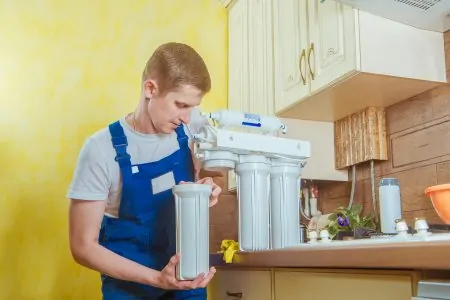
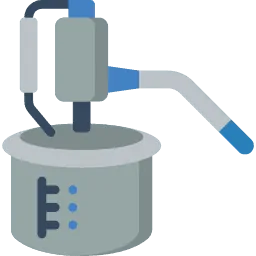
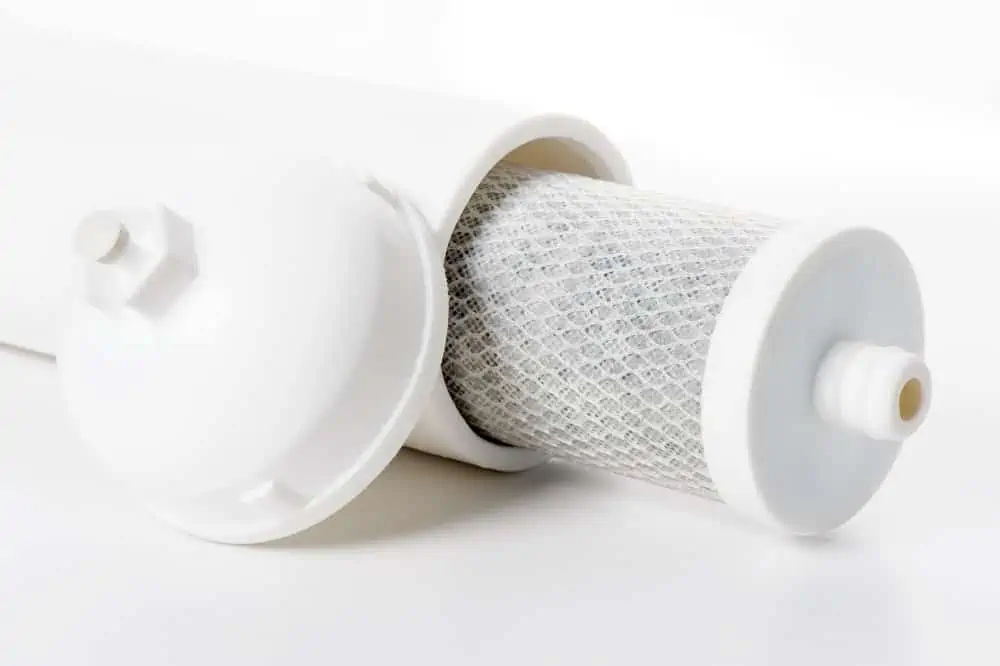
Activated Carbon Filter Pumps
Activated carbon filters manually draw in water, pass it through a filter, and then output it into a second container. They provide an effective way to thoroughly filter water in the wilderness.
You insert the pump feed into the source of dirty water, then place the pump’s other tube into a clean container. Pump the handle up and down to draw in water and let the carbon filter purify it for you.
There are several of these pumps on the market. The Purewell pump is capable of processing 58 ounces of water per minute. You can get 793 gallons of water from the pump before you need to replace the carbon filter.
Pros
- Easy to use
- Relatively inexpensive for how much water it can process
- Lightweight
- Improves the taste of water
Cons
- Might require two people to operate at first as the pump can slip and slide
Solar Water Purification

You can purify drinking water using the power of the sun. Two reliable ways to use solar energy to clean water are solar distillation and solar water disinfection.
Solar distillation uses a closed system to evaporate water and collect the condensation. This is an effective way to remove salt from seawater.
In contrast, solar disinfection uses the sun’s energy to eliminate organisms, such as bacteria, protozoa, and viruses. This method is preferable due to its high rate of success.
To use solar power to disinfect your water, try to find the clearest water you can. If you can’t find clear water, you can use the sedimentation method or a filter to remove some of the larger contaminants.
Fill a plastic bottle with water and shake it to disperse oxygen throughout. Place the bottle in a sunny spot, such as a roof. Try to leave them in direct sunlight for at least six hours on a bright day. If the sky is cloudy, you should leave the bottle in place for two days, so it is worth having multiple bottles (11).
Pros
- Solar energy is completely free
- A good way to reuse plastic bottles
- Doesn’t impact how the water tastes
Cons
- Might need to filter the water as well
- It can take up to two days to make water safe to drink
Best Methods for Different Scenarios

With so many methods to choose from, it can be difficult to know which one is right for you. Which method to use will depend on where you are, how dirty the water is, and which resources you have access to.
Let’s explore three common scenarios and which methods will be the most suitable for them.
1. Traveling/Hiking
If you are on an extended hike, it can be cumbersome trying to carry enough clean water, so it is helpful to be able to purify it on the go. This is where UV light treatment shines.
UV light will quickly eliminate microscopic contaminants but it will struggle with larger particles. This is why you should filter the water beforehand, which can be done with something as simple as a coffee filter. If the water appears to be clear, it is probably safe to use the UV light and drink it.
One issue with UV light treatment is that the units have a tendency to stop working unexpectedly, so it is worth taking a backup with you. If you are traveling with a companion, you can carry one each and both enjoy clean water throughout your trip
2. Camping
When camping, you will usually have access to a camping stove or an open fire. Even if you don’t, you might have a lighter, matches, or even some fire starters. This makes boiling an excellent option during camping trips.
As boiling won’t remove particles or dirt, however, it is important to filter the water before you drink it. You could remove the particles quickly with a cloth filter or start the sedimentation method while you set up your tent.
If you are using charcoal in your campfire, a charcoal filter provides a simple and effective filtration method.
3. Survival
Survival situations are always unexpected, so you are unlikely to have commercial water purification products with you. However, you might have some means of starting a fire, such as a cigarette lighter. If you are able to do this, boiling is a cheap, effective, and straightforward way to clean water. You should also filter the water through an item of clothing such as a spare t-shirt before boiling it, as this will remove large particles.
If you don’t have a heat source, a wood and tube filter is another reliable option. It is easy to do and you won’t have to worry about high-tech equipment failing or running out of chemical purifiers.
Frequently Asked Questions


Should You Treat Your Water?
Any water that is taken from an unknown source, even if it appears clean, should be treated before drinking it. Although it might look clear, unseen particles and microorganisms can be very harmful. If you are unsure whether or not water is safe, you should not take a risk by drinking it
With so many simple and effective ways to treat water, there is no reason to drink it untreated unless you are in an emergency situation. You should still be able to remove at least some contaminants, even if it is by simply removing your shirt and using it as a filter. This might not make your water perfectly safe but it is better than doing nothing at all.

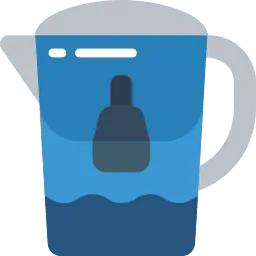
Can I Use the Brita Filter To Purify Water?
Brita water filters are a good way of removing any contaminants that might enter your municipal water supply before it reaches your home. Common harmful contaminants include copper, lead, chlorine, and pesticides. Brita filters can also improve how your water tastes if you currently don’t enjoy it.
However, if you are taking water from an unknown source, you shouldn’t rely on a Brita filter as it won’t comprehensively kill bacteria or microorganisms. You could boil the water before putting it through a Brita filter to get the best of both worlds, but you shouldn’t use one alone.

Should You Use Multiple Methods to Filter Water Outdoors?
There are many ways to filter and purify water when outdoors, but most of these methods will be unable to remove every contaminant alone. For example, filtering water through a cloth will remove large contaminants but won’t be able to deal with microscopic ones. In contrast, boiling will kill many microorganisms but won’t remove solid particles.
Combining these two methods will leave you with water that is much cleaner than when you collected it. It is also a good idea to have multiple purification options in case one gets broken or lost, especially on a long trip.

Is It Safe To Drink Rainwater?
Whether or not rainwater is safe to drink will depend on where you are and how you collect it. It is heavily affected by the atmosphere it passes through. For example, if you are near a city where there is air pollution, harmful particles might be present in the rainwater you collect (12).
The collection method plays a significant role in how safe rainwater is to drink. If you collect water that runs off a rooftop, it will likely gather contaminants from the surface, such as from bird droppings.
If you are determined to drink rainwater or have no other water source available, you can make it safer by boiling it for at least a minute before drinking it. If you are at a high altitude, boil it for three minutes.
What Is the Safest Way To Purify Water?
Boiling is still the standard option when it comes to purifying water cheaply and effectively. It is easily done using basic camping tools and it is very unlikely to go wrong. You can boil water anywhere as long as you have access to a heat source and a metal container to heat the water in.
Boiling can take a while, especially if you need to wait for the water to cool before drinking or storing it, but it will reliably kill the harmful organisms that are often found in wild water sources. Keep in mind that boiling won’t remove solid particles from water, so you should filter it using another method before boiling it. A basic cloth filter should do this effectively.
How Do You Purify Rainwater?
There are various ways to purify rainwater, depending on how contaminated it is and which filtration tools you have access to.
For example, reverse osmosis might be suitable if you need to purify large amounts of rainwater that could be contaminated with pesticides or heavy metals. This involves forcing pressurized water through specialized resin filters to remove the contaminants, which is one of the most effective methods currently in use.
Another common method is distillation, which involves boiling the water and then condensing it back into a liquid form in another container. The contaminants will be left in the original container, which is why this is one of the oldest and most effective methods of cleaning water in the world. It is possible to buy distillation kits, which provide an excellent way of thoroughly purifying water in the wild.

Can You Filter Lake Water to Drink?
There are several ways to filter lake water to make it suitable to drink. You might be wary of doing so because we are generally warned against drinking standing water in comparison to rivers and streams.
However, it is possible to remove impurities from lake water using advanced filtration techniques and state-of-the-art technology. You should always collect your water from the surface, as sediment will naturally fall to the bottom and be more concentrated down there.
One way to improve water quality is via reverse osmosis, a process where water is forced through a filter membrane that removes harmful substances including heavy metals and organic compounds.
Another option is UV purification, which uses UV light to kill pathogens and microorganisms that are present in the water. Most of the methods we have outlined in our article will help you make lake water more suitable for consumption.

Which Trees Purify Water Naturally?
Eucalyptus trees purify water naturally. These large, evergreen trees produce a chemical called Eucalyptol, a natural antibacterial and antiseptic agent.
Eucalyptol neutralizes the chlorine in tap water, making it easier to filter out microorganisms and other impurities.
This is why eucalyptus trees are often planted in areas where the water quality is poor or contaminated. They not only improve the overall water quality, but they will also protect local aquatic wildlife from toxic chemicals.

What Is the Best Material for Filtering Dirty Water Outdoors?
If you are in the wilderness, you might be able to create a rock and sand filter. This combination has been used for thousands of years and is still a very reliable way of making water cleaner.
The most popular way of doing this is by placing a cloth over an opening and then covering it with small rocks and sand of various sizes. When you pour water through the cloth, the sand and rocks will filter out the majority of contaminants and the water that flows through will be much cleaner.

Does LifeStraw Purify Water?
LifeStraw is a water filter that promises to provide drinkable water from any source. Designed for emergencies, the device can remove contaminants from water as it flows through the straw, making it safe to drink.
The product consists of two components: a hollow tube that contains activated carbon and fibers to trap particulates and an outer filter case that acts as a pre-filter for larger particles.
Thanks to its compact size and easy operation, LifeStraw is an ideal choice for hikers, campers, or anyone else who might find themselves without easy access to clean water. Just keep in mind that some people find these straws quite difficult to suck water through.