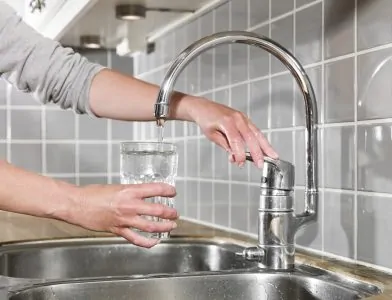
A water filter will provide you with healthy, fresh-tasting water. If you have one installed, you are probably already aware of the benefits, but the time will come when your filter needs to be replaced.
Changing your filter will keep your water odorless and free from contaminants, which is particularly important if your water isn’t treated before it reaches your home. With so many different systems available today, you might not know how how to change a water filter.
In this article, we will take a look at the most popular types of water filtration systems. We also explain the steps you will need to take to replace each one and keep your water tasting fresh and clean.
Key Takeaways
- Choose the right filter: Whole house, refrigerator, under-sink, and pitcher filters are common types.
- Turn off the water: Shut off the water supply before changing any filter.
- Follow specific steps: Each filter type has unique steps for replacement, so read instructions carefully.
- Maintain regularly: Replace filters every six months or as needed to ensure clean, fresh-tasting water.
Water Filter Options
When buying a water filter, you will have several types to choose from. These include:
- Whole house
- Refrigerator
- Under the sink
- Pitcher
Each type of filter has advantages and disadvantages, and you will probably find one type is more suitable for your needs than the others.
How to Change a Whole House Water Filter
A whole house water filter is the most complicated system, which is why it also requires the most care to replace. Read the following steps carefully to find out how to change a whole house water filter.
1. Be Prepared
Before you attempt to replace a whole house water filter, you should have these items to hand:
- New filter: Make sure you have the appropriate filter for both your system type and your local water supply.
- Filter wrench: This is a large wrench designed to fit over the filter housing. You need one that is designed for your filter, to ensure you can unscrew the unit safely.
- Strap wrench: This isn’t necessary to complete the installation, but a strap wrench can help overcome any difficulties when unscrewing the filter.
- New O-ring: Your old O-ring may look okay, but it’s worth replacing it alongside every filter change. A damaged O-ring will compromise the seal and allow leaks. Make sure you buy the right-sized O-ring.
- Silicon grease: Your filter is your water source, so make sure you use grease that is approved for use with food.
- Plumber’s tape: This reinforces the seal and prevents leaking.
Once you have everything you need, it’s time to change the filter.
2. Turn Off Your Water
There should be a shut-off valve located near your water filter. Make sure this is in the off position before you proceed with your maintenance.
It can be safer to shut off the water supply to your entire house during this process. This will prevent any accidents from occurring if you encounter any unexpected problems. If nothing else, it is good to know where the external shut-off is so you can turn it off if necessary.
Top Tip
3. Depressurize Your System
Remove the pressure in your plumbing before you proceed. To do this, open a kitchen or bathtub faucet, which will release the water pressure.
If you live in a multi-story home, we recommend using a tap on the ground floor, or whichever one is the lowest. This will drain as much pressure from the lines as possible. You can leave the faucet open for the duration of the filter change.
4. Prep the Water Filter Area
You are now ready to replace the filter. Newer plumbing setups usually have three dedicated valves to individually control the water filter’s supply. These valves can turn 90 degrees and should be clearly labeled.
Starting from the water filter, the first lever you reach will be the water filter’s intake. Turn this off to prevent water from entering the water filter during the process.
The next lever should also be turned to the off position to prevent any backflow when you remove the existing water filter.
The third valve is the bypass valve. If you have this valve, it is usually set to the off position. It allows the water in the system to make its way to the filter. During your filter change, open this valve, so any water in the line can move past the entrance to your water filter.
Make a note of which levers you adjust and how. Once your new filter is in place, you will need to return everything to how it was previously to get your system working again.
Keep In Mind
5. Open the Canister
It’s time to use that oversized plastic water filter wrench. Some people struggle during this step, for two main reasons.
The first reason is that the water filter was previously overtightened during its installation.
Some water filter systems, especially more expensive ones, are equipped with a red button. This button easily releases pressure from the unit. If you have one, press the button and see if any water trapped in the system is released. This could solve your problem.
If you are still having trouble opening the canister, grab your strap wrench. You don’t want to risk breaking your water filter wrench by applying too much pressure.
Quick Tip
Hard water can leave calcium deposits that make screwing and unscrewing the filter more difficult. Carefully clean away the deposits during the filter change to prevent future problems.
6. Assess the Filter and Clean the Housing
Once the water filter is detached, take a good look at the housing and the inner filter. Pour any water currently in the housing into your bucket. Inspect the water for any large pieces of debris or sediment.
After inspecting the water, turn to the filter. Hopefully, you have been maintaining your water filter properly and replacing the filters when necessary.
Your filter works when water flows into it. The bulk of the debris should be on the outside of the filter. Any debris found in the filtered water area could suggest a problem with your home’s pipes.
While a small amount of sand and sediment is normal, larger chunks of debris aren’t, and could call for a visit from a professional plumber.
Check Before You Change
7. Replace the O-Ring
Once you are done with the old filter, it’s time to replace the O-ring. This is the rubber piece between the filter bracket and the canister. It should be made of food-grade rubber, as you consume the water that passes through it.
To remove it, pry the O-ring open. Be careful not to damage the housing. If you are only adjusting the O-ring and then placing it back into the unit, take care not to stretch it out of shape. If you do, you might struggle to achieve the necessary seal to keep it watertight.
Before replacing the O-ring, clean out its track. A Q-tip is an excellent choice for this job. Don’t bother using cleaner here as it could damage the new O-ring.
Once the area is clean, you are ready to install your new O-ring. Apply some silicone grease directly to the O-ring using your fingertips. A little goes a long way here and you can always add more, so don’t apply too much.
Top Tip
8. Install Replacement Filter
You can now install the replacement filter. We recommend soaking your new filter before installing it. Place the filter into clean water and allow it to absorb the liquid to prepare it for installation.
Once the filter is soaked, place it into the canister. Do your best to keep it centered, and try to hold it level throughout the process. Placing it centrally will reduce the risk of damaging the top of the filter while installing it.
9. Repressurize the System
If you turned your water off at the main inlet, you can now go ahead and turn it back on. You have also turned off the individual valves to the water filter, so you will be able to repressurize it slowly.
Turn the water back on slowly. If you can, ask somebody else to turn on the water while you watch the filter. Open each valve a quarter turn and listen to the pipes. This will give you a good idea of how your system is functioning.
How to Change a Refrigerator Water Filter
You will know it’s time to replace your refrigerator water filter when your ice maker or water dispenser is no longer allowing water to flow freely. Thankfully, there isn’t too much involved in learning how to change the water filter in your fridge.
Different refrigerator models require different filters, so check your manual to ensure you order the specific part you need. There are two types of refrigerator filters: twist-in and push-in.
1. Turn Off the Water
Locate the lever that controls the flow of water to the refrigerator and ensure it is turned off before changing the filter. As this filtration system is well isolated, you won’t need to turn off your home’s main water supply.
2. Remove the Old Filter
If your filter is inside the refrigerator, simply press the eject button to remove it. With a twist-in unit, you will find the filter located in the grille at the bottom of the refrigerator. Turn the filter to the left to loosen it and remove the water filter from your fridge.
3. Insert Your New Filter
With a push-in model, align the arrows and push your new filter into place. Gently turn it clockwise until you hear it click into position. The button you pressed to eject the old filter should pop back out once the new filter is in place.
For in-grille units, position the filter and twist it until it is secure. Don’t forget to reset your filter light if your refrigerator has one.
Finally, turn the water supply to your refrigerator back on. It is ready to be used again until you next need to install a water filter in your fridge.
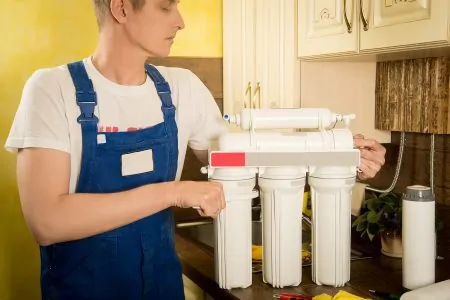
How to Change an Under-Sink Water Filter
An under-sink water filter is a great choice if you want an inline water filter for the water you receive from a specific outlet. There are many different models available, including sophisticated reverse osmosis systems, so it’s important to learn how to change your under-sink water filter.
1. Turn Off the Water
Before replacing this filter, you need to turn off the cold water to your sink. There should be a valve directly under the sink on the cold water hose. You could also consider turning off the water at your home’s main inlet, especially if you don’t have much plumbing experience.
Once the water has been turned off, open up the faucet. This will depressurize the system so you can move on to the next step.
2. Remove the Old Filter
Your under-sink filter is likely held in place by a mounting bracket. Remove the filter from the bracket.
If you have a self-contained unit, you can get rid of the entire housing and filter. Some units have a replaceable inner filter. If that’s the case, open up the external housing, remove the inner filter, and dispose of it.
3. Install the New Filter
If you have reusable sediment filter housing, make sure to take the time to clean it fully. This will remove any sediment, build-up, and other impurities that interfere with how your filter works. Use a different sink filled with soapy water for this.
Each model will have slightly different installation instructions. Self-contained filters generally screw back into the filter location. An inner filter may click into place at the base. Follow the manufacturer’s instructions for installation to ensure you do it correctly.
4. Complete Installation
Be sure to complete this step slowly. This will allow the system to repressurize gradually. It will also let you know if your water filter is leaking without it causing a flood.
With your new filter installed, reconnect the water hoses to the input and output of the unit. Once you have done this, you can turn the water back on.
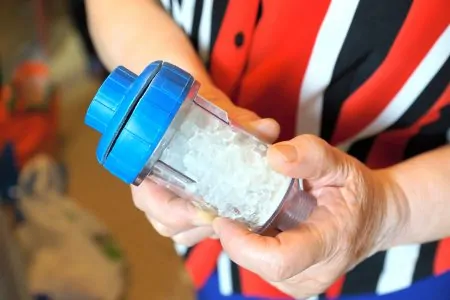
How to Change a Water Pitcher Filter
A pitcher filter is a great way to keep clean drinking water to hand. These filters are easy to replace and economical to buy. They are also perfect for camping trips and other times when you won’t have access to a larger filter.
1. Prep Your New Filter
Unpack your new water filter cartridge and read the instructions. Most pitcher filters are charcoal units, and you should soak them before using them. This will ensure your filter can interact with water effectively.
2. Remove the Old Filter
Most pitchers have a top opening where new water is poured in. A bottom section collects the filtered water. The majority of these pitchers have a cylindrical filter between the two, filtering the water before it drops down into the main container.
Open the pitcher lid and grasp the filter. Rotate it to loosen it, then pull it from the unit. There should now be an empty cylinder in the pitcher.
These filters are usually self-contained and made for single use. Dispose of your filter (ideally by recycling it), then proceed to the next step.
3. Replace the Filter
Your filter should have been pre-soaking according to the instructions. You can now take it out of the water and place it into the empty cylinder. Once it is in place, rotate it slightly to secure it.
You can now fill your pitcher with water. It is often worth filling the pitcher and discarding the water a couple of times to get rid of some of the initial taste. Once the water has been filtered, it is ready for drinking. Many pitchers keep track of when you should next replace your filter. Don’t forget to reset this timer after you change the filter.
FAQs

How Often Should You Replace a Water Filter?
There is no universal answer to how often you should replace your water filter. It depends on your water supply, how many people use the filter, and the type of filter you have installed. Generally, an inline water filter will need to be replaced every six months, but this depends on the manufacturer. If you have particularly unclean water, it could be sooner. A pitcher filter will be much quicker, often needing replacement every month.

What Happens if You Don’t Replace a Water Filter?
If you don’t replace your water filter, it will eventually lose its effectiveness. If your local water supply is not harmful, the filter won’t make it so, but it might start to allow sediment and foul tastes through. Depending on how many people use water from your filter, it could last a while longer than the recommended time between replacements. To be safe, you should follow the guidelines and keep your water tasting fresh.

Can Unfiltered Water Make You Sick?
If you receive your water from a municipal water supply, it should have already been treated effectively and should not make you ill without being filtered. There are also advantages to unfiltered water, such as small amounts of fluoride and minerals that are beneficial to your health. On the other hand, if your water is untreated before it reaches you, you should filter it to avoid ingesting harmful bacteria and other material.

How Much Does a Water Filter Cost?
The price of a water filter varies based on what type of filter you want. Reverse osmosis filters usually cost between $250 and $4,000, while ionization filters vary between $1,000 and $2,000.
Expect to pay between $50 and $500 for a carbon filter and between $1,000 and $4,000+ for a well-water filter.

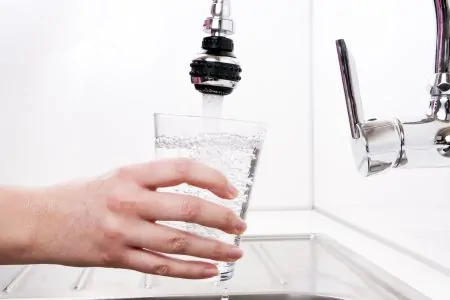
How Long Should You Run Water After Changing Filter?
You should usually run water about 5 minutes after changing the filter for the first time. However, this is not mandatory and depends on your filter type.
Take carbon filters, for instance. As the carbon block is transported and handled, some of its constituent parts may become dislodged inside your filter.
Because carbon can leave a bitter taste on your tongue, most people choose to put their water through a filter instead of drinking it, even though it won’t hurt them.

Why Is My Water Cloudy After Changing Filter?
If the water looks cloudy after changing the filter, that’s because of tiny air bubbles in the water.
When the cartridge in a high-end water filter is replaced, it is common for the water that is generated by the new filter to have a hazy appearance, almost identical to the appearance of a glass of skim milk.
This “cloudiness” occurs because the filter is filled with air rather than water during the manufacturing of a new water filter cartridge.
This causes cloudiness. It is common for the filter to generate cloudy water for anywhere between one and four weeks, and the length of this cloudiness is directly proportional to how frequently the filter is used.

Can You Get Sick from Not Changing Your Water Filter?
It is possible to get sick if you don’t change your water filter on time. Every time you take a drink of water from the refrigerator, you risk ingesting chemicals, bacteria, and particles which are dangerous if you do not regularly change your filter.
If you fail to change your water filter, it is usual to detect bacteria such as E. coli or fecal coliform in the water supply. These are two types of bacteria that are capable of causing severe harm to your health.

Why Do Water Filters Turn Brown?
Water filters can turn brown because of the sediments usually found in the water. Since the role of the filter is to trap impurities, these will eventually lead to the filters turning dark in color.

What Is the Best Filter for Drinking Water?
The APEC Water Systems ROES-50 Essence Series is considered the best filter for drinking water in 2022.
This filtration system has five stages of filtering, each of which works independently to remove 99 percent of all pollutants.
Filters require maintenance at varying intervals; the first three stages can last anywhere from six months to a year, while the final two stages can last anywhere from two to four years.
This filter effectively turns nasty tap water into proper drinking water using reverse osmosis. In addition to lead, this process can eliminate as many as one thousand more harmful elements in the water.
You can place it under the sink or even in the basement, wherever it’s more convenient.
In Conclusion
To enjoy the cleanest, best-tasting water possible, replace your water filter regularly. Mark your calendar so you can know you last changed it and when you will need to replace it again.
If you notice that your water is declining in quality before the usual six months or so, consider replacing your filter more frequently. Everyone’s lifestyle and water supply will be slightly different, so there is no universal answer as to how often you should change your filter.
After reading this guide, you should have a better idea of how to replace a water filter. Read it alongside the manufacturer’s instructions to ensure you install your new filter properly and keep enjoying your filtered water supply.