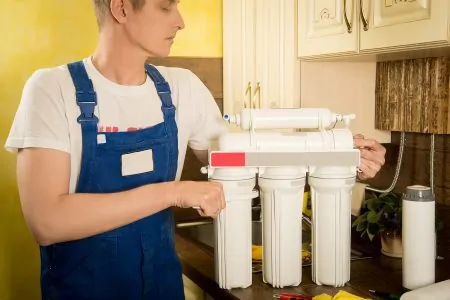
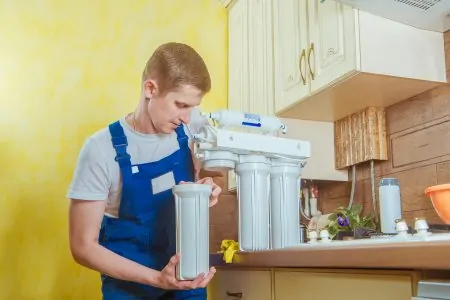
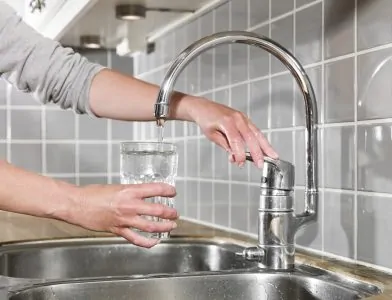
A water filter is a great way of removing harmful contaminants from your drinking water. It will also make your water taste better! There are numerous types of water filters available today, for everything from a water bottle to a whole house system.
However, it is also possible to make a DIY water filter at home. These filters are made using basic household items and could help you avoid spending a lot of money on replacements every six months.
This article will explore some of the creative ways that people have devised to filter your water. We will also explain how to make DIY water filters of your own, so you can enjoy cleaner water whenever you need it.
Key Takeaways
- Choose DIY water filters to save money and use household items.
- Simple DIY filters include solar water disinfection, boiled water, and charcoal filters.
- Advanced options include stove-top distillers and bio-filters for more effective purification.
- Remember to boil water after filtering for added safety and bacteria removal.
Why Choose a DIY Water Filter?
You might be wondering why anyone would choose a DIY water filter over a store-bought unit. A DIY water filter can save you money, especially if you end up using items that you already have around the house. More importantly, learning how to make a homemade water filter gives you extra flexibility.
Have you ever found yourself at a hotel or a friend’s house where the water quality is questionable? Perhaps your local authority has issued a warning when your drinking water is usually fine without a filter. This is when a DIY water filter can come in handy.
How to Make a Homemade Water Filter
Here are five tried and tested homemade water filter ideas:
1. Solar Water Disinfection
This is one of the easiest water filters to make, with the most important ingredient being a sunny day. It is an excellent choice for camping, picnics, and other off-grid activities. Just make sure you can find an area that receives plenty of sunlight.
What You Need
For this water filter, you will need:
- A container
We recommend using a food-safe plastic container. A 2-liter soda bottle or a 1-gallon milk container is perfect, as they will allow you to store the filtered water and drink it later.
Instructions
- Get started: Place some water in your chosen container.
- Cover: Lay a screen or mesh over the container to prevent new contaminants from getting inside.
- Filter: Leave the water to sit in the sun.
Once the water has been purified by the sun, it is ready for consumption. If your water was already clear, you should be able to drink it after two hours. If the water quality was inferior, allow it to sit for longer, even up to two days.
If the water is still cloudy, leave it for longer. After a couple of days, the majority of water should be ready to drink.
2. Boiled Water
Another reliable filtering process that you can use almost anywhere involves boiling the impurities out of your water.
What You Need
To successfully boil water to make it safe to drink, you will need:
- Heat source
- Cooking pot
- Water
It is also worth getting an additional container to store your filtered water for future consumption.
Instructions
- Warm things up: Start a fire or heat up your stove.
- Get ready: Fill your cooking pot with water.
- Begin the process: Place your pot over the heat and bring the water to a boil.
- Start the timer: Once the water is visibly boiling, allow it to continue boiling for at least three minutes.
- Sit back and wait: Remove the pot from the heat source and allow the water to cool.
The more water that is in your pot, the longer it will take to reach boiling point.
Boiling the water for longer than three minutes will not negatively affect it, but it will begin to evaporate and you will waste water unnecessarily.
Allow your water to cool down before transferring it to a storage container.
3. Charcoal Filter
You will need a few more ingredients to make a DIY charcoal water filter, but charcoal is an excellent option for filtration. Many commercial water filters also use it.
What You Need
Before you get started, gather the necessary items. You will need:
- Sand
- Charcoal
- 2-liter plastic bottle
- Cloth
- Cutting tool
Prepare the plastic bottle by cutting off the bottom using your chosen cutting tool. You might not have all of these items to hand. If you don’t have them but are considering using this filtration option in the future, it’s worth having these items on standby.
This is an excellent option if you need heavier-duty filtration but don’t have the resources to assemble a more extensive system.
Instructions
- Prep your materials: Remove the bottom of your plastic bottle.
- Begin assembly: Turn your bottle upside down so it can serve as a funnel; wide end up and narrow end down.
- Add your strainer: Line the hole on the neck of the bottle (inside the new bottom) with a cloth.
- First layer: Place the charcoal on top of the cloth.
- Second layer: Add sand on top of the charcoal.
Don’t Be Hasty
Your DIY water filtration system is now ready for water to be added to it. The sand filters out larger debris and contaminants.
Charcoal further refines the water as it passes through, removing smaller particles.
Finally, the cloth keeps the sand and charcoal from flowing through the filter with the water.
Using this filter as part of a catchment system is a great option when you’re working off-grid or camping.
If you like, you can add multiple layers of charcoal and sand to provide better filtering. Just remember to leave some space in the bottle for the water!
4. Stove-Top Distiller
If you want a more powerful form of filtering, you should consider creating distilled water. This setup is capable of making salty or dirty water drinkable. Knowing how to do this is a very useful skill, whether you need it for cleaning or drinking.
What You Need
This method does require some preparation. To get started, you will need the following items:
- Tea kettle
- Stainless steel hose
- Connecting valves
- Container
- Heat source
Instructions
- Get started: Put water in your tea kettle.
- Prepare your area: Place the kettle over the heat source.
- Create the connection: Attach the stainless steel hose to the spout of the tea kettle with the connecting valve.
- Finish assembly: Place the other end of the hose in the collection container.
- Warm things up: Activate your heat source.
This system works by boiling the water and evaporating it. The steam is sent through the hose and turns into condensation before being collected as distilled water in the container.
This method takes longer than the others, but you aren’t merely filtering your water, you are also distilling it.
A Few Things To Remember
5. Bio-Filter
The bio-filter is a more sophisticated version of the charcoal filter. With an additional layer to the unit, it will do everything your charcoal filter does — and a little more.
What You Need
You will need the following items to serve as your homemade water filter materials:
- 2-liter soda bottle
- Cutting tool
- Sand
- Activated charcoal
- Screen or mesh
Instructions
- Get ready to filter: Prepare the soda bottle by cutting off the bottom.
- Prep your filter: Turn your bottle upside down so it can act as a funnel.
- Add your liner: Line the inside of the new bottom (where the neck is) of the bottle with your cloth.
- Start the process: Place a layer of activated charcoal on top of the cloth.
- Begin layering: Add a layer of sand.
- Complete your filter: Create a layer of gravel at the top.
Experiment with how much of each substance you use in a layer. As with the charcoal filter, you can choose to repeat particular layers, depending on the water source. Just make sure to leave enough room for the water that needs to be filtered.
This is another good option for working as part of a catchment system. It will remove both large debris and microscopic particles. To ensure that any bacteria is removed, remember to boil the water after it has passed through this filtering process.
FAQs

How Do You Make a DIY Water Bottle Filter?
There are a couple of ways to make a DIY water bottle filter, explained in more detail in this article. For a simple solution, you can fill a bottle with water and leave it in the sun, using the sun’s rays as a natural filter. For thorough filtering, you can cut the bottom off the bottle, lay a cloth across the neck from the inside, then put charcoal and sand on the cloth to filter water as you pour it through.

Why Is Charcoal Good for Filtering Water?
Charcoal is naturally effective at filtering water because it will filter out the harmful substances in the water, including sediments and bacteria. At the same time, it leaves the positive contents of water where they are, including minerals that are beneficial to your body in small doses. This is why charcoal is commonly used in commercial filters, including pitcher filters.

Can You Make a DIY Whole House Water Filter System?
These DIY water filters are great for filtering water in small amounts and are perfect if you are without a clean water source for a while, such as on a camping trip. However, they aren’t very viable if you want to filter your main water supply. Some of them could be adapted for small houses; for example, you could create a larger version of a charcoal and sand filter to clean water for a cabin or outbuilding.

How Did Humans Drink Water Before Purification?
Some individuals in ancient times gathered rainwater in large containers, but the vast majority of people relied on water that had been naturally collected in rivers, streams, and the ground.
They might come across groundwater flowing by in rivers or springing out of the ground in the form of a spring. They might also search for water by digging quite far into the ground.
People worldwide came up with innovative water sources as their cities grew. Aqueducts were large, bridge-like structures that the Romans constructed to facilitate water transportation from remote springs into the city.

What is the Best Way to Filter Tap Water?
The best way to filter tap water is by using activated charcoal filters.
The carbon in the charcoal serves as a filter, allowing only the purified water to pass through while retaining any contaminants that may have been present, such as pesticides, chlorine, and certain types of microplastics.

Which Filtration Material Leads to the Best Drinking Water?
To determine which filtration material leads to the best drinking water, you must first know what the water is contaminated with. In general, water filters can improve the overall smell, taste, and look of drinking water and remove some contaminants.
If the water you are drinking includes lead, you will need to select a filter that’s been tested and proven to remove lead from the water.
Consider purchasing a carbon filter instead of single-serve bottled water because there is no valid reason to believe bottled water is higher quality than water drawn from the tap.
Making Your Own Drinking Water
You now know how to make a water filter and ensure water is safer for consumption, wherever you are, and whatever kind of water you have access to. Put your new DIY water filter to the test by comparing its results to water that has passed through a commercial filter.
You may be surprised by just how effective homemade water purifiers can be — and how easy it is to construct them using the items that are in your home or your local store. Being away from home is no reason to have to put up with poor water quality!