Are you tired of receiving energy bills that are unnecessarily high due to heat loss? If so, you are probably looking for ways to make your water heater more efficient.
One way to cut down on your wasted energy is with a hot water heat trap. These reduce the amount of heat that escapes from your hot water tank and are present in almost every modern tank water heater.
In this article, we will explore what a heat trap is, why it is important, and if it is worth having them in your heater. This should leave you in a better position to decide whether or not to buy a heat trap for your water heater.
Key Takeaways
- Water heater heat traps prevent heat loss and increase efficiency by reducing wasted energy.
- There are two main types of heat traps: traditional loop pipes and heat trap nipples, both using convection restriction.
- Heat traps can save you money on energy bills and are inexpensive and easy to install.
- Common heat trap problems include rattling noises, thermal expansion, flow restrictions, and loss of energy, often due to poor installation or faulty traps.
What Are Water Heater Heat Traps?
The first water heater heat trap was a basic copper tube shaped into a loop, which would trap the heat. Today, heat traps have evolved to become more effective.
They are still simple constructions, often consisting of a pipe shaped like a valve or a loop similar to the original design. However, modern systems incorporate metal elements called “nipples” — a small piece of piping with either a ball or flap sitting inside.
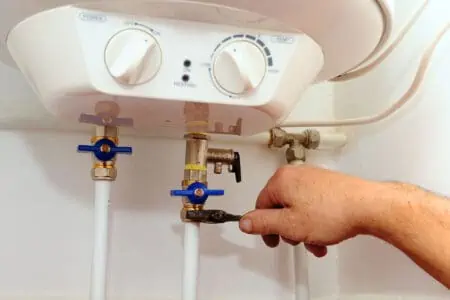
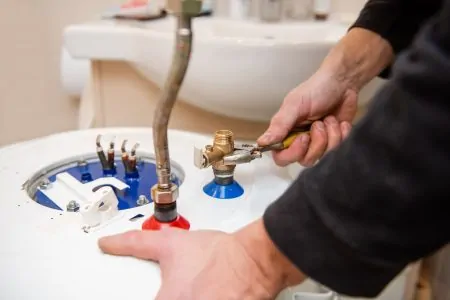
You place the heat traps on the water inlet and outlet pipes. Here, they prevent heat from escaping due to convection. You can install heat traps on gas-fueled or electric-powered water heaters.
How Do They Work?
There are two main types of heat traps: a traditional loop pipe and the newer heat trap nipple. Both restrict convection to prevent the heat in the tank from escaping.
Most storage-tank water heaters have something called a dip tube. This is the cold inlet pipe that feeds water into the tank.
In a trapless system, when the unit heats the water inside the tank, it expands and begins to rise through the pipes.
Eventually, heat escapes through the plumbing. This results in wasted energy as the boiler has to use more power to maintain the water temperature inside the tank. This sequence of events is known as natural convection, or thermosyphoning (1).
With a traditional heat trap, the inlet and outlet pipes are shaped in a loop, also called a “gooseneck.” The reshaped pipes trap the heat at the top while enabling the cold to pass through. As the hot water rises, the cold water sinks to the bottom where it is heated.
As we mentioned previously, newer variations of heat traps incorporate nipples. These are fitted with either a ball or a flap, which most experts now recommend. They are reported to be more effective thanks to their small size, and also significantly quieter.
The two types work similarly. A Teflon ball or heat trap flap will sit in the fittings for the hot outlet while a polypropylene ball or flap sits by the inlet. Teflon is used because it can withstand the corrosive nature of hot water.
As your water heater rests in standby mode, the heat traps rest in front of the valves. Here, they prevent heat from dissipating through the plumbing. When you turn on a hot water tap, the flaps or balls lift, allowing an unobstructed flow.
Are They Worth It?
A heat trap loop or heat trap nipple will significantly reduce the amount of wasted energy, with some estimates at as much as 60%. In terms of energy bills, you could save anything from $15 to $30 monthly (2).
Heat trap nipples also provide an additional benefit. Most will create a dielectric union that may extend the lifespan of your anode rods. This connection is even capable of reducing corrosion inside steel tanks.
Heat traps have been found to be so beneficial that some states require water heaters to have them built-in. Many homeowners choose to retrofit their old unit rather than replace it.
As a bonus, heat traps are generally inexpensive and very easy to install. Even if you don’t want to perform the installation yourself, professionals generally don’t charge much to do it.
Common Heat Trap Problems
Heat traps aren’t entirely safe from issues. The most common water heater heat trap problems are rattling noises, thermal expansion, flow restrictions, and loss of energy. The root of these problems is usually poor installation or a faulty trap.
Let’s take a closer look at each problem in more detail, plus some solutions.
1. Thermosyphoning, Convection, or Thermal Expansion
Thermosyphoning is a problem that occurs when something is wrong with the heat traps. It’s easy to spot as the cold water might run warm or even hot.
If there is an issue with the heat traps, they cannot function and hot water can enter the cold pipes. If you suspect this is happening, try to feel the inlet pipe. If it’s hot to the touch, you know there’s a problem with at least one of the heat traps.
Some DIY homeowners might suggest that you remove the plastic cap. This is not recommended as the ball can fall into the system and cause noise or flow restrictions.
Doing this can also interfere with the dielectric heat trap effects. In turn, this decreases the corrosion resistance of the anode rods, leading to rust in the tank.
The Solution
Remove the existing pipes and replace them with longer, more flexible lines. Then, create a gooseneck heat trap and wrap the pipes with thick insulation.
Doing this can prevent thermosyphoning. However, thermal convection can still occur. If bending the pipes isn’t an option for you, you can install a non-return valve. Be aware that doing this can result in increased flow resistance.
2. Flow Restriction
Flow restriction is an issue that can occur with ball heat traps. This happens when the ball gets stuck inside the heat trap. The ball is unable to move when you open a hot water tap and the flow is restricted. This problem is usually caused by improper installation of the traps.
The Solution
There are two simple solutions. Either loosen the ball with a screwdriver or replace it with a flap.
3. Noise Problem
This problem is again caused by the ball. When you use hot water, the pressurized water will flow around the ball inside the heat trap. The ball naturally vibrates which creates a rattle noise. This issue is more common if you have a recirculation pump that creates more pressure.
This might not be an issue if your water heater is placed away from any living areas.
The Solution
Most experts recommend that you simply replace the ball with a flap. This will also reduce natural convection by trapping more heat.
Should You Buy One?
The choice is yours but considering that heat traps are inexpensive and can save you money in the long term, it’s probably a good idea to get one.
That said, heat traps aren’t without their problems, as we have established. Unless it’s a legal requirement in your state, this comes down to personal preference.
Tips for Installing Heat Traps
Installing heat traps is easy and requires only basic plumbing knowledge. If you don’t have any experience or want to install a loop heat trap, we recommend calling a professional. They might be able to bend the pipes and will avoid any mistakes.
Heat trap nipple kits are easy to find in most hardware stores that sell water heater parts. You can also purchase them from larger manufacturers such as Rheem, A.O. Smith, and Bradford White, among others.
The installation process is pretty straightforward. You will need the following:
- A non-contact circuit tester.
- Large bucket.
- Pipe wrench.
- Heat traps.
- Teflon tape or another joint compound.
- A towel.
Here’s a brief explanation of how to install heat traps.
1. Turn the Power Off
Start by locating the appropriate breaker in your breaker box and moving it to the “Off” position. Use the non-contact circuit tester on your heater to check for electricity.
2. Drain the Tank
Drain the tank of approximately 2 gallons of water. You can use the drain valve or relief valve.
3. Remove Nuts From Pipes
Use a wrench to remove the pipe-connecting nuts from the pipe nipples at the top of the unit.
4. Apply Teflon Tape
Fasten Teflon tape or another joint compound to the heat traps, then insert them into the hot and cold pipes. If your heat traps are color-coded, remember — red for hot and blue for cold.
5. Tighten and Finish
Grab the pipe wrench and tighten the nuts.
Do not apply the wrench to the thread, only to the steel body.
Turn the power back on and you should be ready to go.
FAQs

What Is a Heat Trap on a Water Heater?
A heat trap prevents prevents heat loss that occurs naturally when hot water is left in your heater’s tank for a prolonged period. If you have a large tank, this kind of heat loss can be costly and heat traps greatly reduce the amount of wasted energy. They are an important part of making modern water heaters as efficient as they have become.

Do I Need a Heat Trap on My Water Heater?
Depending on where you live, you might be obligated to have a heat trap on your water heater by law. This varies from state to state, so take the time to find out whether or not you are affected. Even if you don’t legally need to have a heat trap, it’s still worth the relatively minor investment, given how much money it could help you save in the long term.

What Are Dielectric Nipples?
Dielectric nipples are important because plumbing systems often use metals that should not be placed in contact with each other. Some metals undergo a corrosive reaction when placed together, such as copper and galvanized steel, and dielectric nipples bridge the gap between the two while keeping them separate from each other. Dielectric nipples are an inexpensive solution to a potentially very costly problem.

Do New Water Heaters Come With Heat Traps?
New water heaters come with heat traps. Heat traps are pipe loops or valves that go on your water heater’s hot water outlet and cold water inlet. They permit cold water to get into the heater while ensuring that hot water flows out of the tank.

How Do I Know If My Water Heater Has a Heat Trap?
The best way to know if your water heater has a heat trap is to search for it, as it should be visible. Heat traps can be found either at the tank’s entry or exit.

What Does a Heat Loop Do?
Adding a heat loop is a method that has been around for a long time, but it is still an efficient way to prevent hot water from escaping the tank due to convection.
Trap That Heat
Water heater heat traps are essential if you want to minimize heat loss from your heater. They are available as “nipples” with a flap or ball, or you can bend the pipes to form a “gooseneck.” Heat traps will greatly reduce the amount of heat that can escape while in standby mode. This significantly improves the efficiency of your hot water tank.
They are relatively easy to install and inexpensive to buy. They aren’t immune to issues, but these are generally simple and easy to fix.