Nobody wants lukewarm water coming out of their faucets. You can’t perform household chores, and showering is no fun at all. Testing the water heater element is the only way to solve the issue.
We show you how to test a water heater element, show you the possible causes of the problem, and explain how to replace it.
Key Takeaways
- Spot the signs of a faulty water heater element, such as no hot water or small amounts of hot water.
- Locate the water heater element, usually found in the middle or at the base of the tank.
- Test the water heater element using a digital multimeter, with readings between 10 and 30 Ω indicating a functioning element.
- Replace the faulty element if needed and maintain your water heater regularly to prevent future issues.
Bad Water Heater Element Symptoms
Before we get down to checking your water heater element, you need to know how to spot the signs of a problem. Here are a few pointers:
Symptoms of a Faulty Upper Heat Element
- No hot water.
- Water fails to heat to temperature.
Symptoms of a Faulty Lower Heat Element
- Small amounts of hot water.
- Hot water flows faster than normal.
Whether you have a faulty upper or lower element, the end result is you get lukewarm water or none at all. It is always advisable to check your heater elements yearly as part of your maintenance schedule to prevent problems from occurring.
Top Tip
It’s best to check the elements when performing a tank drain because it saves you wasting water and time.
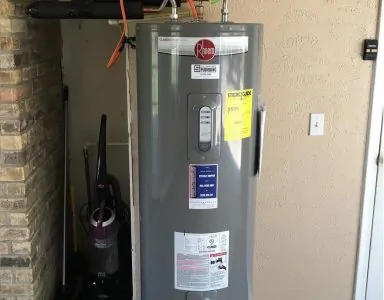
Where is My Water Heater Element?
A standard water heater has two elements: one located at the tank’s base and the other in the middle. The idea is that it heats the water faster and spreads the load evenly throughout the tank.
How to Test a Water Heater Element
So, you’ve had enough cold showers to last a lifetime and today is the day you sort out the problem. Before getting into the details, you will need some specialist tools.
How Many Ohms Should a Heating Element Have?
Your heating element is measured in ohms (represented by the omega symbol Ω). The ohms determine the resistance in the circuit, which then determines if your element is working.
If your water heater is 3,500 watts, it should register 16 Ω, while 4,500-watt heaters read between 12 and 13 Ω. For 5,000-watt units, expect a reading of 10 or 11 Ω.
What You’ll Need
- Screwdriver.
- Digital multimeter.
- Non-contact voltage tester (optional).
1. Shut Down the Power
Before you embark on any maintenance of your water heater, always shut off the power. You will need to locate the circuit breakers, typically located in garages and basements. Each breaker should be labeled to make it easier to isolate different circuits in your home.
If you don’t have labels, shut off the entire system.
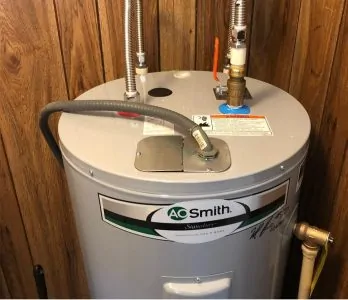
2. Remove the Thermostat Cover
You should see one or two metal covers on the side of your water tank. They protect the thermostat and heater element. Use a Phillips screwdriver to remove the cover screws and remove the cover.
3. Remove the Insulation and Plastic Cover
Inside the chamber is a layer of insulation and a plastic cover. Remove the insulation and unclip the plastic shield from the metal fasteners. Take care when doing this, as you will need to replace them after checking the element.
4. Locate the Heating Element
The heating element lives inside the tank, so what you can see is the end base plate. You should have two wires running from the base, connected by two screws. These screws are what you will test using the multimeter.
The thermostat is rectangular, with several wires protruding from the top.
5. Check the Power is Actually Off
Perform a voltage test using a non-contact voltage tester. It resembles a pen and will beep when it comes near a live wire. Sometimes they light up rather than beep.
If this happens, it means you still have power coming to the water heater. Turn the center dial on the multimeter to alternate current (V~), and place the red wand on one screw and the black on the other.
If it gives a reading between 110 and 130, you still have a live connection. Swap the probes around and test again to get a reliable reading.
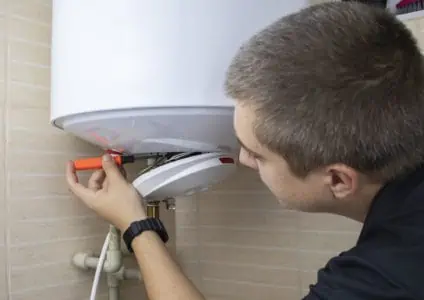
6. Check the Element
Switch the dial on the multimeter to the lowest ohms setting and touch both probes to the two screw heads. The ideal reading is between 10 and 30 Ω. If you get a lower reading of 0 or 1, the element is faulty and must be replaced.
If you have two elements, you will need to locate the protective plate and perform the same test. Ideally, you want the same readings as before.
7. Replace the Insulation and Panel
Once you’ve determined where the fault lies and replaced the heating element, you will need to replace the plastic panel, insulation, and metal cover. Now turn the heater back on at the breaker box. You will have to wait while the water heats up.
Can You Test a Water Heater Element Without a Multimeter?
You can test your heating element without a multimeter. The simplest method is to call out a pro to do the test. This is expensive, but at least you get the job done right the first time.
You can also use a non-contact voltage tester. It lights up or beeps when it detects a live connection, but it won’t give you the accuracy of a multimeter or the targeted information.
You can also check it with an ohmmeter; although most multimeters come with an ohm setting, so you may as well do it with a multimeter. The good news is they are readily available in every hardware store and online at sites like Amazon.
Causes of Water Heater Element Failure
So, we’ve covered the symptoms of heater element failure, but what are the causes? Let’s look at the most common reasons why your hot water tank fails.
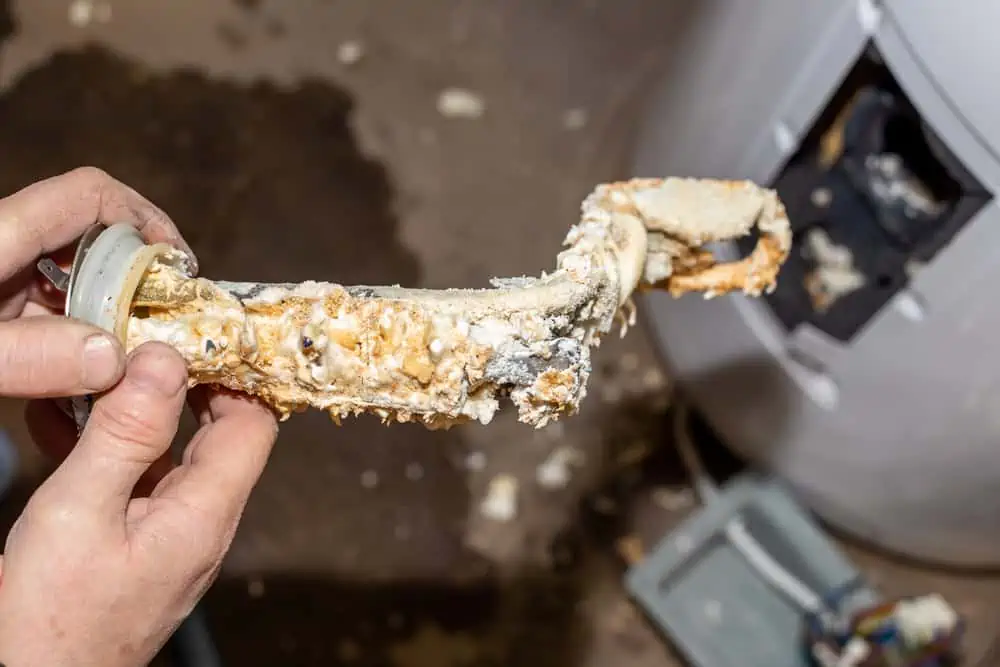
Sediment Build-Up
Mineral deposits are more acute in hard water areas, but they still occur in soft water. Sediment settles on the tank’s base, and when your electric element heats, it bakes it to the surface.
Over time, the scale hardens and reduces the effectiveness of your heating element. This results in your water heater working overtime to produce hot water and a soaring energy bill.
A simple solution is to flush the water tank regularly to wash away the sediment.
Air Pockets
Trapped air causes your heating elements to burn as though they weren’t immersed in water. Water protects the copper and allows the heat to transfer without the element burning through.
Bleeding the air from your system should form part of your maintenance schedule.
Power Surge
A sudden burst of power can cause the copper element to burn out. While copper is robust, coming second on the resistance chart, it is still voltage rated, so if the load exceeds the required voltage, it burns out the element.
While copper is robust, coming second on the resistance chart, it is still voltage rated.
Faulty Thermostat
The thermostat tells your heating elements to heat the water to the desired temperature. It comes equipped with an override switch that kicks in when the temperature exceeds the limit. If that switch is faulty, the heating elements get hotter and burn out.
Broken Element
Your heating element has a shelf life of around eight years on average, depending on how heavily it gets used and the mineral content of your water. In hard water areas, the lifespan may reduce to five years, while it might increase to 10 years in soft water areas.
You may experience a loss of hot water, or the water inside the tank cools more rapidly. If you only get cold water, both elements have likely blown.
Tripped Fuse
Before you start ripping out your bad heating element, it’s worth checking the breaker cupboard for a tripped switch. More often than not, it has simply blown due to a power surge for safety. It stops the system from overloading and burning up.
The solution is often just to flick the breaker switch back to the “on” position.
How to Change a Water Heater Element
So, you’ve done all your checks, and the culprit for your icy-cold shower is the heating element. The answer is to change it for a new one, so here’s a quick guide to help you.
- Switch off the power at the breaker circuit.
- Isolate the water supply.
- Drain the tank.
- Open the panel that covers the element and remove the insulation.
- Unscrew the bad heating element and remove it.
- Insert a new element and screw it in place.
- Replace the cover and insulation.
- Close the drain valve and switch on the water supply.
- Reconnect the power to the tank.
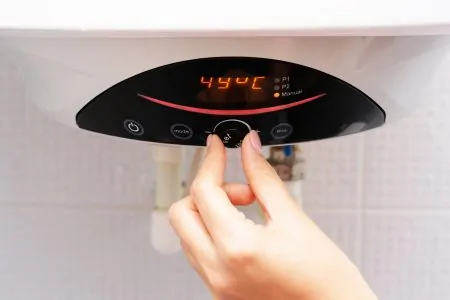
- Set the thermostat at the required temperature and wait while the water heats.
FAQs

Can a Water Heater Test Good But Be Bad?
This is a tricky question to answer. The heater element can only give false readings if the wires are faulty or there is a loose connection. For accurate results, always test the connections with the multimeter and then swap the probes around and test again.

How Easy Is It to Replace an Electric Water Heater Element?
It’s pretty simple to replace an electric water heater element as long as you drain the tank and have the right tools. It should only take an hour or two, and it doesn’t require a high degree of skill.

How Much Does a New Heating Element Cost for a Hot Water Tank?
It depends on the brand, tank size, and heating element. Some are as low as $10, while others cost $100. The average price seems to be between $20 and $40.

Should I Replace Both Water Heater Elements?
Only if you’ve tested both and they are faulty. Otherwise, replace the broken one and leave the working element in situ.
It’s All Element(ary)
So, now you know how to test a hot water heater element, and it’s not nearly as scary as you first thought. You will need to invest in a multimeter, but they are reasonably priced and help you out in so many ways around the home.
Things we don’t understand can always seem daunting until we strip away the mystery. The next time your water heater serves you cold water, roll up your sleeves and get to work.