The water that comes from your hot tap is supposed to be warm, but you might have noticed that it is suddenly much hotter than normal. If adjusting the temperature doesn’t help, there could be a problem.
Thermostats are an essential part of a modern water heater, monitoring your water temperature and ensuring it stays exactly how you like it. When your thermostat no longer works effectively, it might be time to replace it.
Depending on your water heater, replacing its thermostat shouldn’t be too complicated. In this article, we will explain how to replace a water heater thermostat and tell you some of the things you should look out for.
Key Takeaways
- Turn off power and check thermostats: Use a multimeter to test the upper and lower thermostats for voltage, indicating whether they need to be replaced.
- Remove and replace thermostat: Carefully remove the faulty thermostat(s) from the retaining clips, and replace with a new, identical thermostat.
- Reconnect wires and set temperature: Reconnect the circuit wires to the correct screw terminals and set the desired water heater temperature (recommended 120°F).
- Replace insulation and cover: Put back the insulation and compartment cover, turn the power back on, and allow the water heater to heat up for at least two hours before testing the water temperature.
How to Replace a Water Heater Thermostat
Replacing a thermostat is fairly easy but the process differs slightly depending on how many heating elements your tank has. It’s also worth troubleshooting some other potential issues first.
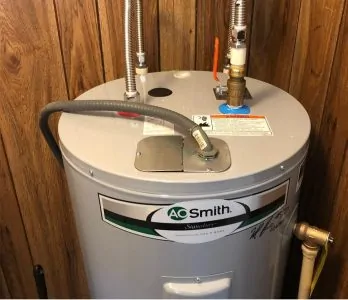
Most current electric water heaters have two heating elements. Smaller units and older models usually only have one.
For each heating element, your tank has a matching thermostat. If your unit uses a dual-element system, it requires two compatible thermostats. A single-element system only requires one.
Because most water heaters have a dual-element system, we will focus on that type.
Recommended
Here’s what you will need to replace the thermostat:
- A multimeter or voltmeter.
- Screwdriver.
- Flat blade screwdriver.
- Differently-colored tapes or bandages.
- A new thermostat, identical to the previous one if possible.
1. Turn the Power Off
Start by turning off the power supply to the water heater. Do this at the breaker box by turning the breaker to the “Off” position.
2. Check Upper and Lower Thermostats
Before you replace the thermostats, you should check them first. For this, you will need a multimeter and a screwdriver.
Start by removing the access panels and the insulation that covers the elements. Then, using the screwdriver, turn the upper thermostat to its highest setting. Then, turn the lower thermostat to its lowest setting.
Turn the power supply to the water heater back on. Use your multimeter or voltmeter to check whether or not a voltage is coming through. Place it on the two wires above the reset button — it should read 240 volts.
Next, place the multimeter on the terminal screws to the upper element. If there is no power, the thermostat is broken and you should proceed to replace it. If there is power, check the lower thermostat.
Follow the same steps as above but turn the lower thermostat to its highest setting and the upper thermostat to its lowest. Then, check for voltage.
If there is voltage, you can just replace the upper thermostat. However, if there are no signs of power, replace them both. It isn’t a bad idea to replace both thermostats if one is no longer working, so you won’t need to do them separately.
3. Turn Off the Power Again
Once you have established that one or both thermostats need replacing, turn off the power to the unit again. Do not proceed with the water heater still connected. Use the voltmeter or multimeter to check for any voltage.
4. Remove Bracket
The thermostats are secured by specialized brackets that keep them in close contact with the tank. This is so they can accurately detect the water temperature.
Use the shaft of the screwdriver and carefully but firmly pry the bracket out one side at a time. Pry one side of the bracket while you slowly twist the thermostat upward. This will prevent the bracket from locking.
Don’t worry about the bracket if you accidentally break it. They are also easy to replace.
5. Disconnect the Wires
Disconnect the wires one by one. When you disconnect a wire, place a small piece of colored tape or band-aid on the wire and its matching terminal.
Use a different color for each wire and terminal set. This will help you return them to the right spot later.
6. Remove the Thermostat
This is probably the hardest part and you should be very careful. Start by loosening the screw terminals holding the thermostat in place. Remove each wire from its terminal.
Spend some time looking at the thermostat. You will see that it sits in retaining clips. Gently remove it from the clips and set it aside.
Watch Out
7. Install New Thermostat
Remember that the new thermostat must be identical to the one it is replacing. If it isn’t, it might not work as well, if at all.
Grab your new thermostat and place it into the retaining clips. Position it so it rests firmly against the tank wall.
Reconnect the circuit wires to their correct screw terminals. Be sure that they match the original wiring. This is where the color-coded tape comes in handy — remember where each color should go and remove the tape.
Use your screwdriver to tighten the screw terminals — make sure they’re tight.
8. Set the Temperature
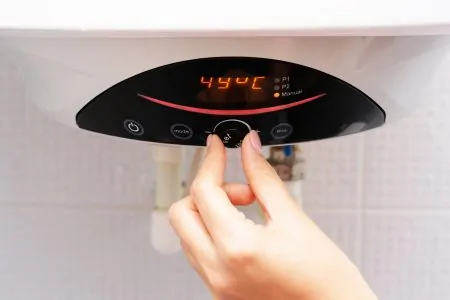
Once the thermostat is in place, set the temperature. Use the flat-bladed screwdriver and gently turn the thermostat to your desired temperature.
Remember
9. Replace Insulation and Cover
You’re almost done! Replace the insulation so it covers the thermostat and electrical components. Place the compartment cover back on and secure it with the screws.
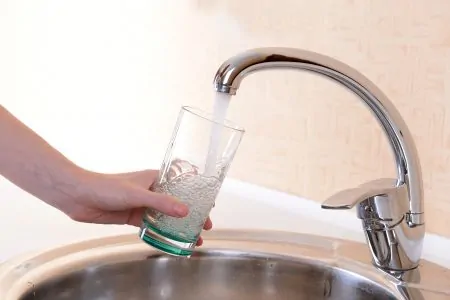
Turn the power back on at the breaker box and give the unit at least two hours to heat up. After two hours, you can test the water temperature by turning on a hot faucet.
Are All Thermostats the Same?
Electric water heater thermostats are relatively simple devices. They work using a bi-metal switch at the back of the thermostat, which senses the temperature of the tank.
When the water inside the tank reaches the set temperature, the bi-metal switch pops in or out. This either connects or disconnects the unit to prevent the water from overheating. Usually, when you adjust the temperature, you hear a click; this is the metal switch adjusting the temperature.
Although it’s best to find an identical replacement, this won’t always be possible. If you can’t find a thermostat identical to your previous one, check how many elements are in your unit and the voltage they use before looking for a compatible one.
If there is no label indicating your heater’s voltage, refer to your owner’s manual. If that fails, most residential water heaters are 240 volts.
Another reason why you should always try to replace the previous thermostat with an identical one is the difference between dual and single.
Thermostats used on a single-element water heater have only two screws on the right side. Thermostats for a dual-element tank, on the other hand, have three screws on the right side.
A dual-element thermostat may still work on a single-element tank. However, a single-element thermostat cannot be used on a dual-element unit.
Gas Water Heater Thermostats
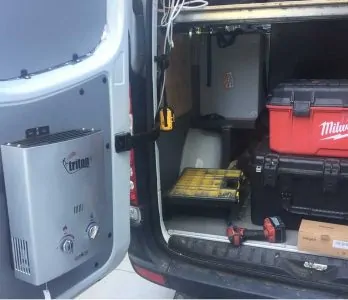
If you have a gas water heater, replacing the thermostat is less straightforward. Firstly, the thermostat on a gas unit is integrated into the gas control valve. This means that, if the thermostat isn’t working properly, you will need to replace the whole gas valve.
Although you might be able to do this if you are experienced, we advise against it. Changing the gas control valve involves dealing with multiple gas connections. If something isn’t connected correctly, the consequences could be dire.
That is why we recommend contacting a heating contractor or your local plumber. In some cases, a faulty gas valve is so expensive that it warrants a new unit. This is especially true if the unit is near the end of its warranty or severely damaged.
Not a Faulty Thermostat?
If your water is suddenly overheating and you know it isn’t the thermostat, check your water. One of the most common causes of scalding hot water is a water supply with high mineral content.
If your local area has hard inlet water, this is definitely worth keeping in mind. Hard water is groundwater that is high in minerals such as magnesium and calcium. These minerals tend to gather around the heating elements, where they eventually create a crust and cause corrosion.
In turn, this restricts the heating elements from working properly. Over time, they are forced to work harder and eventually overheat and burn out (2). This will also cause the water inside the tank to overheat.
Fortunately, you can fix this by replacing the heating elements and regularly flushing out your unit.
FAQs

Where Is the Thermostat on a Hot Water Heater?
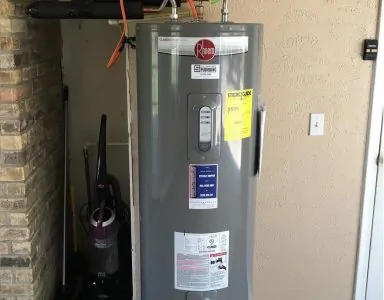
Thermostats will be in different places depending on whether you have one or two on your heater. Modern electric heaters generally have two thermostats, one at the top and one at the bottom of the tank. The two thermostats work together to ensure your hot water is at the right temperature. Smaller heaters and older units often have one thermostat, so its location can vary. Check your owner’s manual if you aren’t sure where they are.

Are Water Heater Thermostats Universal?
Water heater thermostats are not universal, which is why it’s best to try and purchase one that is identical to your existing thermostat. You will need a thermostat that is suitable for your water heater’s voltage. Depending on whether your heater has one or two heating elements, they will also vary. Thermostats for single-element heaters have two screws on the right side, while thermostats for dual-element heaters have three.

How Long Should a Water Heater Thermostat Last?
There is no universal answer to how long a water heater thermostat should last, just as there is no simple answer to how long the heater itself will last. It is possible that the thermostats on your heater will last the entire lifespan of the unit, in which case you will never need to replace them before replacing the entire heater. With a properly maintained heater, you can expect the thermostats to last close to a decade, if not longer.

How Do I Know If My Thermostat is Bad on My Hot Water Heater?
To know if you have a bad water heater thermostat, you will have to check it using a multimeter and a screwdriver. Signs that you might be dealing with a faulty thermostat include no hot water, not enough hot water, and slow hot water recovery.

What Happens When a Water Heater Thermostat Goes Bad?
When a water heater thermostat goes bad, you will have no hot water. The consequences depend on which thermostat failed: the upper or the lower one.
You will not have any hot water if your upper thermostat is damaged. Because the higher thermostat is responsible for controlling the lower thermostat, if the higher one breaks, the lower thermostat will never activate.
When you have problems with your lower thermostat, you will either discover that the hot water is only lukewarm or quickly run out of hot water.
This occurs because the upper thermostat signals the heating element to heat the water in the upper part of the tank. But the same thing doesn’t happen on the bottom part of the heater.

How Much Does It Cost to Replace a Water Heater Thermostat?
It usually costs between $150 and $200 to replace a water heater thermostat. A new thermostat won’t set you back more than $20 or $30. When you factor in the cost of the labor, you’re probably looking at somewhere around $200.
In Summary
Knowing how to tell if a water heater thermostat is bad and replace it is relatively easy if you have an electric unit. Simply switch off the power, disconnect the wires and carefully remove the thermostat, then replace and connect. However, if you have a gas unit, call a professional — gas is dangerous to work with and there is no room for error.
If you are replacing your electric thermostat, remember to buy an identical one. If you have hard inlet water, make sure you know how to test a water heater element first. They could be the source of the problem and not the thermostats. Proper maintenance will prevent a lot of water heater problems, or at least delay them significantly.