Nothing is more relaxing than a hot shower to wash the day’s stresses down the drain and leave you invigorated. But there’s a problem! Your shower valve is faulty and needs replacing.
We show you how to replace a shower valve, talk about the costs, and discuss whether replacement is better than repair.
Key Takeaways
- Replacing a shower valve can be a simple DIY task, but call a plumber if you have any doubts or if there is corrosion.
- Identify the type of shower valve you have (pressure-balanced, thermostatic, or diverter/transfer) to ensure compatibility.
- Costs for replacing a shower valve range from $50 to $400, depending on if you do it yourself or hire a professional.
- Shower valves typically last between 20 and 30 years, but hard water areas can reduce their lifespan.
Can I Replace a Shower Valve Myself?
Replacing a shower valve is pretty simple. Even if you have limited plumbing skills, you should be able to complete the task in a couple of hours.
Before ripping out old fixtures and doing more damage than good, ask yourself if you have the confidence to change the shower faucet. Enthusiasm may be a good substitute for experience, but it will not protect you against shoddy work.
Whenever you work with water and plumbing, the biggest risk is water damage. If your new control mixer leaks because you failed to seal the connections, it could lead to more extensive repairs.
Shower valve replacement may be simple, but call a plumber if you are in any doubt.
Word Of Caution
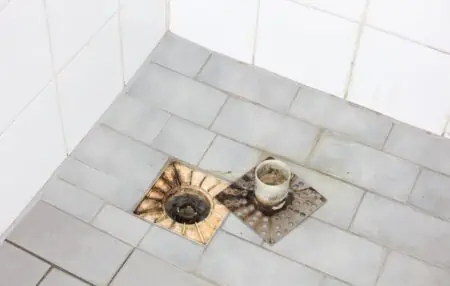
If the valve and pipework are corroded, you may need to call in a plumber to investigate the nature of the leak.
How to Find a Replacement Cartridge
You can pick up a replacement shower valve in most plumbing and hardware stores. You can also buy them online at sites like Amazon. This SR Sun Rise Valve Kit and Shower Head Assembly is an excellent example of a combination set for your shower.
How to Replace a Shower Valve
Before we get into the nitty-gritty of how to change a shower faucet, we need to gather the tools for the job.
What You’ll Need
- Screwdriver.
- Long-nose pliers.
- Standard pliers.
- Drop cloth.
- Utility knife.
- Wrench.
- Replacement shower valve.
- Metal valve clip.
- Caulk.
- Bowl.
- Pencil.
Preparation
Lay the cloth at the base of the shower or bathtub. It prevents small screws and washers from falling down the drain. It’s also good to grab a bowl to store the smaller components safely.
Now that you’ve protected the shower against losing small components, it’s time to break out the tools and get to work.
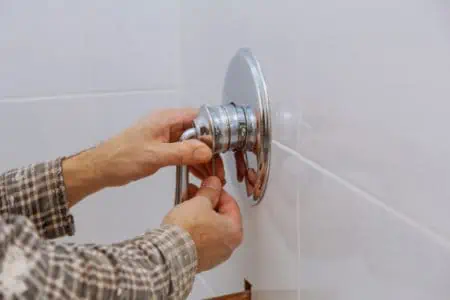
1. Remove the Shower Handles
Pop off the covers from the front of the handles to reveal the mounting screws. Grab the screwdriver and twist them counterclockwise. You may need a flat-head screwdriver or a Phillips, depending on the screws you have.
Place the screws in the bowl and remove the handle from the stem. The handle may need some gentle persuasion to free it from the stem. Some shower valves have an access panel, which gives you access without removing a tile.
2. Remove the Trim Plate
You will need to remove the two screws securing the trim plate to lift it free from the wall. Place the screws in the bowl for safekeeping. Now is a great time to clean the plate to remove years of grime and soap scum build-up.
Top Tip
Soak the escutcheon plate (another name for the trim plate) in white vinegar to bring it back to almost new condition.
3. Scrape Away Old Caulk
You may need to cut away a layer of old caulk to remove the trim plate. Use the utility knife to score through the caulk. Lift off the plate and scrape out the remaining caulk attached to the edges.
Removing the Old Valve
Now that you’ve exposed the broken shower valve behind the wall, it’s time to remove it and swap it for a new one.
1. Isolate the Water Supply
Find the shut-off valve on the water supply pipe leading to your shower and twist it to the off position. The water stops are typically located to the left and right of the valve. Some shut-off valves have a screw that you turn counterclockwise with a flat-head screwdriver.
Take Note
If you have an older system without isolator valves, you will need to cut the supply to the house at the main valve.
2. Clean the Access Hole
Use the utility knife to cut away any obstructions to give you better access to the faulty valve. Remove the old caulk from the edges of the hole. You may get away without cutting the wall if you already have a 12-inch square opening to maneuver around the valve.
Keep In Mind
The hole will still need to be small enough to accommodate the trim plate, so mark the size on the wall with a pencil.
3. Take Out the Valve Clip
Use the needle-nose pliers and pull out the valve clip. Lay it in the bowl with the other screws for safekeeping. If your valve clip is still in good condition, you can reuse it on the new valve.
Some valves have a retaining nut that requires you to remove it with a wrench.
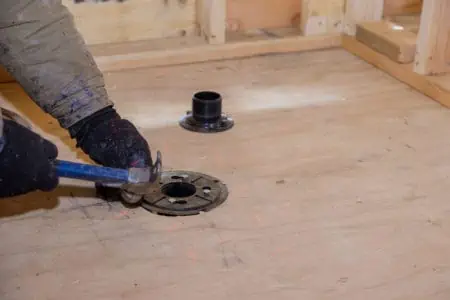
4. Remove the Valve
Using the pliers, grip the end of the valve and pull it out of the wall. If the valve offers resistance, spray it with lubricant and wiggle it free. Place it in the bowl.
Installing the New Valve
With the faulty valve removed and the access hole cleaned of debris, it’s time to install the new cartridge. Here’s how to do it:
1. Install the New Valve
Grip the new valve with the pliers and push it into the housing where the old valve once sat. Use gentle force to slide it all the way in. If you struggle, you may have incorrectly sized the new valve.
Refer to the manufacturer’s handbook to get the correct sizes or compare it to the old cartridge.
2. Insert the Metal Valve Clip
Pick up the valve clip with the long-nose pliers and insert it back into the slot at the end of the valve.
3. Turn the Water Back On
If you isolated the water supply using the valve on the supply pipes next to the shower, turn it on. Do the same if you shut the water off at the main valve.
Safety First
Turn the water on slowly because water will flood out if you have a leak, or the valve is incorrectly installed.
4. Replace the trim Plate
Place the trim plate over the access hole and insert the two screws. Tighten them with the screwdriver. Apply a caulk line to seal the joint between the plate and the wall and smooth the caulk with your finger.
Now screw the shower handles back in place and replace the screw caps.
5. Test the Shower
Turn on the shower faucet and check that there are no leaks and the shower water flows as it should.
Different Shower Valve Types
Essentially, there are three main types of shower valves: pressure-balanced, thermostatic, and diverter/transfer. You will need to identify the one that meets your shower’s needs.
You can install any of the three mentioned, but check they are compatible with your shower assembly. The easiest way to replace your shower valve is to swap like for like. That way, you don’t have all the hassle of making your new shower cartridge fit.
Let’s take a look in more detail:
Pressure-Balanced
Pressure-balanced valves are among the most commonly used. They work by balancing hot and cold water, and the water pressure.
Thermostatic
Thermostatic valves help you select the right temperature setting to maintain consistent heat.
Diverter and Transfer
Diverter valves allow you to transfer the water flow between your bathtub and shower attachment. It works by shutting off the water to the source when you turn the single handle, letting the water flow to the desired location.
How Much Does It Cost to Replace a Shower Valve?
You will pay between $50 and $400, depending on whether you replace the valve yourself or hire a pro. The lower figure just covers the cost of the new valve, although the type and brand you buy affect the price. The higher figure includes the cost of the part plus labor.
When to Repair Vs. Replace a Shower Valve
Not all problems lead to your shower valve. Sometimes, showerheads get scaled up, which affects the water flow, and rubber washers perish, causing the showerhead to leak. These issues are simple and cost-effective to remedy.
Repairing your shower valve is possible, especially when the problem is minor. It could be grime, a perished rubber seal, or it simply needs cleaning. These are all straightforward fixes and should be the first port of call.
The cost of replacing the valve is much less than you might think, so once you’ve explored the obvious solutions, replace the valve.
You may also have rusted components that hint at a bigger problem. Call in a plumber to investigate further and make the necessary repairs.
FAQs

How Long Does a Shower Valve Last?
You should expect between 20 and 30 years of service from your shower valve. Your valve gets more punishment in hard water areas. It reduces the lifespan considerably compared to soft water areas.

Can a Shower Valve Be Leaking Behind the Wall?
Your shower valve could be leaking behind the wall. Look for damp patches, fluctuating water temperatures, and reduced water flow.

How Do I Know If I Have a Single Handle Shower Valve?
This question answers itself. Your single-handle shower valve will have a single handle that controls the water flow, just like a diverter valve.

Can You Change Shower Valves Without Removing Tiles?
It depends on where the valve is located. You may need to remove the cover plate to reveal the access hole beneath. This won’t involve removing a tile because the access has already been cut.
Some shower setups have an access panel that you remove to get to the valve. You should only need to remove a tile if you are ripping out the entire valve and the housing.
Final Thoughts
Knowing how to install a shower valve is pretty straightforward if you have some degree of skill, knowledge, and the right tools. Before you dive in with both feet, it’s worth investigating other options like a scaled showerhead or perished rubber washers.
If you lack the skills or confidence, you should call the pros for peace of mind.