A shower drain installation may seem like a simple task, but get it wrong, and the results could be disastrous. Your shower will be out of action for days, and you may need to call in the pros.
We show you how to install a shower drain, offer hints and tips, and explain when you should call in the pros.
Key Takeaways
- Understand the different types of shower drains: Compression, solvent-glued, and tiled drains each have unique installation processes.
- Prepare the drain components: Separate the strainer, strainer body, gasket, and drain body, and ensure the drain pipe is correctly sized.
- Follow step-by-step installation instructions: Depending on the type of drain, follow the appropriate steps for installing the shower drain and sealing it properly.
- Call a professional if needed: If you’re unsure about any part of the installation process, it’s best to call in a professional to avoid potential issues and damages.
Shower Drain Assembly Diagram
Whenever you start a DIY project, it’s worth getting to know the subject matter. Shower drain plumbing is no exception. Let’s look at the components of a shower drain assembly.
Strainer
The strainer sits at the top of the shower drain to catch hairs and other debris. They can be metal or plastic and are removable, so you can clean them.
Strainer Body
The strainer body is relatively self-explanatory. It holds the strainer in position and screws into the drain body. Water flows through the strainer, into the body, and out through the two-inch waste pipe.
Gasket
The gasket is a rubber ring that seals the connection between the strainer and the drain body. Without it, your shower will leak like a sieve.
Whenever you inspect your shower drain, always check that the gasket is in good condition. Rubber perishes and becomes brittle over time.
Drain Body
The drain body attaches to the strainer body via a threaded connection. Beneath the body sits the solvent weld that is PVC glued to seal the joint.
Take Note
The solvent weld assembly is only relevant for solvent-glued drains. They are not present in compression drains.
Drain Pipe
Finally, the two-inch drainpipe feeds from the base of the drain body and carries the wastewater to the sewer. Below the waste pipe sits the trap, which is a U-shaped pipe to prevent creepy crawlies and sewer gasses from entering your home.
Different Types of Shower Drains
Different types of shower drains are available, and knowing which one is right for your drain configuration is crucial.
Compression Drain
Without access below your shower base, you will struggle to fit the drain. A compression drain is the answer to all your problems. They install via a screw that you tighten from the top with a screwdriver.
It compresses a rubber gasket that creates a watertight seal as it tightens. Installing one of these drains is a lot easier than solvent-glued drains.
Solvent-Glued Drain
A solvent-glued drain is a plastic assembly that seals to the drainpipe via PVC pipe adhesive cement, like this Oatey Primer and Cement Kit.
You are more likely to see this type of drain assembly in new homes because they are cheap and versatile. To fit this drain, you need access to the base of the shower. It may mean cutting through a ceiling to expose the underside of the shower tray.
Tiled Drains
A tiled shower drain consists of a perforated soakaway that resembles a tile. It sits flush with the tiles on the shower base, draining the water to the waste pipe. You can only use this drain for tiled shower bases.
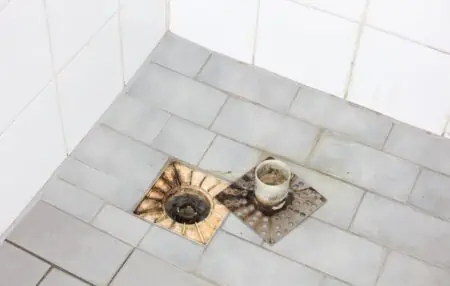
How to Remove an Old Shower Drain
Before you fit your new shower drain, you’ll need to get to the existing drain. How you do it depends on the type of shower drain assembly, but before you get started, let’s gather the tools.
What You’ll Need
- Lubricant.
- Old towels.
- Two pairs of long-nose pliers.
- Screwdriver.
1. Loosen the Drain
Your old drain has been sitting there for many years, so it might be gunked up. Use WD-40 to both clean it and lubricate the threads. Before applying the lubricant, dry the drain with the old towels.
Spray the WD-40 liberally around the inside of the drain and wait five minutes while it gets to work.
2. Check for Screws
Remove the strainer, and you will probably see two screws that secure the drain in place. Use the screwdriver to remove them and set them down somewhere safe.
3. Insert the Pliers
Insert the nose-end of the pliers at opposite sides of the drain. Grip them tightly and twist the drain counterclockwise to unscrew it. If the drain doesn’t budge, apply more lubricant.
Keep twisting until the drain comes free.
How to Install a Shower Drain
Knowing how to attach a shower drain is simple enough, but it depends on the type of drain you are using. Let’s look at each in more detail.
Compression Style Drain
Of all the different drain types, this is the easiest to install. It’s also the one to choose when you have limited access to the drain rough-in because it screws from the top.
What You’ll Need
- Silicone caulk.
- Caulk gun.
- Pliers.
- Hacksaw.
- Drain assembly.
- Phillips screwdriver.
- Flathead screwdriver.
1. Check the Drainpipe
The drainpipe should extend from 3/4 to an inch below the shower drain lip. Check the manufacturer’s instructions before cutting the pipe to size. You may also need to perform a dry fit run beforehand.
If you need to adjust the height of the pipe, use the hacksaw to cut it to size.
2. Connect the Drain
Run a line of silicone caulk around the lip of the shower drain flange. Insert the drain assembly into the opening and attach the rubber gasket over the threaded drain body beneath the shower tray.
Thread the drain body onto the gasket and use the pliers to seal it tight.
3. Clean the Caulk
As you tighten the drain body to the strainer body, the caulk squeezes out beneath the top flange. Use a clean rag and wipe away the excess.
4. Fit the Compression Drain
Position the shower tray so that the drain aligns with the hole. Insert the rubber drain gasket into the hole, ensuring it wraps around the drainpipe. Next, thread the compression nut into the opening and tighten it using the tool supplied.
As the screw tightens, the gasket creates a watertight seal against the waste pipe. Finally, install the strainer grate and wait 24 hours while the silicone cures before using the shower.
Take Note
Compression drains typically come with a tool that enables you to tighten the drain from inside the assembly.
Solvent-Glued Drain
This type of drain is better when you have access below the shower tray. Solvent-glued drains are typically PVC, making them cheap to buy and install. Modern homes increasingly use these drains, especially new housing developments.
You can use this drain with steel, fiberglass, and acrylic shower trays.
What You’ll Need
- Hacksaw.
- PVC primer and cement.
- Caulk and gun.
- Drain assembly.
- Rags.
1. Cut the Pipe to Size
Cut the waste pipe with the hacksaw so that it sits flush with the subfloor level of the shower.
2. Prepare the Drain Assembly
Take the drain components apart, taking special care to keep the rubber gasket in a safe place. A solvent-glued drain comes in several parts, including a strainer, upper body, and glued PVC female socket.
3. Install the Upper Body
Run a line of caulk around the inner edge of the drain flange. Press the upper body into the access hole of the shower tray and hold it steady while the caulk bonds.
4. Secure the Drain
Flip the shower tray and secure the bottom of the drain assembly. Place the rubber gasket and friction gasket over the threads on the upper body of the drain assembly.
Now, screw the lower body of the drain to the upper male thread. Keep tightening until the silicone caulk squeezes out beneath the flange. Remove the excess caulk with an old rag.
5. Glue the Assembly to the Waste Water Pipe
Coat PVC primer around the outer edge of the drainpipe and inside the corresponding socket of the lower drain body. Now, spread solvent glue on the same surfaces and connect the two sections.
Do this immediately because the solvent glue will set quickly. Leave the adhesive to cure for 24 hours before attempting to work on the shower.
How to Install a Tile Shower Drain
Tile shower drains are for use on tiled shower trays. These drains come in three parts and are installed at varying stages of the shower fit-out. They are typically square and sit flush with the tiles on the base.
Let’s find out what tools you will need.
What You’ll need
- Solvent glue.
- Silicone caulk.
- Caulk gun.
- Waterproof membrane liner.
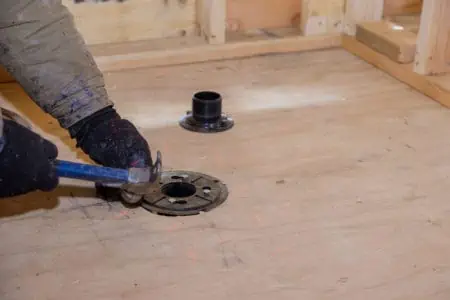
1. Fit the Bottom Flange
Use solvent glue to attach the bottom flange of the shower drain to the drainpipe. Once completed, the flange is encased in a concrete floor that slopes 1/4-inch per foot toward the drain opening.
Once the concrete sets, a waterproof membrane is installed over the floor and the lower flange. Seal the flange to the liner using silicone caulk. Now, cut the liner away from the drain hole.
2. Fit the Middle Flange
Insert the middle flange into the drain opening and lay it on the membrane. The liner is now tightly held in place by both flanges.
Top Tip
Pour water over the liner and check for leaks. It’s better to do it at this stage than when the drain is fully assembled.
3. Install the Strainer Assembly
The strainer assembly extends above the shower floor. It has a male thread that screws into the female thread of the middle flange.
Follow the manufacturer’s instructions to set the height of the flange to accommodate the tile thickness. Now you are ready to install the thinset mortar and tiles.
How to Install a Drain Without Access Below
If you lack access to reach below the shower tray, you will need to install a compression drain. These drains have a screw that you can access from the top. When you twist it, it creates compression to tighten the drain to make it watertight.
Apply a silicone seal to the underside of the top flange. Press it to the shower tray floor and then drop the rubber gasket over the male thread. Attach the female thread of the lower drain body to the drainpipe.
Fit the strainer assembly and drop in the compression screw. Twist the screw, and the drain creates a watertight seal. Wipe away the excess caulk with an old rag.
When to Hire a Professional
Fitting a new drain in your walk-in shower enclosure is pretty straightforward. You only need a basic grasp of plumbing. You also need very few tools, most of which you’ll have in your toolbox.
If you lack the skill or will to complete the task, it would be better to call in the pros. After all, you can’t mess about with plumbing because a small leak could lead to bigger issues.
It’s also a great idea to call in the pros when you spot wet patches beneath the shower floor. It could be a more significant plumbing problem that is beyond your capabilities.
Shower Drain Installation Tips
Let’s take a leaf out of the pro handbook and make life easier. What are the secrets of installing a shower drain? Let’s find out!
Measure the Height of the Drain
If you install a compression drain into a molded shower tray, the height is less important. However, fitting a tile drain is crucial because it has to sit flush with the surrounding tiles.
You may need to allocate at least one and a half inches to allow for a layer of thinset mortar and the new tiles.
Dry Fit First
A great way of checking your drain fits and is compatible with your drainage pipes is to do a dry fit. That way, you can iron out any issues before using PVC cement.
Buy a Dedicated Shower Drain
If you try and fit a tub drain, you will fail. Tub drain pipes are typically one and a half inches, whereas shower drain pipes are two inches. Tubs have narrower pipes because they have a greater capacity to hold water.
Showers are shallow, so they have reduced water capacity, meaning the water needs to drain away faster.
FAQs
Let the Drain Take the Strain
Changing a shower drain is not rocket science. It requires a structured approach and an understanding of the drain components and how they work. It will also save you a tidy sum on plumber’s fees.
Once you’ve grasped the basics, you won’t look back.