The advantage of owning a 2-piece toilet is the tank is detachable. It means that if the tank ever needs replacing, you can do it without having to swap the entire toilet. This is better for your bank balance and convenience.
We show you how to replace a toilet tank in easy steps, tell you what tools you will need, and answer your most common questions.
Key Takeaways
- Gather the right tools and materials, such as a new toilet tank, pliers, adjustable wrench, and plumber’s putty.
- Turn off the water supply and drain the tank by flushing the toilet a few times.
- Locate and loosen the mounting bolts, then remove the old tank carefully.
- Attach the new tank, making sure the gasket and rubber washers create a watertight seal. Tighten the bolts and reconnect the water supply.
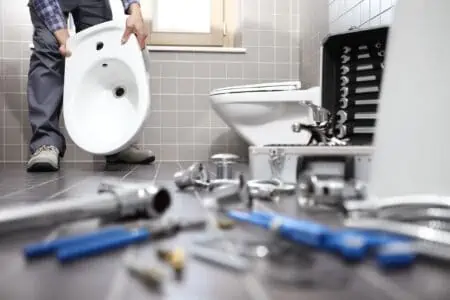
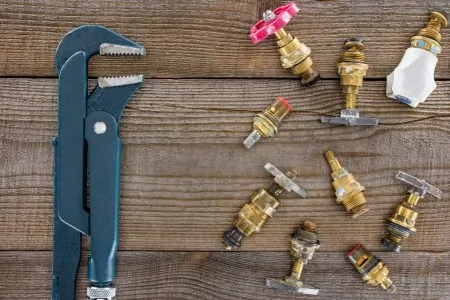
What You Need
Before starting any project, you should always plan ahead and make sure you have the correct tools and materials before you start.
Tools
- Pliers.
- Adjustable wrench.
- Caulk.
- Caulk gun.
- Screwdriver.
- Putty knife.
- Plumber’s putty.
- Bucket.
- Dry towel.
- Paper towels.
Material
- New toilet tank.
- New washers and bolts (may come supplied with the tank).
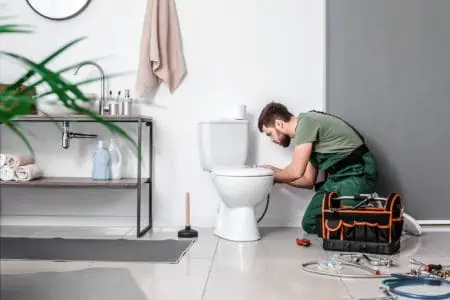
How To Replace a Toilet Tank
So, now you have the tools and equipment, it’s time to get started.
1. Isolate the Water Supply
Before attempting anything, you need to disconnect the water supply. It is typically located below the toilet, where the water pipe meets the base of the tank. Turn the valves counterclockwise until the water is no longer flowing.
Now you are ready to drain the tank.
2. Drain the Tank
Now the water is isolated, flush the toilet a couple of times to drain the water from the tank. Because it is no longer connected, it will empty without filling up. Lift the lid and place it on the towel.
When you are sure that the majority of the water has flushed away, grab the paper towels and bucket and mop up the residue at the base.
3. Disconnect the Water Pipe
Locate the plastic bolts under the tank that connect the water pipe to the cistern. Twist it counterclockwise until it loosens enough so that the pipe pulls free. Make sure you place the bucket beneath the loosened pipe to catch the last few drops of water as you remove it.
If the bolt is too stiff, you can use the adjustable wrench or a pair of pliers for added grip.
4. Loosen the Bolts
Grab the adjustable wrench and the screwdriver and clamp the bolts that join the base of the tank to the toilet bowl. Now start to loosen them using the screwdriver. When the nuts are loose, you can remove them and store them somewhere safe.
Repeat the process until all the bolts are free.
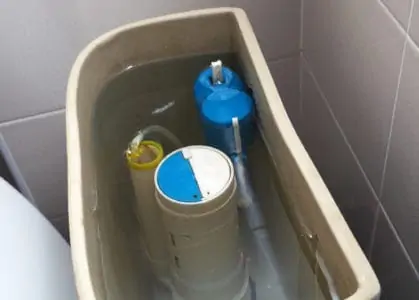
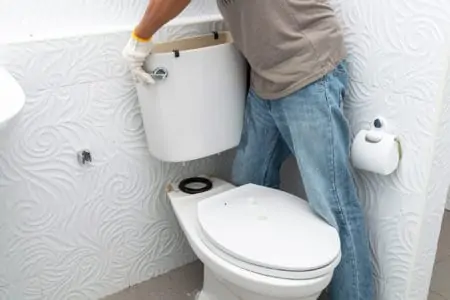
5. Remove the Tank
Now all the bolts are out, it’s time to lift the old tank free. Hold the bottom of the tank with both hands and lift it so that the gaskets disconnect from the base. Place the tank on the towel for safety and to catch any water drips.
Before going any further, check that the gasket on the new tank fits the old one. Hopefully, this is one of the first things you did when ordering the replacement water tank. Assuming the two match, you need to attach the gasket to the base of the new tank, so there is a watertight seal.
6. Fix the Rubber Washers
Insert the bolts into the new cistern at the base and slide the rubber washers on the protruding parts to create a cushion between the tank and the bottom of the toilet.
Make sure you push the washer all the way to the end of the bolt thread, as this helps to create a watertight seal between the tank and the base of the toilet. For extra security, place a small amount of caulk on the washer.
7. Fit the New Tank
Grab the new tank, and using both hands, offer it up to the bolt holes on the base of the toilet. Line the bolts up and ease them in place, making sure that the gasket lines up with the hole.
Be careful not to be too rough, as you could risk cracking the ceramic base or the tank itself. Some tanks have additional rubber washers at the end of the bolts for extra protection against leaks.
You can use the plumber’s putty to smear around the joints so that it dries, creating a watertight seal.
8. Tighten the Bolts
First, twist the nuts by hand until they are hand-tightened, then grab the adjustable wrench and give them a few extra turns until they are tight. Don’t overtighten because you could risk cracking the body of the toilet.
Luckily, the rubber washer also cushions the pressure of the nuts as well as containing any leaks.
9. Reattach the Water Pipes
Now reconnect the water supply pipe, using the plumber’s putty to create a watertight seal and tighten the plastic nut, giving it a few extra twists with the pliers.
10. Turn on the Water
Open the water supply valve and let the water tank refill. Make sure all the joints are dry so you can check for water leaks. If all looks good, you have been successful.
FAQs

Do You Need To Replace Toilets?
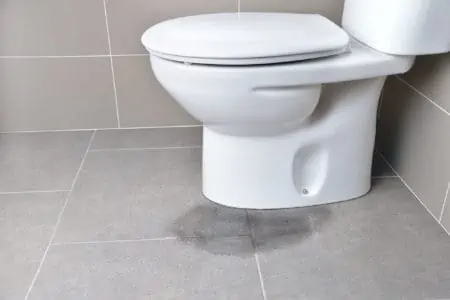
You do if they are showing signs that they leak or there is a crack in the body of the toilet. Most leaks come from seals, gaskets, and joints where the rubber that connects the tank with the base perishes.
The problem comes when you try to get spares for your older toilet, and they no longer exist. If that happens, you may be forced to replace the entire unit unless you can mix and match parts.

Can You Replace Just the Tank of a Toilet?
You can replace just the tank if you have a 2-piece toilet. The tank and base are separate. So when you need to replace the tank, it simply unscrews and lifts off. It’s a bit more involved than that, but essentially, that’s how they connect with the base of the toilet.
That is the advantage of a 2-piece toilet. You can repair either the base or the tank separately, although the irony is that you are more likely to spring a leak with this type of toilet because it has seals that create a watertight connection between both elements, and they are prone to failure.

How Do I Measure a Replacement Toilet Tank?
When replacing the toilet tank, you want it to have the same height as the old one, or you might find it doesn’t fit the space. This is especially important if you have the toilet recessed into shelving.
Take a tape measure and place the end on the floor, at the base of the wall where the tank will sit. Now extend the tape to the top of your existing tank and mark down the measurement, and that will tell you how high the tank needs to be. Alternatively, make a pencil mark along the line of the top of the tank and use it as a template for the new tank.

How Often Should You Replace Your Toilet?
A lot depends on how much use the toilet gets. Family toilets get more punishment than single or couples using the lavatory, so it stands to reason that it will wear out faster. Actually, the internal components are more likely to give up first rather than the toilet.
The average toilet should give you 10 to 15 years of trouble-free use before it starts to show signs of wear and tear.

Can You Mix and Match Toilet Bowls and Tanks?
You can as long as they are compatible. Make sure the bolt fixings match and the gaskets line up, but the best solution is to get the tank from the same make and model to avoid any future headaches.

Is It Expensive To Replace a Toilet?
Replacing a toilet can be expensive, but it depends on what your budget is. Some toilets cost as little as $150, while others can be $1,000 plus. And then you need to factor in the cost of the plumber unless you intend to fit it yourself.
A DIY installation is the cheapest way to get the job done.