Toilets last for years, but that doesn’t mean they don’t need updating. Fashions change, styles change, and modern toilets use a lot less water. So, your toilet installation may be necessary for eco reasons.
Strap in as we show you how to install a toilet, remove the old toilet, and offer top tips for better outcomes.
Key Takeaways
- Replace wax ring when removing old toilet: Wax rings last up to 30 years, but they should be changed when replacing a toilet to ensure a proper seal.
- Don’t overtighten floor bolts: Tighten bolts until snug, but avoid overtightening to prevent cracking the porcelain and causing leaks.
- Level the toilet with shims: Use plastic shims to level the toilet on an uneven floor, ensuring a proper fit and preventing wobbling.
- Caulk around the toilet base: Caulking around the base of the toilet keeps it looking neat and prevents debris buildup, as recommended by the International Plumbing Code.
Can I Install a Toilet Myself?
The simple answer is yes. You can install a toilet by yourself. However, only consider the DIY route if you have the skills, tools, and time to complete the task.
If the thought of installing a toilet leaves you cold with fear, call in the pros. Why not source a local handyman if the price tag is too steep for a plumber. It could be a good middle ground in getting someone experienced at a lower price.
If you are redesigning your bathroom and moving pipework and plumbing, it is probably better to consult a plumber. If you are swapping like-for-like fittings, then the process is much simpler.
Toilet Installation Diagram
So, the time has come to bid farewell to that avocado-colored toilet. Before you get to work, take time to learn the parts of a toilet assembly and what they do.
Let’s start at the base and work our way up:
Closet Flange
This part of the toilet system seals the toilet to the outlet pipe and secures it to the floor. The wax ring sits inside the flange and seals the toilet’s base to the sewer pipe. It stops water and sewer smells from seeping into your home.
The bolts sit on either side of the flange and slot into pre-drilled holes in your toilet to mount it in place.
Toilet Bowl
The toilet bowl contains water. It’s where your waste matter goes to be flushed down the drain. The water serves a dual purpose: to help carry waste matter away and reduce smells.
Inlet Holes
The inlet holes deliver the flush from the toilet tank to the bowl. Water squeezes through the inlet holes and swirls around the bowl when you pull the lever.
It washes fecal matter from the bowl’s surface and drains it down the outlet pipe.
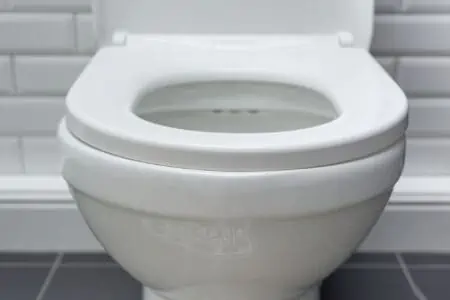
Toilet Seat
The toilet seat sits on top of the bowl and gives your posterior a more comfortable experience when you sit down. It has two bolts that connect it to the bowl, enabling you to raise or lower the seat.
Seats have a cover that closes to keep smells at bay. When your partner has eaten a hot curry, you’ll be thankful for this.
Inlet and Gasket
For two-piece toilets, the tank attaches to the base via bolts. The tank has an inlet at the bottom that aligns with the bowl and is sealed via a gasket. This is where tank water makes its way into the bowl via the inlet holes.
The tank is bolted tight to prevent leaks between the tank and bowl.
Fill Valve
When you flush the toilet, it empties water from the tank. The fill valve refills the tank to be ready for the next flush.
Flapper Valve
The flapper sits at the base of your toilet, sealing the water inlet. When you flush the toilet, the flapper lifts to allow water to flow into the bowl. When the tank empties, the flapper falls back into place to seal the inlet.
Lift Chain
The lift chain attaches to the lever arm (connected to the flush lever) and the flapper. When you pull the handle, the chain lifts the flapper to send water to the bowl.
Ball Float
Ball floats rise and fall with the water levels inside the tank. They trigger the refill valve when the water levels get low enough and shut it off when it reaches the set level.
Overflow Tube
If the tank fills too much, the excess water falls down the overflow tube to stop your toilet from flooding. While the overflow tube is crucial, your toilet shouldn’t overfill because the ball float should cut off the supply when it reaches the correct level.
It could be a sign that the float is incorrectly set or the fill valve is faulty.
Water Isolation Valve
The water tap sits on the wall behind the toilet. Turn it one way, and it closes off the supply, and the other opens the valve. The water supply line is attached to this valve, delivering water to the toilet tank.
Flush Lever
The flush lever sits on the tank’s exterior and is connected to a pivoting arm that operates the lift chain and flapper.
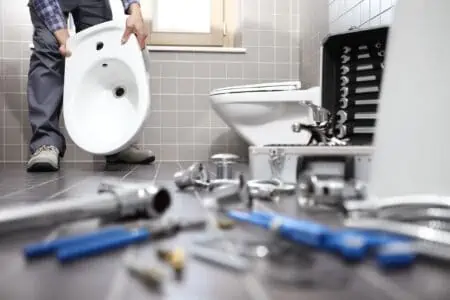
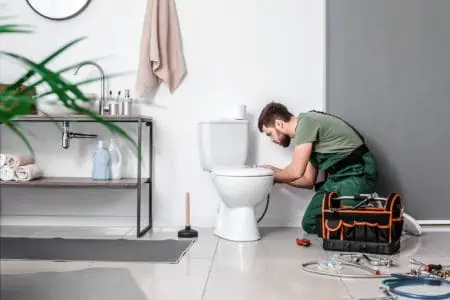
How to Remove an Old Toilet
Before installing the new toilet, you’ll need to rip out the old one. You will need the right tools and equipment to do this successfully.
What You’ll Need
- Utility knife.
- Putty knife.
- Screwdriver.
- Adjustable wrench.
- Pliers.
- Rubber gloves.
- Old towels.
- Old newspaper.
- Sponge and bucket.
- Small cup.
1. Isolate the Water Supply
Turn the water supply valve to the right and isolate the water. Newer valves only require a quarter turn, but older ones may need several twists. Use the screwdriver if your valve has a rotating nut instead of a knob.
Take Note
Lay the old towels around the toilet’s base to catch drips. Also, lay the old newspaper on the floor to the side of the toilet. This is where you will stand the old toilet and tank.
2. Flush the Toilet
Flush and wait while the water drains from the tank. When it empties, lift the tank’s lid and mop out the last residues of water, squeezing it into the bucket.
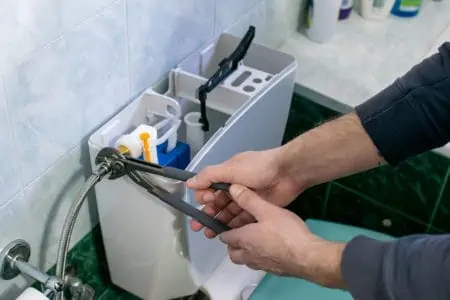
3. Disconnect the Supply Line
Grip the supply tube with the adjustable wrench and twist it free. You have now disconnected the water supply, and we can move on to the next phase.
Check the condition of the supply line for wear and tear. Most professionals recommend you should replace it every three to five years.
4. Empty the Toilet Bowl
There may still be water in the bowl. Don your rubber gloves and sponge the water out of the bowl into the bucket. If you have enough water in the bowl, use a small cup to scoop it out.
5. Remove the Tank
Reach underneath the toilet bowl where the tank meets the base. You’ll find bolts that connect the two. Grab the adjustable wrench and remove the bolts. You can now lift the tank free and place it on the old newspaper.
Take Note
You can skip this section if you have a one-piece toilet.
6. Remove the Bowl
Using the adjustable wrench, remove the mounting bolts that connect the toilet to the flange. Use the utility knife or putty knife to cut along the caulk line to break the seal.
Gently rock the toilet to loosen it from the flange. Eventually, it will lift free to reveal the toilet wax ring. Carry it to the old newspaper and gently ease it down.
How to Measure for a New Toilet
Your new toilet must fit, and the only way to ensure it does is to measure it accurately. You can measure with the old toilet in situ or remove it. Grab the tape measure and check the distance between the wall behind the toilet and the flange bolts.
The standard should be 12 inches. If the gap is larger than 12 inches, take your measurements to the hardware store and find a custom toilet that fits.
How to Install a New Toilet

With the old toilet removed, the time has come to fit the new commode. Luckily, most toilets come with an installation kit to make life easier.
What You’ll Need
- Caulk.
- Adjustable wrench.
- Pliers.
- Screwdriver.
- Spirit level.
- New flange (optional).
- New wax ring.
1. Check the Condition of the Flange
The flange should be in good condition, with no broken pieces or cracks. If you think it needs replacing, do so while the toilet is out. It will save you a world of pain later down the line.
You can pick them up cheaply enough, like this Fluidmaster, and they are readily available online.
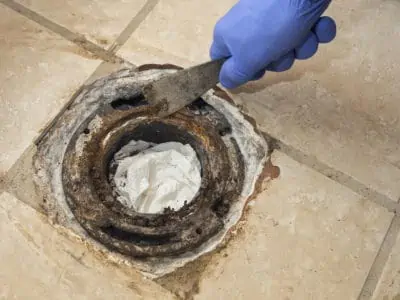
While checking the flange condition, remove the old wax ring with the putty knife. You will need to remove wax residue from the flange opening, or the new ring won’t fit.
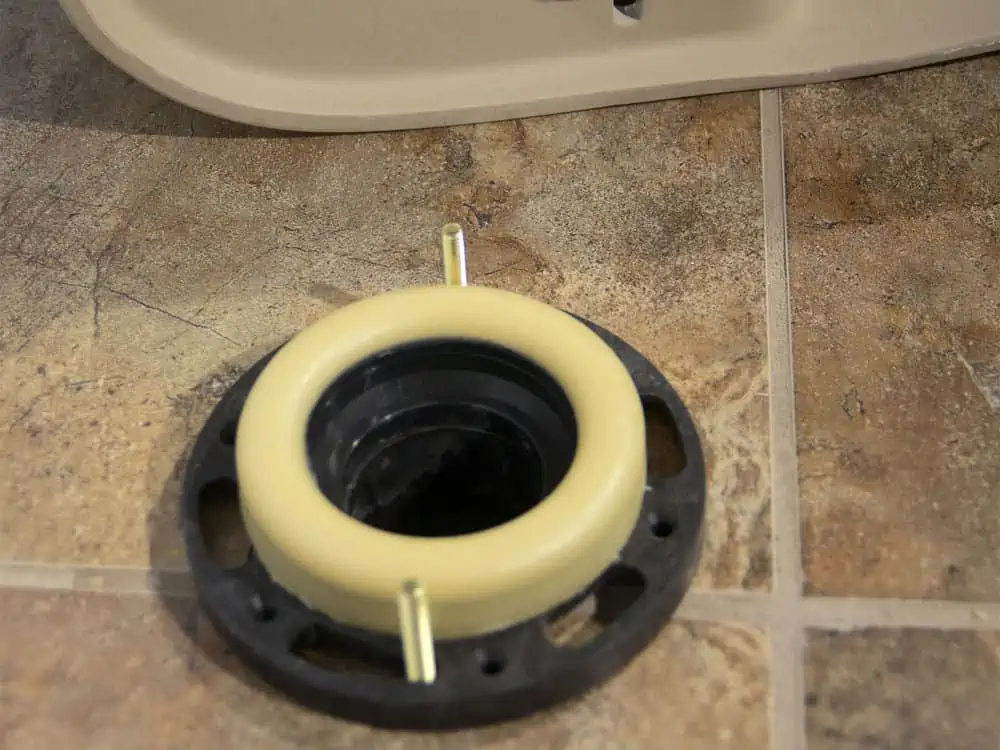
2. Install the Wax Ring
Lay the toilet bowl on its side and slide the new wax ring over the outlet pipe at the base. Make sure it fits snugly, or you could get leaks further down the line.
3. Attach the Bowl
Lower the toilet onto the mount bolts protruding from the toilet flange. Ensure they align with the pre-drilled holes in your toilet. Once it’s in position, sit on the toilet to ensure the wax ring has adequately sealed.
Grab the adjustable wrench and tighten the bolts to secure the toilet. Don’t overtighten, or you risk cracking the porcelain.
Take Care
Slide plastic washers over the bolts and tighten them by hand at first. Alternate between the bolts to ensure the toilet is even.
4. Check the Toilet Is Level
Place the spirit level across the span of the bowl. You will need a level that measures at least 24 inches. If the bubble sits in the middle, your new toilet is level.
If not, you may need to add shims (small plastic wedges) to level the toilet. If you are happy, cut off the excess bolt lengths and pop on the protective plastic caps.
5. Attach the Tank
Lift the tank and align the inlet hole. Don’t forget to install the rubber gasket between the tank and the bowl. Without it, your toilet will leak at the back.
Insert the bolts in the holes and tighten the nuts with the wrench. Alternate between the bolts to get the tank as even as possible. Your toilet tank is now secure; it’s time to plumb it in.
6. Connect the Water Supply Line
Hook up the water supply line by screwing it to the thread at the tank’s base. This feeds the fill valve when you flush. Connect the lift chain to the lever arm and tighten the nut to hold it in place.
Pro Tip
Use Teflon tape to create a tighter seal between the supply line and the toilet.
7. Turn on the Water
Twist the isolation valve counterclockwise, and the water starts flowing back to your replacement toilet. Wait as the tank fills, and then perform a test flush. At this point, you should investigate around the toilet’s base for leaks.
You can now caulk the base to the floor and pop on the tank’s lid if all is okay.
Be Aware
Some isolation valves operate using a bolt that turns with a screwdriver.
How to Install a Toilet Flange on Concrete
When the flange shows signs of wear and tear, please don’t ignore it; replace it. If you don’t, all that hard work installing your new toilet will be in vain. Leaks will occur, which means reinstalling the toilet from scratch.
What You’ll Need
- Putty knife.
- Screwdriver.
- Replacement toilet flange.
- PVC cement.
- Rubber gloves.
1. Apply PVC Cement
With the old flange removed, you will need to apply PVC cement to the soil pipe to bond it to the new flange. Don rubber gloves for this bit to protect your hands from the cement and toilet contamination.
Important Point
Use the putty knife to scrape wax residue from the flange opening. Do this before you set up the new toilet, or it may not fit.
2. Align the New Flange
Line up the bolt holes and press the flange into the cement. Hold it in place while the glue gets to work. It only takes 30 seconds for the adhesive to dry.
Leave the flange for another 15 minutes while the adhesive cures. Now you can screw the flange to the floor.
Top Tip
Don’t forget to insert the mounting bolts before screwing down the flange.
Tips for Installing a Toilet
Take a leaf out of the professional playbook. What are the hints and tips used by the experts every day? Let’s take a look:
Alternate When Tightening Bolts
The best way to ensure your toilet is level is to turn one bolt and then the other alternating between the two. If you tighten one all the way and then the other, you risk cracking the porcelain, leading to hairline fractures and leaks.
Always Replace the Wax Ring
If left untouched, your wax ring will last 20 or 30 years. However, when you remove the old toilet, you will need a new wax ring. It molds around the toilet outlet pipe and seals against water and sewer odors.
Use Shims
Shims are small wedges of material that slide under the toilet’s base to level it up. These ingenious little wedges are the best way of leveling a toilet on an uneven floor. The best material to use is plastic, like this 32-piece leveler set.
Use Plumber’s Tape
Whenever you disturb old plumbing, you risk leaks. One way to ensure a good seal for threaded pipes is to use plumber’s tape, like this DOPKUSS sealant tape.
Simply wrap it around the threads and screw it in place. As the tape compresses, it grips and seals. It’s the most common way of sealing pipes in new constructions because it is cheap and easy to use.
FAQs

How Often Do You Need to Replace a Toilet?
A typical toilet should last 20 to 25 years if it is maintained in good condition. Most of the time, people change their toilets when they fall out of fashion. The best way to ensure your toilet stays relevant is to buy white because it doesn’t age.

Do You Have to Replace the Wax Ring When You Remove a Toilet?
You should change the wax ring every time you replace the toilet. They last up to 30 years, but you disturb the wax seal when you remove the toilet.

Do You Tile Under the Toilet or Around It?
You can do both, but it’s better to install the toilet over the tile for the neatest finish. It’s quicker, more convenient, and avoids the need to cut awkward shapes.

How Tight Should Toilet Floor Bolts Be?
There is no specific rule to govern bolt tightness, but stop if you can hear metal scraping porcelain. If you overtighten the bolts, the porcelain will crack and leak.

Should You Caulk Around a Toilet?
According to the International Plumbing Code, you should. Caulking the base of your toilet looks neat and stops debris from building up.
How to Replace a Toilet
Replacing a toilet is not for everyone. They are dirty, heavy, and expensive, so making a mistake could cost you. If you lack confidence, call in the professionals.
However, if saving money motivates you, following our guide will deliver your new toilet for a fraction of the price.