If you spot a pool of water at the base of your toilet, it typically means that the seal has gone bad. The wax seal between the flange and the toilet has failed. So, is it an easy fix?
We show you how to fix a toilet seal in easy-to-follow steps to save you money and get the job done faster.
Key Takeaways
- Signs of a bad toilet seal: Water pooling at the base of the toilet and wobbly toilet.
- Causes of a toilet seal leak: Disturbance during remodel or floor replacement, and old age.
- How to fix a toilet seal: Turn off water supply, drain the toilet, remove the toilet, replace the wax ring, reinstall the toilet, and reseal the base.
- Wax ring lifespan: Toilet wax rings can last 20 to 30 years if installed correctly and left undisturbed.
How Do I Know if My Toilet Seal Is Bad?
The good news is that wax seals are inexpensive and pretty foolproof when sealing the toilet to the anchor flange. They last for years and repel mold and mildew while keeping their sealing abilities.
You should expect 20 or even 30 years of use from a wax seal, but occasionally, they fail. It’s easy to spot a faulty toilet seal because water typically pools at the base of the toilet. This tends to happen every time you flush.
What Causes a Toilet Seal to Leak?
They can fail if they are disturbed during a remodel or while you are laying a new vinyl floor in the bathroom. Every time you remove the toilet, you should take the time to replace the wax seal.
A wobbly toilet could be an indication that you have a broken seal. Even if the toilet moves a fraction, it is a sign.
How To Fix and Replace a Toilet Seal
Replacing a toilet seal does require some manual labor and specific tools. The good news is it is a simple task to accomplish, even if you have limited plumbing experience.
What You Need
1. Empty the Toilet
Isolate the water supply by twisting the water valve clockwise until it turns no more. The valve is located at the rear of the toilet to the left. If you don’t have a valve, you will need to turn the water off at the main valve. This is either located outside the front of your property or in the house where the water supply enters your home.
Once the water is turned off, flush the toilet to drain the water tank. As the water drains away, use the sponge to get the last remaining pool from the toilet. Squeeze the sponge into a bucket and use a plunger to force as much water into the drain.
Top Tip
If you are in a hurry and don’t want to wait for the toilet to drain, you could use a wet and dry vacuum to suck out the water from the bowl.
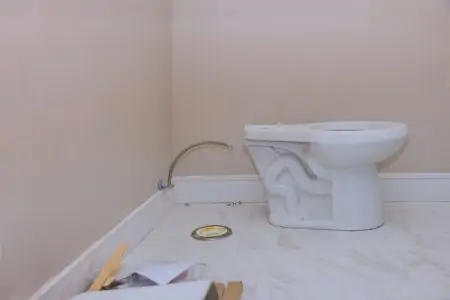
2. Remove the Toilet
Remove the water supply pipe from the refill valve. This helps to reset the valve when the time comes to refill the water tank.
It might be an idea to renew the water supply hose while you have the toilet drained. The toilet will be caulked to the floor, so you will need to scrape it away using the knife. To do this, score the caulking all the way around the base of the toilet.
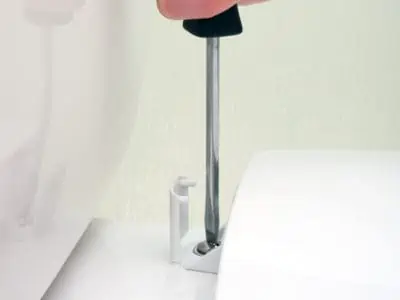
Put the dry towel on the floor so you can stand the toilet on it when you replace the wax seal. Unclip the covers over the mounting bolts on either side of the toilet. Use the flathead screwdriver to gently pry the cap lids upwards to expose the bolt head.
Apply some penetrating oil if the mountings have rusted. Grab the wrench and gently twist the bolt heads to loosen them. Don’t overdo it because this might bend the bolts, making it harder to reinsert them afterward.
You also risk breaking the anchor flange, which adds to your repair costs and delays the completion of the job. Plus, the ceramic toilet bowl could chip or crack if you apply too much pressure.
Remove the nuts and washers and store them somewhere safe to avoid losing them.
Top Tip
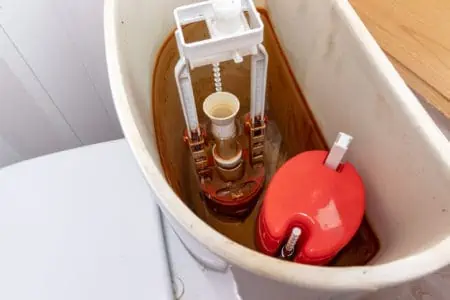
While the toilet is out, it is a great idea to inspect it for defects, the floor for water damage, and the anchor flange.
3. Moving the Toilet
Gently rock the toilet back and forth to loosen the seal. Lift the toilet and place it carefully on the blanket. Make sure you keep the toilet flat at all times.
Before placing the toilet down, check that the old wax ring isn’t still attached.
Top Tip
If you have a two-piece toilet, consider detaching the water tank before attempting to lift it. It will halve the weight, putting less strain on your back and arms.
4. Replace the Wax Ring
Don your waterproof gloves and remove the old wax ring. Scrape the old wax seal off using a putty knife. Also, remove the residue of the caulk from the base of the toilet.
Inspect the anchor flange for any cracks or defects. If all is okay, proceed with installing the new wax seal. Once you remove the old wax ring, plug the hole with some old rags to prevent odors from seeping back into your home.
5. New Wax Ring
Place the new wax ring over the hole and make sure it is centered. Press it down onto the toilet flange.
6. Reinstall the Toilet
Lift the toilet over the hole, and using the fixing bolts as a guide, lower the toilet onto the new wax ring. keep it level and parallel to the wall behind it.
Don’t rock the toilet when you place it, as this could weaken the seal. Instead, opt for a gently twisting motion until it rests on the floor and fixing holes line up.
7. Fix the Toilet in Place
Install the bolts and washer in the same order they were removed. Alternate from side to side while tightening the bolts to even the tension load. Take your time, using small turns each time before swapping to the other side.
Be careful not to overtighten the bolts and risk cracking the toilet. When the bolts are secure, and the toilet doesn’t move, clip the caps back in place to conceal the bolt heads from corrosion.
8. Reconnect the Toilet
Reattach the water supply line using plumber’s tape to get the best possible seal. Turn on the water supply and allow the tank to refill before flushing. Lay toilet tissues around the base of the toilet to check for leaks and flush several times.
If the tissues become wet, the seal is leaking, and you will have to repeat the whole process. Even if there are no apparent leaks, wait a couple of hours before reinspecting the base of the toilet. If the tissues are still dry, throw them away and pat yourself on the back for a job well done.
9. Reseal the Toilet Base
Before packing away your tools, grab the caulk and run neat beading around the toilet base where it meets the floor.
FAQs

How Long Does a Toilet Wax Ring Last?
Toilet wax rings last 20 to 30 years. If installed correctly and left undisturbed, they should last as long as the toilet. As with all seals, there are two weak points; when they are first installed, and they take time to bed in, and when they age and become brittle.
It’s always good advice to try and leave a seal to establish, often with years of water helping to reinforce the security of the joint by coating it in sediment, which creates a protective barrier.

Can Plunging a Toilet Damage the Wax Ring?
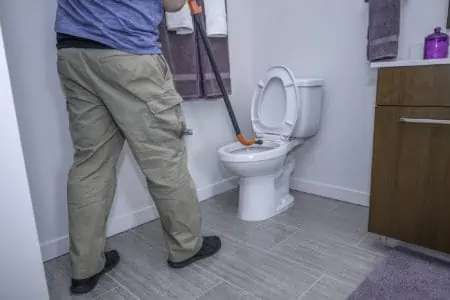
You can cause damage to your toilet’s wax ring by over-plunging. Forcing too much pressure down the drain hole can place pressure on the wax seal and cause it to fail. Likewise, trying to plunge a large blockage forces the mass down the drain, adding stress to the seal.
As the jam moves, it stretches the seal, causing it to crack and tear, especially if it’s an old wax ring.

How Often Should You Change the Wax Seal on a Toilet?
You should only need to replace the seal every 20 or 30 years. However, if you remove the toilet for any reason, like a remodel or a new floor covering, it’s good advice to replace the wax seal because disturbing it often causes issues.

Do You Need To Replace the Wax Seal After Removing Toilet?
It’s not always necessary to replace the seal every time you remove the toilet, but it is advisable. The seal bonds with the anchor flange and, over time, creates a natural joint that, if left undisturbed, forms a powerful seal.
Once you disturb the seal, you risk opening cracks that didn’t previously exist, so rather than taking a chance, get a new seal.

How Much Does a Plumber Charge To Replace a Wax Ring?
While the wax ring only costs between $2 and $10, a plumber could set you back anywhere from $50 to $200 depending on your location and the complexity of the work involved.
Seal the Deal
There is no substitute for doing it yourself. The sense of satisfaction you get is immense. Plus, you save a packet on professional costs. With our step-by-step guide, we have hopefully shown you just how simple it can be to replace the wax seal on your toilet.
So what are you waiting for? Roll your sleeves up and get stuck in.