Wet tile saws are the quickest and most effective tile cutters money can buy. These powerful saws will cut tiles accurately without overheating the blade or damaging the surrounding material.
A wet tile saw is much quicker than a traditional snap tile cutter but it is also more complicated to use. They require more preparation and their cutting power means there are some important safety steps you will need to take.
In this article, we will explain how to use a wet tile saw to achieve the best finish possible. This includes which equipment you will need, how to prepare, how to make cuts, and how to clean your saw.
Key Takeaways
- Set up wet tile saw securely on a flat surface and fill the water reservoir.
- Mark cutting lines on tiles and adjust saw fence or miter gauge accordingly.
- Wear safety goggles, ear protection, and a face mask for protection during cutting.
- Turn on the saw, wait for the blade to reach maximum speed, and cut tile slowly.
How Does a Wet Saw Work?
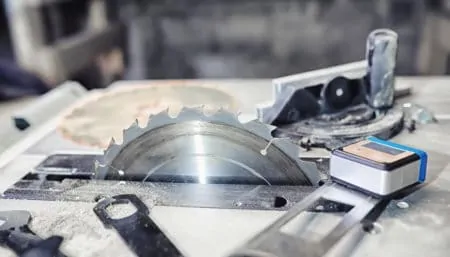
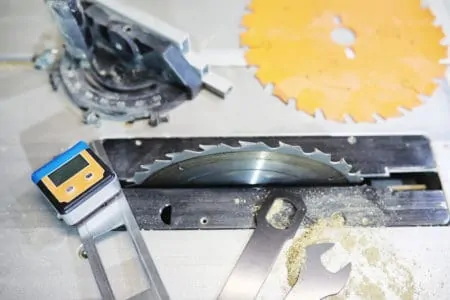
ffaA wet tile saw resembles a table saw or miter saw. It has a similar design and size but uses different blades to a standard saw. Unlike a miter saw blade, which has teeth, a wet tile saw uses a diamond-encrusted disc that uses friction to slice through ceramics, porcelain, and other tile materials.
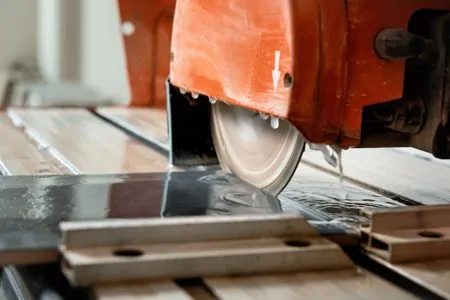
Wet tile saws use a stream of water, either drawn from a reservoir in the saw or from a hose attachment that provides a continuous supply. The water cools the cutting disc and the tile, keeping them from overheating and preventing dust from flying up as you cut.
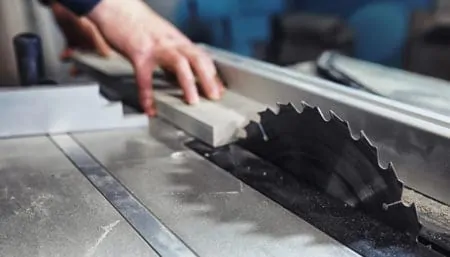
There are two main types of wet saws. The most common saws for DIY use resemble table saws, with the diamond-coated disc protruding through a slot in the table. This allows you to maneuver the material around a fixed blade.
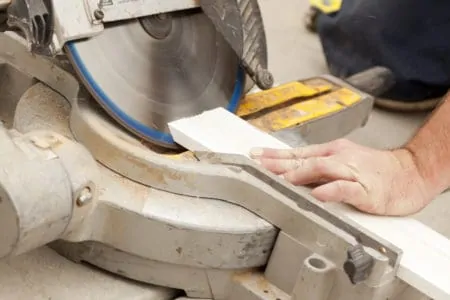
The other type is more popular with contractors and resembles a miter saw. These saws are usually more expensive because they are versatile and can cut angles and bevels in addition to straight lines.
What You Need
Like any DIY task, you will need to prepare before you start cutting tiles. Here is a list of the equipment you will need:
- A wet tile saw
- GFCI extension cord (if required)
- Plastic bucket
- Plastic drop cloth
- Clean water
- Marker pen or grease pencil
You will also need some personal safety equipment:
- Eye goggles
- Ear protection
- N95 face mask
How to Cut With a Wet Saw
Find an area to work in that is well-lit and free from obstructions. Only use the saw if you have a flat, stable surface to work on, and protect the floor with a plastic sheet if you are cutting indoors.
1. Prepare the Saw
Fill the water reservoir so it covers the recirculating pump. If your saw’s power cord won’t reach an electrical outlet, use a GFCI (ground fault circuit interrupter) extension cord and make sure that there is a drip loop in the cable. This will encourage the water to fall away safely because the drip loop is lower than the power socket.
Top Tip
2. Mark the Cut
Mark your cutting line on the tile using a grease pencil or a fine marker. Adjust the saw fence to the same width as the cut you want to make. If you need to cut at an angle, adjust the miter gauge to the required angle.
Place the tile on the saw’s table, pressing it against the fence or miter gauge. Make sure the tile is flush. Position the tile so it aligns with the saw’s blade and then draw it back so it sits in front of the blade.
3. Put on Safety Equipment
Put on your goggles and ear defenders. Wet saws are loud and messy. You should also put on your facemask; despite the water system reducing the amount of dust and debris, you might still end up inhaling some without a mask.
4. Power Up
Turn on the saw and wait for the blade to reach its maximum speed. This will prevent the tile from cracking and reduces the risk of kickback. Keep an eye on the water; it should hit the blade without splashing too much. If you need to adjust the water flow, do it now by following the manufacturer’s instructions.
5. Cut the Tile
Push the tile toward the blade slowly. Use both hands to hold each side of the tile but keep them away from the blade. Let the tile feed gradually as it passes through the blade, without trying to force it.
As the tile moves past the blade, slow down. This is where most cracks occur. Once the tile has cleared the cutting disc, turn off the saw and wait for the blade to stop moving before removing the tile. Unplug the saw.
Top Tip
6. Keep the Water Clean
If you need to make repeated cuts, check the water reservoir for sediment. If the water is cloudy, replace it or it could impact the quality of your finish.
7. Remove Safety Gear
Take off your goggles and ear defenders and check your work. If everything has gone to plan, you can take a moment to admire your cutting before fitting the tile.
How to Clean a Wet Saw
Drain the water into a bucket and carefully remove the saw’s trays, dropping them into the bucket as well. Wipe down the saw and its blade with a wet sponge, and spray the fence and miter gauge to remove any residue.
Empty the bucket and use the sponge to clean the trays. Allow each part to dry fully before reassembling the saw.
Wet Tile Saw FAQs

How Do You Set a Wet Saw?
Water and electricity are a dangerous combination, so make sure the saw is not receiving power when connecting them. This will prevent the saw from being switched on accidentally.
Set the power cord so it is away from the water as much as possible. Wet saws create a lot of mess and the floor and surrounding area could get covered with water and debris. This is why you should put down a plastic sheet if you are cutting indoors.
If the saw doesn’t have a reservoir, it will likely have 2 connectors. One is an inlet that supplies clean water and the other is an outlet to drain the dirty water. Trailing a small hose to a dirty water bucket will keep the water from spreading as much as possible.
Can You Use a Wet Saw Without Water?
It is possible to use a wet saw without water but you will miss out on the benefits of using one. This should be fine if you are only cutting one or two small tiles, but prolonged use could damage the blade and cause the saw to overheat. You are also much likelier to crack the tile. You should always try to take advantage of the saw’s water system where possible.
How Much Water Should You Put in a Wet Saw?
The amount of water you should use depends on the capacity of the saw’s reservoir. Always fill it to the max line, or at least until the recirculating pump is submerged. If you choose a saw that takes its water supply from a hose, you won’t need to worry about filling it by a certain amount.

Can You Use a Wet Saw as a Table Saw?
You can’t use a wet saw as a table saw because the blade is designed specifically to cut brittle materials such as tiles and ceramics. The blade has no teeth and won’t be able to cut softer materials such as wood effectively.
Tile saw blades also spin in the opposite direction to table saws. This means that to cut wood, you would need to feed the stock from the rear of the blade, which is impractical and dangerous.

Does a Wet Tile Saw Make a Mess?
While a wet tile saw can be an excellent tool for cutting tile, it can also make messes if not used properly. Before using it, it is essential to be familiar with the machine and to take proper safety precautions by wearing protective gear such as goggles and gloves.
When using a wet saw, just make sure to prepare the space first with drop cloths and plastic. This will cut down on the mess and make it easier to clean when you’re done.

How Thick of a Tile Can a Wet Saw Cut?
A wet saw is an incredibly versatile tool that can be used to cut through a wide variety of tiles. The maximum thickness that it can cut will depend on the type of blade you use, but also the size and power of the saw itself.
Generally, a wet saw can handle most standard-sized tiles without issue, but thicker tiles will often require a more powerful machine and more aggressive blades. The type of material being cut (such as ceramic or slate) may also influence how thick of a tile the saw can handle.

How Do You Cut Tile With a Wet Saw Without Chipping It?
Cutting your tiles with a wet saw without chipping is totally possible if done properly. Just be sure the blade is in good condition and nice and sharp. Make sure you have enough water to provide lubrication while cutting.
The key to avoiding chipping is to just cut slowly. Going too fast can cause vibrations that lead to chipping or cracking.
You should also set the blade’s depth so it does not go too deep into the tile. Apply gentle but firm pressure when cutting, making sure to keep the saw head level and move only in straight lines rather than curves or circles.

How Long Should a Wet Tile Saw Blade Last?
When properly cared for and used according to the manufacturer’s instructions, a wet tile saw blade can generally last 10 to 12 hours of cutting time.
This is especially true if consistently lubricated with water while in use; even so, it’s essential to regularly inspect blades for signs of wear and tear to maximize their lifespan.
Taking the time to maintain the saw and its components will ensure that it provides accurate cuts and resists damage for years.

Is a Wet or Dry Tile Saw Better?
It depends on what you’re doing. You want to use a dry tile saw when working on indoor projects or when you have to cut tiles into small pieces. A wet tile saw is better for intense projects with a high volume of tiles to get through.

What Is the Best Wet Tile Saw for the Money?
The Delta 96-110 Wet Tile Saw is widely regarded as the best tiling saw on the market regarding value for money. Its 15 amp motor and large 10-inch rip-cutting capacity allow it to quickly and efficiently handle any job.
It has a heavy-duty rail system that ensures smooth and accurate cutting results every time. Its professional design makes it highly durable, even when faced with demanding cutting projects.
The Delta 96-110 Wet Tile Saw delivers reliable and high-quality performance at an affordable price.