Porcelain is as popular as ever, especially when decorating kitchens and bathroom floors. Knowing how to cut porcelain tiles is an invaluable skill that will come in handy time and again. However, cutting porcelain tile is far from straightforward without the right tools.
We explain the best way to cut porcelain tile and the correct tools to use.
Key Takeaways
- Choose the right tool: Dremel, manual tile cutter, angle grinder, circular saw, wet saw, or tile nippers.
- Use a diamond-coated blade for cutting porcelain tiles.
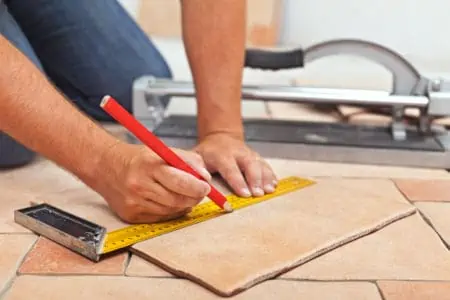
- Mark the cutting line with a wax-based pencil and clamp the tile to keep it steady.
- Cut slowly and carefully to avoid chipping and cracking the tile.
Porcelain Vs. Ceramic Tiles
Before we get into the differences, we should point out that porcelain is a form of ceramic; however, it has a few key differences. The most significant is porcelain is much harder, making it more resistant to water.
It gets its robust qualities from the type of clay used (with finer particles) and the higher firing temperatures.
Porcelain is ideal for high-moisture areas of your home, like bathrooms. However, porcelain is far more likely to crack or chip, thanks to its brittleness. This creates challenges when it comes to cutting and shaping your tiles.
Porcelain tiles also share many attributes of ceramic tiles. They are both heavy, hardwearing, and suitable for kitchen and bathroom floors. They come in glazed and matte patterns, as well as large slabs ideal for patios.
Can You Cut Porcelain Tiles?
Porcelain tiles can be cut as long as you work slowly and carefully. We’ve already mentioned they are prone to cracking and chipping, and the cutting process increases this risk. There are several tools you can use to cut porcelain tiles.
Safety First
When working with tiles, you need to wear safety gear, so don goggles, gloves, and a face mask.
Best Tool to Cut Porcelain Tile
While porcelain is more temperamental during the cutting process, there are several tools you can use effectively to cut your tiles. The secret is to take it slowly and make accurate cuts.
Here is our take on the tools you should consider:
Dremel

A Dremel is ideal for making smaller cuts to get intricate shapes. Maybe you are trying to negotiate a radiator pipe or a wall curvature? In that case, a Dremel is ideal because it spins at a super-fast rate and has a small diamond-coated cutting blade.
Dremels are lightweight, easy to handle, and come with an array of accessories, making them a go-to tool for several DIY projects.
Unfortunately, you will struggle to cut larger tiles because the Dremel is suited to detailed work.
Manual Tile Cutter
If you fancy a little bit of exercise, a manual tile cutter is the tool to use. In some respects, it may be an ideal choice for brittle porcelain because you have to work slowly. But, this will be an issue if you have a lot of tiling to complete.
Like the model featured, a manual cutter consists of a long handle attached to a sliding rail. You move the handle along the rail to make the cut, applying firm pressure to the cutting disc. It even has an angled pad that snaps the tile to the required shape.
For small floor areas, a manual cutter will suffice. You can cut as many tiles as you like, but it will slow you down. It’s also one of the cheapest options, and you can take it anywhere because it doesn’t need power.
Manual tile cutters are pretty basic, but they require some practice before you are up to speed on the correct technique.
Top Tip
Before you cut your porcelain tiles by hand, ensure you double-check the measurements. Accuracy is vital, and porcelain tiles are expensive.
Angle Grinder

If you fancy going nuclear on your porcelain tiles, you can’t go wrong with a grinder. It is the perfect tool to use when cutting substantial tiles, and it easily eats through the thickest porcelain.
It is a bit of an “industrial” way to make cuts, and we would only recommend this method when you need speed rather than accuracy. An angle grinder can cut intricate shapes, but it is more of a challenge.
Cutting L-shapes and angles for fitting round trim is also possible, but a Dremel is lighter and more versatile.

Circular Saw

Using a circular saw is always a popular choice with DIY enthusiasts. However, you cannot use a standard blade with teeth, like those used to cut wood. You need a specialist blade, like this DiaPro Diamond Tile Blade.
Circular saws are versatile, easy to handle, and make accurate cuts. They are also powerful, so they speed up your work rate.
Diamond is one of the hardest substances on earth, so it stands to reason that a diamond-coated blade will easily slice through porcelain.
Wet Saw
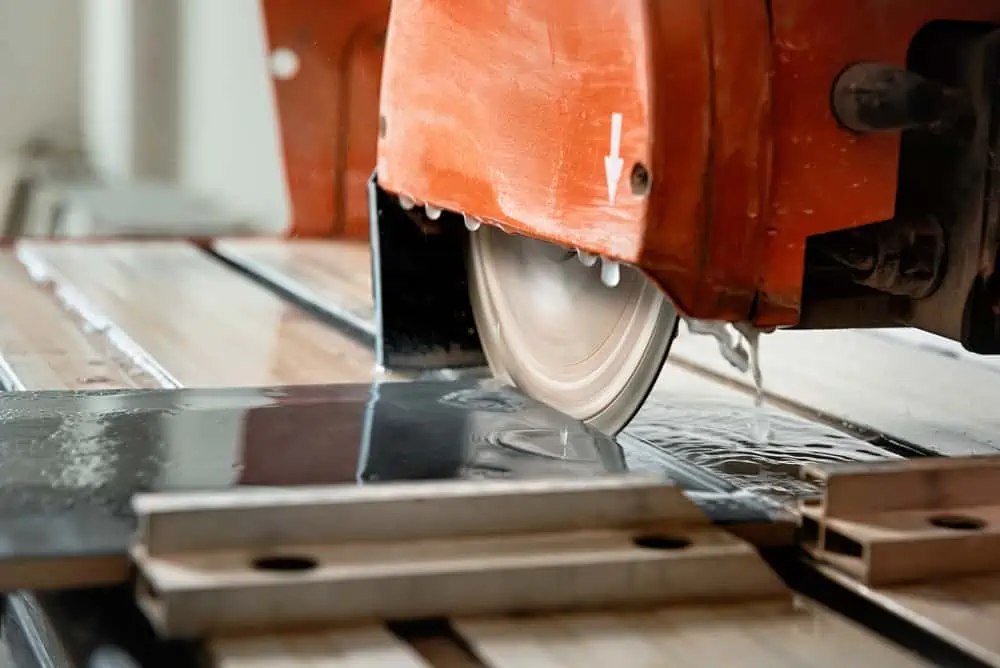
Think of a circular saw or angle grinder with a hose attached, and you have the basics of a wet saw. They work by using water to prevent the tile from heating, which causes it to crack and chip. Plus, the water helps to increase the abrasion of the blade.
If you have a lot of tiles to cut, a wet saw will save you time and money in expensive mistakes. However, wet saws are not cheap, and who has one lying around their garage? You would most likely need to hire one from a hardware store.
Top Tip
Use a wax-based pencil to ensure the cut line stays on even when immersed in water.
Tile Nippers
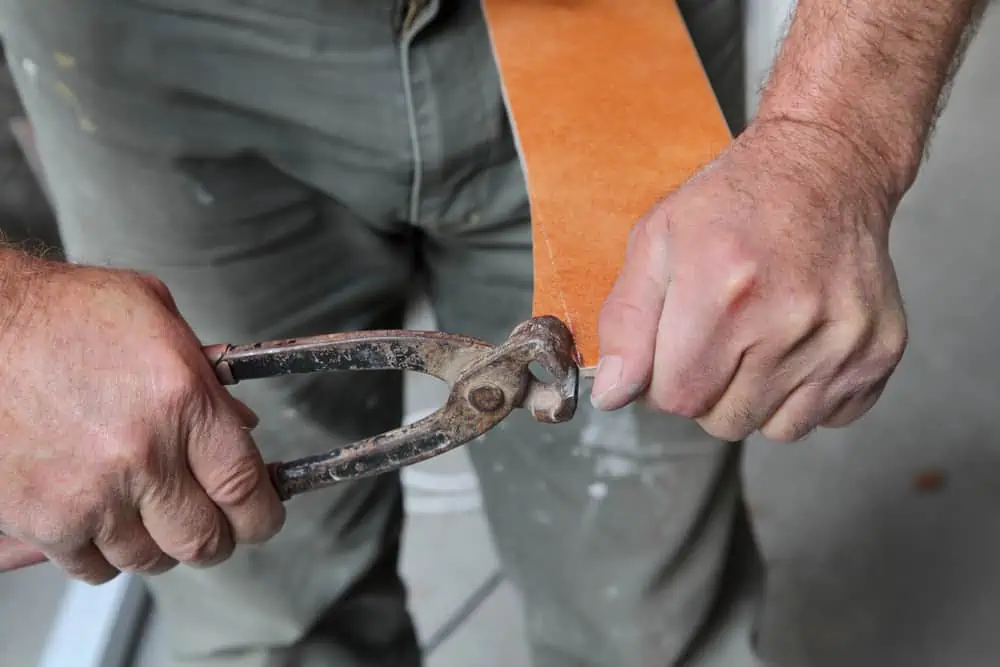
Tile nippers are a small hand-held tool for shaping and removing small amounts of tile. They are the perfect tool for shaping your porcelain tiles to fit intricate and awkward angles.
Tile nippers are not the neatest tool you can use, and they regularly chip porcelain, but they serve a purpose. If the edge of your tile is concealed beneath a pedestal washbasin or bathtub, it doesn’t matter about the quality of the cuts.
The other advantage of tile nippers is they are cheap. If you are restricted to a budget, these tile nippers by ABN are a great choice.
To recap, here’s a handy at-a-glance table:
| Tool | Pros | Cons |
| Dremel |
|
|
| Manual Tile Cutter |
|
|
| Angle Grinder |
|
|
| Circular Saw |
|
|
| Wet Saw |
|
|
| Tile Nippers |
|
|
How to Cut Porcelain Tile by Hand
Given there are so many options open to you to cut porcelain tiles, we decided to give you the low down on each method. That way, you can choose the technique that suits you the best.
With a Dremel
A Dremel is one of the best tools to use to make the cuts without chipping. Thanks to its diamond-coated cutting bit, it scores through the porcelain in smooth lines. It’s also effective at cutting holes and intricate shapes.
- Ensure you use the diamond-coated cutting blade.
- Mark the lines you want to cut with a pencil.
- Clamp the tile to hold it steady.
- Fire up the Dremel and place the blade on the tile at a 45-degree angle.
- Gradually lower the Dremel until the blade sits at a 90-degree angle.
- Allow the cutting bit to work at its own pace, or you risk wearing it out sooner.
- Once you reach the end of the cut, remove the Dremel gently and power down.
With a Manual Tile Cutter
You might think that a manual tile cutter is better for cutting ceramic tiles, but it works just as well on porcelain. It has a cutting disc that scores the surface of the tiles just enough for it to split.
Because porcelain is much harder than ceramic, you may need to score the tile several times to get the cut, and it may chip when it splits.
- Mark the cut line on the face of the tile.
- Load it into the tile cutter, lining the cut line with the circular blade.
- Pull the long handle down and apply firm but controlled pressure as you drag the scoring wheels along the line.
- When you reach the end, lift the handle and slide the blade back to the top.
- Repeat this process two or three times.
- Don’t use too much pressure, or the tile will crack.
- Pull the handle down, using the v-shaped pad to split the tile.
With an Angle Grinder
Angle grinders are versatile tools and handy for a host of DIY projects. They make light work of porcelain tiles and can speed up your work rate. An angle grinder is perfect if you are laying a large tile floor and don’t have too many fiddly bits to cut.
- Choose the correct diamond-coated blade.
- Clamp the tile to hold it steady.
- Mark the tile with a pencil.
- Fire up the angle grinder.
- Hold the blade at 45 degrees and then lower it to 90 degrees as it begins to bite.
- Move along the cut line, letting the blade work at its own pace.
- With each pass of the blade, press it deeper into the tile.
- Once the tile is cut, you may need to neaten the edges with sandpaper.
With a Circular Saw
Much like the angle grinder technique, you will need a diamond-encrusted blade to cut porcelain tiles with a circular saw. That said, it is a popular method because so many people own one of these tools.
- Choose a diamond-coated blade that matches the size of your saw.
- Mark the cutting line on the tile and clamp it to stop it from moving.
- Load the blade into the circular saw and switch it on.
- Always allow the blade to reach optimum speed before making surface contact.
- Work along the cut line until you reach the end.
- Use firm but gentle pressure as the blade bites through the porcelain.
- Remove the circular saw and power down.
With a Wet Saw
Wet saws are sometimes called tile saws. They were designed for the sole purpose of cutting tiles and masonry thanks to their ability to wet the material to keep it cool. As the blade spins, it passes through a water reservoir to scoop water onto the tile.
- Mark the cutting line on the top side of the tile.
- Power up the wet saw, ensuring the water reservoir is full.
- Guide the tile onto the blade, taking care to follow the cutting line.
- Make a 0.25-inch cut on either end of the cut line.
- As you feed the tile, the blade coats in water and wet clay to keep it cool. This prevents cracks and chips.
- When you reach the end, power off the saw.
Take Note
Wet saws are extremely messy because they throw a mixture of clay and water into the air. You should try and work outside or take precautions to minimize damage.
With Tile Nippers
When you need to remove small amounts of porcelain from the edges and corners of your tiles, nippers are the perfect tool. They aren’t much good for actually cutting tiles, but they are excellent for intricately shaping your tiles.
It leaves a rough edge, but that doesn’t matter when the tile is obscured by baseboard or trim. With a little practice, you may get an edge neat enough that you can use grout to mask it.
- Mark the face of the tile where you want to remove material.
- Score the surface of the tile with a glass cutter. This helps to maintain a straight line when cutting along the tile lengthwise.
- Work in small increments along the cutting line, taking off tiny amounts of material each time.
- For thicker tiles, snip the bottom first and then the top edge of the tile. This helps to create a neater line.
- Smooth the tile edge with sandpaper or a sanding block when you reach the end.
How to Cut Porcelain Tiles Without Chipping
Porcelain is an unforgiving material because it is incredibly challenging to cut without breaking. However, there are hints and tips that the pros use to make their life easier.
Use a Sharp Blade
You must use a sharp blade to cut your porcelain tiles. If it is blunt, it heats the tile, causing friction. The tile will eventually crack under pressure. It takes longer to complete the work, which costs you more time, energy usage, and mistakes.
Always Cut Slowly
When dealing with porcelain, the slower you cut, the better. You cannot force the blade to cut any faster, or you risk chipping the tile. Once your power tool reaches optimum speed, let the blade work at its own pace rather than forcing it.
Top Tip
For the best results, keep the cut depth to a maximum of half the tile thickness.It reduces chipping and allows you to snap the tile for a neater line.
Making the Cut
It’s worth making the extra effort to fit porcelain tiles; they are more robust, resist water better than ceramic tiles, and are super-smooth. Cutting them takes a little practice, but with the correct tools, it can be done. And like most things, once you get the knack, it’s a breeze.