Plywood is a robust, inexpensive, and versatile building material, but get it wet, and you might live to regret it. Waterproofing plywood is crucial if you want to protect it from the elements.
We show you how to waterproof plywood with sealant and other practical materials to avoid expensive damage later down the line.
Key Takeaways
- Plywood can be waterproofed using sealants such as epoxy resin, PVA glue, or drying oil to protect it from moisture and the elements.
- Choosing the right type of plywood, such as marine-grade, can increase its water resistance and durability.
- Sealing the edges of plywood with high-grade epoxy helps prevent moisture from penetrating the layers and causing damage.
- Properly sealing and protecting plywood can extend its lifespan, making it suitable for both indoor and outdoor use.
Can Plywood Be Waterproofed?
Waterproofing plywood preserves it against the elements. It is an excellent material for bonding with sealant and paint, making it durable for outdoor use.
Because plywood consists of layers of veneers glued together using heat and pressure, it is incredibly strong. If you couple that strength with a marine-grade sealant, plywood is also a useful material for use in the marine industry.
If you don’t protect your plywood from water, it can have a detrimental effect because it typically comes in large sheets. This can be costly and disruptive when you need to replace them after moisture damage.
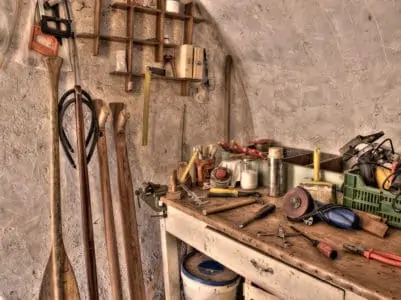
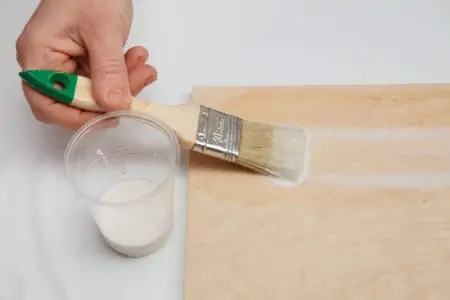
How to Seal Plywood from Moisture
There are several ways to seal and protect plywood. Where you intend to use the material is crucial because some methods offer better water resistance than others. Exterior plywood needs the highest protection levels, but for indoor use, the treatment is minimal.
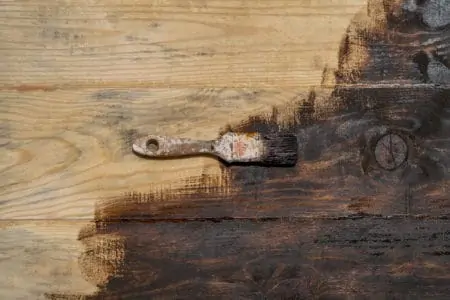
Epoxy Resin
Sealing plywood with epoxy resin is one of the most popular methods. Epoxy resin not only waterproofs but also makes the material stronger because it forms a hard shell. It makes the surface resistant to scratches and dents, which is perfect for high-traffic areas.
The epoxy also soaks into the surface of the plywood, protecting it from within. And it dries clear, enhancing the color and pattern of the plywood, making it a great alternative material for floors.
Top Tip
Once the epoxy dries, you can paint the plywood any color you choose if you sand it.
How to Apply
- Sand the plywood with 80-grit sandpaper.
- Step it up with 120-grit sandpaper and repeat the process.
- Clean the surface, so it is free of debris.
- Apply the first layer of sealer using even brushstrokes.
- Wait for it to cure.
- Sand between layers.
- Apply a second coat of sealer and allow it to dry.
PVA
PVA is an excellent and readily available product to seal plywood. Try mixing the PVA with water if you have plywood walls and want to preserve their natural quality. It dries in thin, clear layers, sealing the surface against moisture.
PVA is cheap, easy to use, and washes clean with soap and water. It is also safe for your kids and pets.
Keep In Mind
This is not the best method for outdoor surfaces like a plywood deck.Ideally, you would only use PVA to seal end grain and edges.
How to Apply
All the application methods start with sanding and cleaning, so, rather than repeating ourselves, we’ll get straight into how the different sealers apply.
- Thin the PVA with mineral spirits.
- Spray, roller, or paint it onto the plywood.
- Allow it to dry.
- Sand between coats.
- Clean the surface and apply a second coat.
- Let it dry.
Liquid Latex
Liquid latex is also easy to apply. It brushes or sprays on, and when it dries, you can forget about it. However, liquid latex is not the most cost-effective way to protect plywood, especially over substantial surfaces.
Spray latex is more expensive than the paint-on version, but you do get the added convenience of the spray application. However, painting it on is more accurate, so you reduce wastage. With latex spray paint, you get overspray, reducing precision.
It’s also a challenge knowing that you have applied the correct amount for maximum protection. If you get it right, you might get a couple of decades of protection. Get the coverage wrong, and water seeps in, damaging your plywood and all your hard work.
How to Apply
- Fill in any gaps and dents with wood filler.
- Once dry, sand the filler, so the surface is smooth.
- Wipe the surface to remove the dust.
- Apply the liquid latex paint with a roller.
- Wait while the first layer dries, and then apply a second coat.
- Once it dries, it looks like a plastic coating on the plywood.
Drying Oil
Drying oil soaks into the plywood, protecting it from within. It is an excellent method if the plywood is used in high-moisture areas like the marine industry. Drying oil is also robust because it does not flake or chip.
It works to strengthen the wood rather than form a hard seal over the top. Exterior surfaces like wooden sidings and wooden roofs get maximum protection from drying oil.
How to Apply
- Apply the first layer of drying oil using a brush.
- Wait four to six hours while it dries.
- Apply a second coat and wait again while it dries.
- After 24 hours, it is ready to use.
Spar Urethane
Spar urethane is ideal for the marine environment. It is thicker, so it takes longer to dry, but it is one of the most effective ways to seal plywood once cured. It is best to apply it in thin layers by diluting it with mineral spirits.
Once thinned, it can go on with a roller, brush, or sprayer, although using a brush will take longer. Spar urethane should only be applied in temperatures of 50 degrees Fahrenheit or above because colder temperatures affect how the sealant applies.
Keep In Mind
Spar urethane is solvent-based, so you will need a ventilated area if you are using it indoors.
Oil-based products are best used on surfaces like decks and wooden outbuildings because the sealer penetrates the plywood. This makes it better at coping with UV and rainwater.
How to Apply
- Thin the spar urethane with mineral spirits.
- Either spray, roll or brush the solution on.
- Allow the first layer to dry.
- Apply the second coat and wait 24 hours to dry completely.
Water-Based Paint
For indoor spaces, water-based paint is pretty hard to beat as a surface sealer on plywood. They can still be used outdoors, but the surfaces will need some TLC and be touched up more frequently.
Unlike oil-based products, water-based paints are better for the environment. They contain minimal VOCs (volatile organic compounds), which release low-level ozone as the paint dries. They also have fewer odors, which is why they are suitable for indoor work.
How to Apply
- Lay down two layers of water-based primer, sanding between coats.
- Wait for the primer to dry.
- Apply the basecoat of color using a brush, roller, or sprayer.
- Sand between coats.
- Apply the topcoat in the same way as the basecoat.
- Wait for the topcoat to dry.
Polyurethane Varnish
Varnish is a great middle-ground between paint and epoxy resin. It dries clear, just like epoxy, and forms a hard shell. However, it doesn’t offer the same protective qualities as epoxy, although it applies just like paint.
You can get marine-grade varnish for the highest water resistance, making it suitable for boats and docks. If you are sealing with polyurethane, consider using it outdoors. It has excellent UV and rainwater resistance.
How to Apply
- Using a brush, apply a coat of varnish to the edges of the plywood first.
- Now coat the surface of the plywood using a brush.
- Leave the first layer to dry overnight.
- If there are any visible brush marks, sand between coats.
- Now lay down the next coat and leave it overnight.
Waterproof Wood Sealant
Waterproof wood sealant is suitable for indoor and outside use. It forms a hard shell on the surface of the plywood to protect against water, heat, UV, and wear and tear.
It is best applied using a paintbrush, so make sure you get an appropriate size brush for the task. Try a smaller two-inch brush for edges and a wider variety for flatter surfaces.
Keep In Mind
Waterproof sealant comes in oil and water-based versions. The drying times vary between the two, with oil taking 24 hours and water-based products drying in four to six hours.
How to Apply
- Start by sealing the edges with a two-inch brush.
- Swap to a larger brush for the flat surfaces, working from top to bottom.
- Use long strokes that follow the grain of the plywood.
- Depending on the type of sealant, wait the appropriate time for it to dry.
- Add a second coat and wait for it to dry before use.
Shellac Flakes
Shellac is a decorative and effective way to protect plywood surfaces. It is particularly effective on birch plywood cabinets. Shellac was used for years before falling from grace when other lacquers became popular.
Shellac produces a honey-like tint on the wood surface, giving everything a retro look. It is now back in fashion and a popular choice with those seeking a vintage feel to their furniture.
Interesting Fact
Originally, Shellac was formed from crushed beetles and their secretion, but modern versions are synthetically made.
How to Apply
- Use a fine-bristled brush to apply the first coat.
- Work in straight lines, using steady strokes, overlapping each pass by one inch.
- Work parallel with the grain.
- Wait while the shellac dries (one to four hours, depending on humidity).
- Sand the dried coat of shellac using 180-grit sandpaper.
- Brush off the dust and apply a second coat in the same way.
- Sand between each coat.
- You can apply between two and four coats to achieve the protection you need.
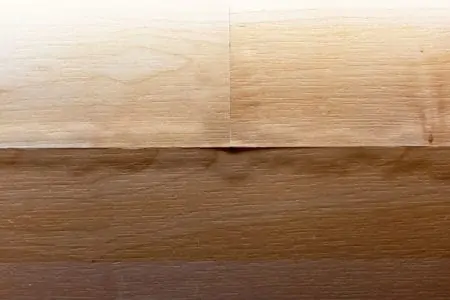
Which Is the Best Waterproof Plywood
Giving your plywood protection is good, but you can make your life easier by selecting a suitable waterproof plywood from the get-go. Knowing which is the best can be confusing.
The American Plywood Association determines the plywood grades, and the letters refer to the quality of the plywood sides.
So, what are your options, and what do the letters mean? The lower the letter, the lesser the quality of the panels. For example, AB has fewer faults than AD plywood and so on. The X denotes that the plywood is constructed using exterior-grade glue, so it withstands moisture.
ABX Plywood
ABX plywood is also known as marine-grade plywood, and it is the most water-resistant type you can buy. It is regularly used in boat construction and docks. It has fewer (if any) faults, and those detected are generally removed during construction.
ACX Plywood
This plywood has two different quality panels, with an A-grade and C-grade side. It is better for use in lighter construction where the decorative qualities are more important than structural integrity.
ADX Plywood
ADX plywood is the lowest grade and is really only useful for interior walls such as paneling.
Tips for Protecting Sealed Plywood
Protecting your sealed plywood is crucial if you want it to continue to perform for the years ahead. There are always easy methods to make it more manageable, and here are a few to get you started.
Choose the Right Plywood
Selecting the right plywood for the application makes a world of difference. If you are using the plywood outside, it needs to withstand the elements. Eventually, water will get in, so the quality of the plywood underneath the sealant needs to be water-resistant.
Use Epoxy Coating On the Edges
Where the edges make contact with the ground, moisture is usually present. Using high-grade epoxy to seal the edges keeps water from penetrating the layers of plywood and glue.
Use Tar Paper
Sitting your newly built plywood garden structure on a layer of tar paper stops water from penetrating the wood. Ground moisture is just as damaging as rainwater because it soaks into the plywood like a sponge.
Use a Pitched Roof
Build your garden structure with a pitched roof to allow the water to run away instead of pooling and seeping into the wood. Another idea is to cover the roof with sheet aluminum to protect it against the elements.
FAQs

How Long Will Untreated Plywood Last Outside?
It will last approximately five years, although a lot depends on the conditions and the moisture levels.

Do You Need to Seal Plywood For Interior Use?
It is less important in dry rooms like bedrooms and dining rooms, but sealing the plywood is necessary for bathrooms and kitchens. However, if you want peace of mind, it is better to seal all plywood.

Is Exterior Grade Plywood Waterproof?
It is water-resistant rather than water-proof. The “X” in “ABX” stands for exterior, meaning water-resistant glue has been used in the construction process.

Can You Use Flex Seal to Seal Plywood?
Coating plywood with flex seal does protect it from moisture penetration. Flex seal bonds to almost every surface, including wood, concrete, tile, metal, and masonry.

What is the Best Primer for Plywood?
Marine-grade primer is the best to use on plywood because it has superior water resistance. However, there are several products available that will do a perfectly adequate job of sealing your plywood.
Look for brands like this KILZ All-Purpose Primer and Rust-Oleum Painter’s Touch as a mark of quality primer.

How Do I Get a Smooth Finish on Plywood?
Praise the Plywood
Plywood is an excellent building material. It is robust, versatile, and a lot cheaper than wood. It is engineered, so you can guarantee square and flat panels every time, unlike working with natural wood.
However, the elements take their toll, so if you want your plywood to last 20 plus years, put in the effort and protect it with sealant.