Rounding wood corners without a router is pretty challenging. However, before routers were invented, craftspeople used skills and ingenuity to create rounded wood edges. It isn’t easy, but it is possible.
So, hone your skills as we show you how to round wood edges without a router, covering several methods in simple steps.
Key Takeaways
- Use a block plane, sanding block, or power sander to round wood edges without a router.
- Draw a template curve onto the wood to guide your shaping process.
- Be patient and gentle with your tools to avoid removing too much wood or causing damage.
- Finish off the rounded edge using sandpaper to smooth and perfect the shape.
Why Round Wood Edges?
It’s a great question. Why not just leave the sharp corners and relax with a coffee instead? The simple answer is, straight edges on furniture can be dangerous. And, if you have young children, you know their ability to find a sharp corner is as honed as Lassie finding kids trapped down a mineshaft.
Rounding the edges on your furniture makes your home safer. It also helps to improve the aesthetics of your furniture, making it more appealing to the eye. Curves and contours are pleasing because they create an organic, flowing shape.
Cutting curved edges on a table or kitchen counter makes it safer for pets and even adults that prone to whacking against it. It also protects your surfaces and edges from chips and scratches because round edges are more durable when knocked.
How to Round Wood Edges Without a Router
There are several DIY techniques you can use to create rounded edges by hand. Obviously, the easiest way is to use a router because it is faster and more accurate. However, it would be cool to learn anyway.
Block Plane
A hand plane is an excellent tool for creating curves in wood. It is one of the most popular methods other than using a router. Plus, it’s also fairly easy to master.
- Start with a 45-degree angle to the edge of the wood.
- Make sweeping strokes along the straight edges.
- As you near the corner, change the tilt of the blade to accommodate for the curve.
- Gradually plane the corner until it starts to resemble a rounded edge.
- Finish off the rounded edge using sandpaper to mold the shape.
Dremel
Dremels are handy tools for a woodworker. They sand, cut holes, and route, thanks to multiple attachments for different applications. Making curved edges with a Dremel is a lot easier than using a hand plane, but you still need to keep control of the tool.
Take Note
If you apply too much pressure to one part, you risk gouging the wood and spoiling the finish.
- Draw a template curve onto the wood using a pencil.
- Power up the Dremel and let it reach full speed.
- Work in sweeping motions to remove the sharp corners.
- Follow the lines and gradually grade the curvature of the wood.
- Use sandpaper to smooth any rough edges and get a better shape.
Sandpaper
You can’t beat good old-fashioned sandpaper to create curved edges. It takes longer than using a Dremel, but you retain a level of accuracy that other methods lack. The secret with using sandpaper is to start with a low-grade sheet and move to fine-grit as you reach the finish.
Use a sanding block to give you a better grip and control. It also protects your knuckles from splinters. However, if you have a lot of material to remove, try using another method first and finish with sandpaper.
- Draw out the curve to give you a template.
- Start with 80-grit sandpaper and flatten the sharp corner.
- As you near your desired line of the curve, start to shape the edges.
- Swap to 200-grit sandpaper for the finer details.
- Sand along the straight edges, shaping the wood at the corner.
- Keep repeating this process until the curve takes shape.
Rasp or Wood File
The great thing about wood files is they give you an incredible amount of control. They are excellent tools for finesse working, so creating curved edges should be a cinch.
The only downside with rasps and wood files is it can take forever to see the results. It might be better to start using another method like the Dremel or hand plane and finish with a wood file.
- Grip the file by the handle, with the other hand holding the top of the blade.
- Run the file along the straight edges, making a 45-degree angle at the ends near the corner.
- Shape the sharp edges by flattening them and grading the curve to meet the straight lines.
- Keep working the file back and forth along the edge until the curve is complete.
Chisel
Using a chisel requires a little patience and skill. It may even be best to practice on a scrap piece of wood first to get a feel for how it handles.
Apply too much power with the mallet, and you risk removing too much wood in one go, ruining your efforts. Strike the chisel gently to remove small amounts of wood.
Top Tip
Make sure the chisel is sharp before you start. A blunt chisel will only rip the wood rather than cut, and the task will be twice as hard.
Also, wood chisels are aggressive compared to other methods. They are great at removing wood chunks, but be prepared to sand the edges at the end.
- Hold the chisel at 45 degrees and gently tap the end with the mallet.
- Start at the corner and remove the sharp point.
- Keep chipping away until you have a semi-flat edge.
- Switch your attention to the edges where they meet the corner.
- Work along the straight edge, shaping the corner as you go.
- Now grab some sandpaper and start to shape the rough edges into a smooth curve.
Power Sander
It almost feels like cheating using a power sander to fashion curves on plywood, but it still takes a degree of skill. Orbital sanders are the best to use because they are round and easier to maneuver, but a belt sander works too.
Before we get into the process, we need to take stock of the safety requirements. Here’s what you will need:
- A face mask to protect you against sawdust.
- Safety goggles in case of flying debris.
- Safety gloves to protect your hands.
- Start by drawing out a curved template to give you a guide to follow.
- Switch on the sander and wait while it reaches maximum speed.
- Begin rounding off the corners, working the sander side to side.
- When the corner is curved enough, switch your attention to the straight edges.
- Run the sander along the edges, angling it as you reach the corner.
- When you have the perfect curve, switch off the sander.
Keep In Mind
Power sanders remove a lot of material in a short time, so you need to concentrate. Apply gentle pressure to the sander or risk gouging out the wood. Once it’s gone, it can’t be replaced.
Jigsaw
A jigsaw is ideal for making curves in wood. It is maneuverable, fast, and efficient. However, don’t expect neat edges because jigsaws are also crude.
Using a jigsaw to curve sharp corners on furniture will get the job done quickly, but it only works if you need to remove large wood chunks. Jigsaws need material to bite into, so you might be better using a sander to shape the straight edges where they meet the curve.
A jigsaw in the hands of a novice is a dangerous thing. It takes practice and skill to control the blade. You risk carving up your favorite furniture if you get it wrong.
- Draw out your curve as a template for the jigsaw.
- Place the jigsaw blade onto the start point.
- Power up the jigsaw and push the blade forward.
- Start to angle the blade as it turns into the corner.
- Complete the cutting action in one sweep, and stop when you reach the finish point.
- Power off the jigsaw.
- Grab the sandpaper and start to smooth the rough edges.
Surform
A surform is a cross between a hand plane and a rasp. It has a perforated blade that grates the wood as it makes a pass.
You use it in the same way as a hand plane, gripping the handles at both ends. It is specifically designed for bullnose work, so if you are rounding edges on a board, this is your tool.
- Start by curving the sharp corner, working in sweeping motions.
- Remove the 90-degree angle of the corner, rounding as you go.
- Run the surform along the straight edges, angling it as you reach the curve.
- Repeat on the other straight edge until you have a natural curvature.
- When you have a curve you like, sand to smooth the rough edges.
Types of Rounded Wood Edge Profiles
With so many wood edge profiles, it can be a challenge to know which one is right for your project. From pencil round to chamfered, the level of intricacy and design varies enormously between each style.
Bullnose
A bullnose wood profile is a classic curved edge. It is the perfect edge for kitchen countertops and farmhouse-style dining tables. This type of edge also comes in a half bullnose design.
The best tool to make this curve is either a sanding block or an orbital sander.
Chamfered Edge
A chamfered edge is deceptively simple. You can see from the image that it consists of two angled edges. This design is typically used on tables and countertops.
A sander or hand plane is the best tool for making chamfered edges.
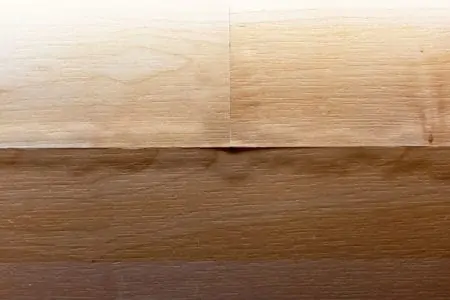
Pencil Round
You can see that the pencil edge profile is more subtle. It almost looks flat, but there is a slight curvature where the flat side meets the edge. You find this design on tabletops, cabinets, and countertops.
The best tool for making pencil round profiles is a sander or block sander.
Quarter Round
While the image is of a length of trim, it illustrates a quarter round edge perfectly. It consists of two straight edges that meet a subtle curve. It is a common profile on countertops, but it is also used in moldings and trim.
A hand plane, surform, or sander is the best tool for creating quarter round edges.
Rounded
Surprisingly, the rounded edge is flatter than a full bullnose, but the “rounded” refers to the softer curve between the flat and the edge.
Rounded edges are used in everything from kitchen countertops to baseboards and moldings. The best tool to create rounded profiles is a block sander.
Ogee
Ogee profiles are more intricate, which is why you often find them on high-end furniture and cabinets. The design resembles the closed lid of a piano, with a concave curve that meets a convex curve, a bit like an elongated S.
Because of its intricate nature, the best tool for creating ogee profiles is a Dremel.
On the Edge
Whichever profile you choose, rounding off the edges of your woodwork project makes it look more appealing. It makes your furniture more durable and stops serious accidents with young children and pets.
If you don’t own a router, you have no excuse because, as we’ve shown, there are several methods to achieve the same results.