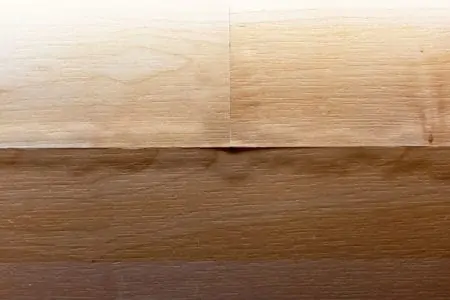
Knowing how to harden wood is crucial if you want to preserve old or soft wood for later use. There are several reasons why hardening wood is useful, from restoring old furniture to recovering moisture-damaged boards.
However, not all wood is recoverable, and knowing the difference is crucial if you want the best results. Here is our guide on how to strengthen wood, along with tips for reinforcing weak wood.
Key Takeaways
- Apply wood hardener: Wood hardeners penetrate the grain and set to provide rigidity, helping to strengthen soft or rotten wood.
- Use Polycryl: Polycryl strengthens the wood surface rather than the fibers beneath, making it an ideal chemical treatment for beginners to work with.
- Use epoxy resin: Epoxy resin forms a protective shell around the wood, hardening and protecting it from damage.
- Strengthen wood with fire: Heating the wood removes moisture, which strengthens the most rotten parts and preserves the wood.
Can You Harden Rotted Wood Naturally?
It depends on what you mean by “naturally.” You can soak your wood in linseed oil and different olive or vegetable oils to create a hard polymer inside the wood. However, while these oils are pressed from natural seeds, they start a chemical reaction within the wood to create the polymerization process.
Therefore, all forms of wood hardening begin with a process that changes the chemical makeup of the wood fibers.
5 Ways to Harden Wood At Home
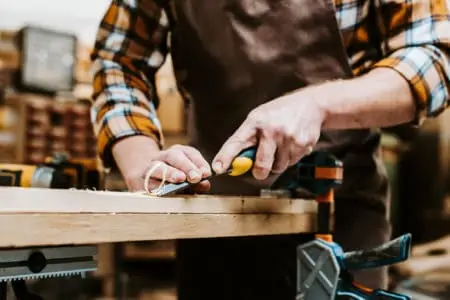
So, you’ve discovered some soft or water-damaged wood, and now you want to restore it rather than replace it. There are ways to bring your rotted wood back to life, and the good news is most DIY’ers can tackle this task.
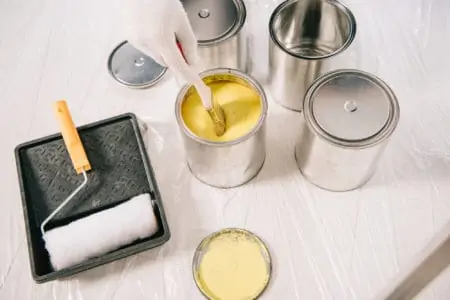
Apply Wood Hardener
Using a wood hardener to strengthen wood is probably one of the easiest methods. Wood hardeners work by penetrating the wood grain and setting to provide rigidity.
If your wood is too soft or rotten, wood hardener may not work at all.
The secret to wood hardener success is to remove bits of the wood that are already too far gone. You also need to remove any sawdust before applying the hardener.
1. Clean and Dry
Use a putty knife to scrape away remnants of rotten wood. Then clean the wood that you have left with soap and water, ensuring it is completely dry before applying the hardener.
If you are restoring old wood, remove oil and grease from the surface as this will cause the hardener to fail, and it won’t bond properly.
2. Prepare the Wood Hardener
Wood hardener comes in cans or bottles in a premixed state. Shake the container to mix the ingredients evenly. In transit, sometimes the solution settles and separates, just like paint. A vigorous mixing revives the contents.
Wood hardener is relatively safe, but wearing gloves will protect your skin. Also, to combat strong odors, work in a well-ventilated area and wear a face mask.
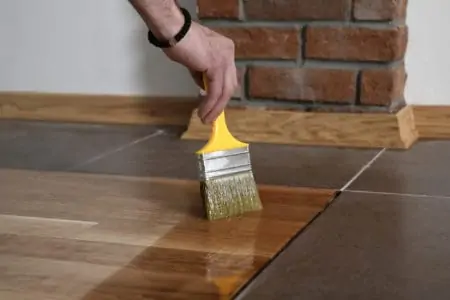
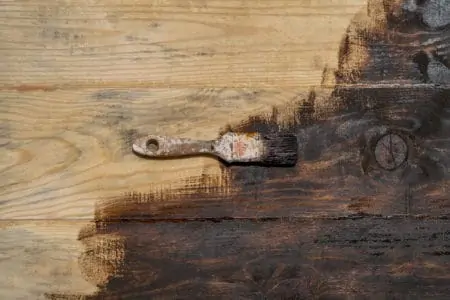
3. Apply the Hardener
You can apply the hardener by either spraying it using a pressurized sprayer or brushing it on with a paintbrush. The size of the project will probably dictate which method you use. A sprayer covers more ground with a more even spread of the hardener.
A paintbrush is better for those fiddly or irregular-shaped pieces of wood.
4. Leave to Dry
Allow the first layer to dry for between one and two hours. When you are happy the allotted time has passed, apply the second coat in the same way. Follow the same procedure for drying times before laying down the third coat.
If you want the strongest possible outcome, with a glossy finish to the wood, try applying five coats.
5. Leave to Dry (Again)
When you apply the final layer, leave the workpiece to dry for between five to 12 hours. Once set, the wood can be sanded and painted or left to show off the natural wood grain.
Use Polycryl
Polycryl works by strengthening the wood surface rather than the fibers beneath. It is the ideal chemical treatment for beginners because it is so easy to work with.
It is sometimes known as a fortifier or wood stabilizer, and it is safe to use and affordable compared to epoxy resins.
1. Prepare the Polycryl
Follow the instructions when preparing the polycryl. Some are concentrated and need diluting before use. Mix it with water and stir until it forms a thick liquid.
2. Clean the Wood
Remove stains, dust, and loose debris from the surface of the wood. Then, thoroughly clean the workpiece before applying the polycryl. The cleaner the wood, the better the polycryl bonds and strengthens.
3. Spread the Polycryl
Use an old but clean paintbrush to spread the polycryl over the surface of your wood. It pours on and covers easily. Rather than focus on the softer areas of your wood, if you spread it everywhere, you increase rigidity.
4. Let It Dry
Store your project in a cool and dry place for about five hours, although you do need to check the particular drying times of your chosen product.
5. Check It
Once the necessary time has passed, check your handy work to see if the wood has hardened. If you think it needs it, you can apply further coats of polycryl to get that super tough finish.
6. Apply a Finish Layer
Once set, you will need to apply lacquer or varnish to protect and seal the wood. It protects against water and UV damage and ensures your polycryl stays working for longer.
Use Epoxy to Harden Wood
Epoxy resin has been used to harden and protect materials since its invention in 1934 by German Paul Schlack. It works by forming a protective shell around the wood. It dries completely clear, showing the natural grain, or you can choose decorative additives.
1. Clean the Wood
The wooden surface needs to be free of debris and dust. Also, remove the loose fibers by scraping them with a putty knife. If you leave any loose pieces, it could stop the epoxy from bonding.
Epoxy comes in all types and sizes, but if you want the strongest seal, choose a two-part product like this Total Boat Clear Resin. It uses a hardening agent that sets the resin solid.
2. Mix the Epoxy
Some epoxies mix with water, but if you’ve chosen a two-part system, the mix ratio is typically one-part resin to one-part hardener. Stir it well, and then pour the epoxy over the affected wood.
Always follow the instructions to the letter to get the most out of your epoxy resin.
Use an old paintbrush to spread the epoxy, ensuring it has an even coat. Epoxy is a thick formula, so you will need to distribute it well. You could also use a plastic putty knife to get the best coverage.
3. Harden the Wood from the Inside
If you want the epoxy to harden from within, try drilling a couple of holes in the wood and allow the resin to fill the gaps. This gives soft wood a stronger inner core.
Top Tip
When working with epoxy, remember that the hardener will get to work immediately. Ensure you work at a brisk pace to avoid it setting before you are finished.
4. Wait to Dry Between Layers
Epoxy takes about three or four hours before it is dry enough to take a second layer. However, consult the instructions to get the specific drying times of your product.
5. Apply the Subsequent Layers
Apply the next two layers in the same way, smoothing the resin with either a brush or putty knife. Because it is self-leveling, it makes life easier, but you still want to avoid air bubbles.
6. Let It Cure
Epoxy takes about three days to cure properly, but it will set sooner if the temperature is cool. After the required curing time, you will have a hardened piece of wood.
Strengthen Wood With Fire
It goes against your instincts to burn your weak wood, but fire is one of the oldest methods. Heat removes the moisture from the wood, which also strengthens the most rotten parts.
Crucial Point
This technique is not for the faint-hearted. It is vital to keep your concentration, or you risk burning your wood or yourself. You also need to follow the steps carefully.
Here’s how to do it:
1. Prepare a Fire Pit
You can use a kiln, a fire pit, or simply dig a hole in the ground. The important point is your work area should be open so you can maneuver the wood easily.
Position the pit where it will cause the least harm, and never place it next to combustible objects like wooden fencing. Also, wear safety gloves to prevent burns and safety goggles to guard against flying embers.
It’s also a good idea to have a bucket of water nearby in case you need to dampen the fire.
2. Light the Pit
Fill the pit with charcoal and wood and light them. The flames should grow and emit a decent amount of heat. Keep adding to the pit as the fire stabilizes.
3. Work With the Soft Wood
Once the flames reach a height of about six inches high, position the wood about three inches above the fire. If you hold it too close, you risk burning the wood.
4. Keep It Moving
Keep the wood moving, ensuring that the flames are never in contact with the wood surface for more than a minute at a time. As the wood heats, it releases moisture, and the more it secretes, the harder the wood becomes.
The aim is to heat the wood and not burn it.
5. Check Regularly
Keep an eye on the wood, checking at regular intervals to see if it is hardening. If it feels tougher, remove it from the heat and wait five minutes while it cools.
Don’t check the wood while it is still over the flames for obvious reasons.
6. Repeat If Necessary
Your piece of wood should have hardened, but if you think it needs more work, hold it over the flames again. You should repeat the previous steps to ensure it hardens without burning.
Infuse with Resin
Acrylic resins like this Cactus Juice Resin are natural water-based products that infuse to stabilize soft or rotten wood. It hardens from within and protects the wood without nasty chemicals, making it safer to use.
The resin is easy to apply, but the prep work probably deters many people from using this method. You also need a vacuum chamber, like this Slickvacseal Stabilizing chamber.
1. Dry the Wood
Remove all traces of moisture by placing your workpiece in a standard oven. There are no chemicals to worry about, so you can do this without damaging the appliance.
You need to remove all the moisture because even the smallest amount will stop the resin from doing its job. The trick is to bake it slowly to allow the wood to dry without burning.
Place the wood in the oven at 250 degrees Fahrenheit for eight hours. Smaller pieces may only take two hours, but it is better to be safe than sorry.
2. Allow to Cool
Toss the wood pieces into zip-lock bags and leave them to cool at room temperature.
If you see condensation inside the bag, moisture is still present, and they need longer in the oven.
3. Turn on the Vacuum Chamber
This is where the stabilization happens. Once the wood has cooled, place it inside the vacuum chamber, ensuring sufficient space between each piece. Hold it in place using a mesh grid.
Pour in the resin, so the wood is completely immersed. The wood needs to stay immersed throughout the entire stabilization process. Now start to extract the air from the chamber to create a vacuum seal.
You will notice bubbles in the resin; that’s the air escaping from the wood. You may also see foam forming in the resin, and again, this is simply a bi-product of air extraction. As more air gets removed, the bubbles and foam disappear.
When all traces of air vanish, there is no more air in the chamber, and the wood has absorbed the resin. This process should only take an hour.
4. Allow the Wood to Rest
Give the wood pieces a couple of minutes to settle before removing them and blotting them dry on paper towels.
Make sure the chamber valve is closed before switching it off. Rather than open the chamber rapidly, ensure there is adequate ventilation.
Pour the excess resin in an airtight container for later use on other projects.
5. Bake the Wood
Grab some aluminum foil and wrap each piece individually, with the matte side of the foil on the outside and the shiny side touching the wood.
Preheat the oven to between 150 and 200 Fahrenheit (71 to 93 degrees Celsius), and place the wood inside for 60 to 90 minutes. When done, remove the wood and allow it to cool in the aluminum foil.
How Do You Reinforce Wood?
There are several methods to reinforce wood that don’t involve resins or other chemicals. They may not deliver the same results, but they are a useful way to strengthen old and worn wood.
Use Wood Glue
Wood glue works in much the same way as resin. It dries to a hard shell, strengthening the wood. You can bind two pieces together or use it to protect rotten sections.
It’s also a good way of sealing wooden ends where moisture may soak in. This is useful if these ends come into contact with damp surfaces. The glue repels the water and leaves the wood bone dry.
Use Plates
If you have rotten sections of wood, a great and simple way to add rigidity is to add metal support plates. The plates screw into the solid wood, connecting one good piece to the next, removing the weak spot.
This is a slightly more crude method, but it still works if the plates are hidden.
Use a Brace
Use a good piece of wood to attach to the back of the soft piece to add rigidity. If the backing board remains hidden, you will never know the outward-facing wood is braced.
How Do You Protect Wood from Going Soft?
The ideal scenario is to protect the wood from rotting in the first place. It saves remedial work further down the line when you resort to patchy repairs. It also keeps the structural integrity of your wood without having to add additional chemicals to strengthen it.
Store It Correctly
Keeping your spare wood in a dry and cool environment is crucial if you want it to hold its strength. A great option is racking; it keeps the pieces apart and off the ground. New wood, like pine, carries a lot of excess moisture that spreads when it makes prolonged contact with other timber.
Seal It
Sealing your wood surfaces with polyurethane, paint, sealant, stains, and other applications ensures that it doesn’t suffer any damage when it makes contact with water. Nothing will waterproof your wood, but you can certainly make it water-resistant.
Use Treated Wood
Exterior projects like sidings and fencing need additional protection from the elements. Using treated wood ensures there is enough repellant to ward off rainwater and UV rays because it has been soaked in a chemical solution.
It is the same as using a penetrating sealer, but treated wood is soaked in sealant on an industrial scale, offering better protection.
Seal the Ends
Most moisture absorbs through the ends of your wood because that’s where the wood grain makes direct contact. Sealing the ends protects against moisture ingress and seals. A simple wood glue or epoxy will work, or you could try dipping the ends in a penetrating sealer.
FAQs

Can You Strengthen Any Type of Wood?
You can, but softer woods like pine benefit more from strengthening techniques. Hardwoods, like oak, have a tighter grain, so they are denser. These woods stand up better to moisture and UV rays, which is why they are an ideal construction material.
The only exception to this rule is balsa wood, which is really only a modeling material and has zero structural benefits.

Does Wood Harden Over Time?
Age is not an exclusive method of hardening wood, but it does add strength if stored correctly. However, other elements play their part. Moisture content, weather conditions, and the placement of the wood are all factors in strengthening or weakening wood.

Will the Wood Stay Strong After Hardening It?
It will unless you expose it to high levels of moisture or UV. Every wood rots if left in poor conditions, and strengthening wood will preserve it for a period, but not forever.

Do You Apply Wood Hardener Before Or After Stain?
You should always stain after applying the hardener (unless it is an epoxy resin) because otherwise, the stain will not adhere. You can’t stain wood and apply a hardener because the stain rejects the hardener.

Does Heat Treating Wood Make It Stronger?
Heat removes moisture, which preserves the wood, making it stronger. It also stops fungal growth that eats the wood, again maintaining its structural integrity.
Keep Your Wood Hard
Wood is a versatile material and can add structural integrity to your project. Exposing it to the rigors of moisture and UV will eventually weaken the wood, and it will need replacing.
Catching it before you have to replace it could mean you retain the original features of the wood and save money in the long run. So, the next time you spot soft wood, think ‘repair’ rather than ‘replace’.