Working with wood requires accuracy, which can be challenging to achieve if you have warped wood. Unwarping wood takes time and patience, but it can be done successfully to get your project back on track.
We show you how to straighten warped wood using several techniques and tell you how to prevent wood from warping in the future.
Key Takeaways
- Store wood properly by keeping it off the ground, allowing air gaps, and protecting it from moisture, extreme temperatures, and insects.
- Use methods like steam and moisture, sunlight, pressure, or a jack plane to straighten warped wood.
- Prevent wood from warping by using proper storage techniques, moisture-proofing the wood, and purchasing high-quality wood.
- Redwood, cedar, and oak are types of wood that are less likely to warp due to their dense fibers.
Why Does Wood Warp?
The way the wood is produced and stored can make a huge difference. Get it wrong, and you end up with warped and twisted wood. The good news is that stopping your wood from warping is entirely avoidable but knowing why it misshapes is crucial.
Storage
Store your wood off the ground because when concrete becomes damp due to temperature fluctuations, the wood sucks up moisture like a sponge.
Keep an air gap between each piece of wood to let it breathe. If you allow them to make contact, one damp strip will infect the rest.
Moisture
Moisture around wood is as welcome as garlic bread on the menu at a vampire convention. It penetrates the wood fibers, causing them to expand. And, as the wood expands, it warps.
Keep In Mind
Beware of wood stored outside at timber merchants because it soaks up a lot of water. When you stack it in the garage, it starts to warp.
Temperature plays a role because colder weather causes the wood to shrink, and extreme heat dries the wood, causing it to misshapen. Humidity is another factor to consider because if the wood is exposed to long periods of moisture, it starts to rot and warp.
Wood Density
Modern lumber is grown for production purposes, and it is way less dense than naturally grown trees. This lack of density makes the fibers loose, leaving them prone to warping from heat, cold, and moisture.
Insect Attack
In the right conditions (or wrong conditions, depending on your point of view), insects can attack your wood. We’ve all seen holes in cabinets and other old furniture, which is a sign of woodworm.
Other boring insects like ants and beetles eat the wood, causing it to weaken and warp.
If left untreated, your wood will become unstable. In the worst-case scenario, houses can collapse if the wooden frame gives way. Luckily, you can treat infestations, and there are ways to harden wood, which we cover in another article.
Types of Wood Warping
There are many ways your wood warps, and spotting the signs helps establish the right way to fix the problem. Fixing warped wood is not easy, but using the correct technique for the problem at hand makes it possible.
Cup
As the name suggests, the wood sags in the middle of the plank, like the example shown. It creates a cupped effect where the center strip takes on a convex shape.
Cupped wood is extremely difficult to remedy. The best way is to use pressure by clamping the wood between two straight pieces, leaving the wood to straighten. You could also use steam to make the wood more pliable.
Bow
Bowed wood is similar to cupped timber, except the bowing takes place along the length of the plank rather than across the middle. You can fix bowed timber in the same way as cupped wood.
Crook
Crooked wood is similar to bowed wood because the warp runs along the length rather than the width. However, crooked wood only occurs on one side. Heat, steam, and pressure are the best ways to fix this type of warped wood.
Twist
Twisted wood has a disfiguration somewhere along the length that resembles twisting the wood in opposite directions. It usually occurs when the wood is stored incorrectly. You rarely see it in wooden boards that have already been installed.
The best way to treat twisted wood is using heat or steam. Warm the wood and try to reshape it gradually. It takes time and patience to get it right.
Kink
A kink occurs when the timber changes shape anywhere along its length. It occurs when the wood is exposed to heat or moisture for prolonged periods. It can be remedied using applied pressure along the edge of the board.
Again, heat and steam will make the board more supple, allowing you to pull it back into shape with a straight edge and clamps.
Can You Fix Warped Wood?
You can fix warped wood but be under no illusion; it is challenging. We list the many methods of improving warped lumber, but you will need to be patient and recognize that it doesn’t always work.
When the wood is too badly warped, you should replace it rather than try and fix it.
How to Straighten Warped Wood
There are several ways you can fix bent wood. Some methods are easier to execute, while others require more patience to achieve success.
Using Steam and Moisture
Using steam is one of the most common ways to shape warped wood. Just as moisture causes it to bend and misshapen, it also helps when you want to straighten the wood.
Essentially, you are heating the wood and using moisture to reshape it.
This method works better for slight warps and thinner wooden boards. You will struggle to try and straighten 2×4 using this technique.
What You’ll Need
- Water.
- Towels and rags.
- Steam iron.
- Flat surface.
1. Damp Towel and Rags
Towels work better because they can withstand the heat better. Wet them, so they are damp but not wringing wet.
2. Cover the Wood
Wrap the timber in the towels, ensuring there are no creases. Also, check that there are no gaps and the wood is completely covered.
3. Find a Flat Surface
Lay the wrapped wood onto a flat surface with the warp sticking upwards. You can use your workbench or a kitchen countertop. You could also use a tabletop, but be careful not to scratch the surface.
4. Heat the Iron
Plug in the iron and switch it on. Select the maximum heat setting and wait while it reaches temperature. Place it to one side while it heats.
You must use a steam iron for this task. Other irons won’t work.
5. Iron the Wood
When the iron reaches temperature, run it over the warped section of the wood. Let it rest on the bowed part for 10 seconds at a time, and then move it to another position and do the same.
6. Check the Wood
Place the iron to one side once you have covered the entire warped section of the wood. Unwrap the towels and check to see if the wood has straightened out. If a slight bend is present, repeat the steam iron process.
7. Let It Dry
Once you are happy the warp has gone, unwrap the wood and leave it to dry.
Using Sunlight
Sunlight is an ancient and simple method of straightening wood. Again, you are using heat and moisture to soften the wood fibers to make them more malleable. The technique employs the same process as using a steam iron.
What You’ll Need
- Water.
- Towels and rags.
- A flat surface.
- Sunlight.
1. Wet the Towels
Soak the towels in water and wring them out so they are damp rather than sopping wet.
2. Wrap the Wood
Cover the wood in the towels and rags, ensuring that there are no creases and the wood is fully covered.
3. Place It On a Flat Surface
Lay the covered wood down onto a flat surface. Decking or a flat concrete patio will work just fine. Make sure the warped section faces upwards and that it is in direct sunlight.
Top Tip
You can aid the straightening process by placing a heavy and flat weight onto the bowed wood to hold it down. A few bricks should do the trick.
4. Leave it
This method of straightening wood takes longer because you need to wait while the sun does its job. For this reason, you should check the wood regularly over the course of a week to see if the warping has diminished.
5. Let It Dry
Unwrap the wood, check that the warp has disappeared, and leave it to dry in the sunlight.
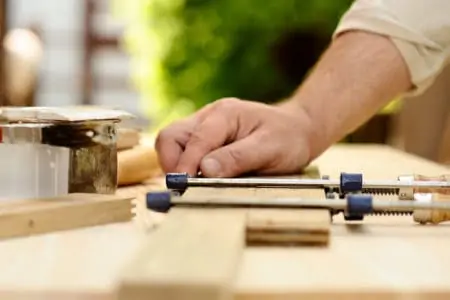
Using Pressure
Old-fashioned brute force has always been an effective way of shaping material, and wood is no exception. Applying the correct amount of pressure should force the warped wood back into shape.
This is the best method for straightening larger pieces of wood like plywood sheets. However, you do need to make sure that the temperatures exceed 50 degrees Fahrenheit when working outside. If this is not possible, consider relocating to the warmest room in the house.
You can use the pressure method in conjunction with the previous techniques already discussed.
What You’ll Need
- Heat mat or lamp.
- Water.
- Towels.
- Food wrap.
- Several clamps.
1. Lay out the Timber
Lay the timber on a flat and solid surface, ensuring that the warped section faces upwards.
2. Damp Towels
Wet some towels and wrap them around the warped piece of timber, covering it completely. Again, the towels only need to be damp rather than wringing wet.
3. Seal the Towels
Because this method takes longer, you need to seal the dampness in the towels. Grab some food wrap and cover the towels to prevent the moisture from evaporating in the sunlight or heat from the lamp or heat mat.
4. Time to Clamp
Now you have the moisture sealed in, work along the length of the warp, attaching strong clamps. You need to ensure the clamps are attached to a solid surface when you tighten them to clamp the timber down.
Tighten all the clamps in tandem to evenly spread the pressure across the warped surface.
5. Walk Away
Once clamped down, you will need a little patience because this process takes a whole week to work. It might even take longer than that, depending on the severity of the warp.
Check back after a week by unclamping the wood and laying it on a flat and level surface. A spirit level helps to determine your success. If the kink is still present, rewrap the wood and clamp it back down.
6. Leave to Dry
Remove the wrapping and place the timber in a dry and warm location to completely dry out.
Ensure the area is dry because any humidity or moisture could cause the wood to warp again.
Using a Jack Plane
A jack plane could effectively remove cupping, where the sides have curled up to make a convex shape in the center. It straightens the timber out, but it will only work on thicker pieces because of the amount of material it removes.
If you plane too much material, you risk making the wood unstable, affecting its structural integrity. If that happens, you will have to replace the wood, which negates the benefits of jack planing in the first place.
For example, a 25mm plank will no longer be the same uniform thickness once you have completed the flattening process.
What You’ll Need
- Jack plane.
- Spirit level.
- Pencil.
1. Check for Cupping
Lay the timber down on a flat surface with the cupping facing upwards. Place the spirit level at various points along the width and length of the wood, checking to see where the wood has cupped. Use a pencil to make marks where you are going to use the plane.
For convex cupping, you will be planing across the width of the wood against the grain.
2. Check for Bowing
Bowing occurs along the length of the timber rather than the width. Lay the wood on a flat surface and use the spirit level to gauge the bowing along the length of the wood.
Mark the spots where the bowing is present because this is where you will perform the planing. Because bowing occurs along the length of the wood, you will be working with the grain to flatten the curve.
Using a jack plane is an effective way to flatten warped wood. But be careful, because once you have removed the wood, you can’t stick it back on if you go too far.
By Kerfing
Kerfing is a specialist process that takes skill to execute. It involves cutting a series of thin strips along the width of the wood to make it more bendable. The secret is to only cut the strips to a depth of half the thickness of the wood.
It means you can straighten the wood by hand, but it also reduces the strength of the wood because you have removed a lot of the material. This is a technique commonly associated with bending wood rather than straightening, but it is an effective way to do it.
What You’ll Need
- Saw.
- Chisel.
- Mallet.
- Medium-grit sandpaper.
- Clamps.
- Wood glue.
1. Make the Cut
Lay the board on your workbench or another flat and sturdy surface. Clamp it in place, so the workpiece stays put. Grab the hand saw and cut across the grain, making a series of thin cuts half the depth of the wood.
The amount of strips you cut depends on the size of the warp you want to straighten, but between eight and 10 should be sufficient.
The kerf must be on the outside of the bow because when you straighten the wood, they close by compression.
2. Use the Chisel
Grab the chisel and mallet and gently hollow out every second strip. You are looking for something that resembles a comb, with a tooth, a gap, and so on.
Once all the kerfs have been removed, use the sandpaper to smooth the recessed areas.
3. Straighten the Wood
Using a couple of spare clamps, gently push the warped section flat to make contact with the workbench surface. Now clamp it down.
4. Wood Glue
Because you have removed significant sections of the wood, you need to make the board rigid so you can use it. Wood glue or filler works well for this task. Spread it into the gaps, ensuring it fills them entirely. Now, wait for the adhesive to set.
5. Sand the Wood Glue
After waiting the recommended time for the wood glue or filler to dry, release the clamp to see if the board stays in place and doesn’t warp. Grab the sandpaper and smooth the surfaces.
How to Prevent Wood from Warping
Knowing how to fix warped wood is useful, but it is better to stop the wood from twisting in the first place. There are ways to protect the wood against damage from water, extreme temperatures, and insect infestation.
Proper Storage
Almost all wood protection starts and ends with proper storage. Wood exposed to the elements will warp. Rain, wind, frost, and sunlight all take their toll on your timber. You also need to store the wood in the correct position to not warp under heavy weights.
Planks and boards should be stored horizontally, with gaps between each panel to let the wood breathe. It’s also crucial that you support the wood against sagging. The same rules apply to thinner strips of wood.
Wood absorbs the same amount of moisture as present in the atmosphere. This is called EMC (equilibrium moisture content), and it is the point where the wood saturates.
Wood needs to be elevated, so if you have the space, try cross stacking, where each layer runs in opposite directions.
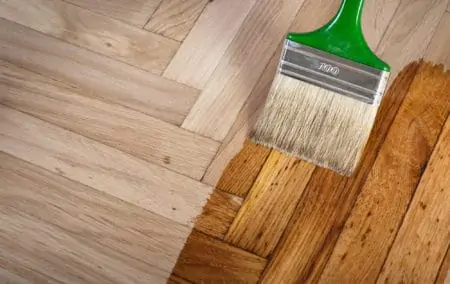
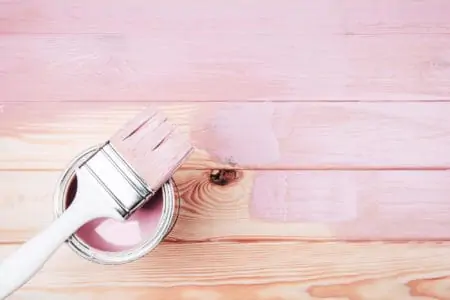
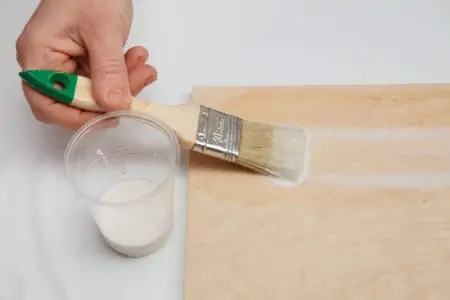
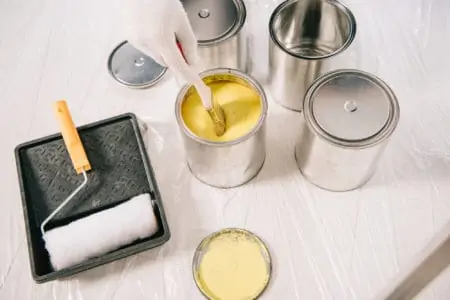
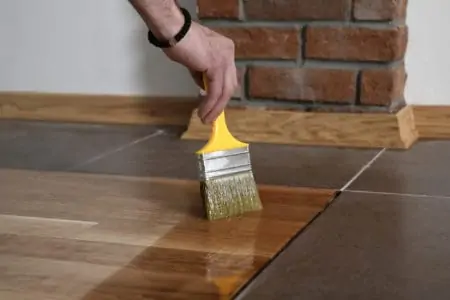
Moisture Proof Your Wood
Once the wood is in situ, you will need to protect it against the elements. The best way to do this is to use a stain or paint to seal the material against water and heat. Warping occurs when there is either too much or too little moisture in the wood.
After staining, your wood will repel water and resist the drying effects of UV rays. Staining also retains the original wood grain. After painting, you will get the same resistance against the elements, but without preserving the natural wood grain.
The upside is you can choose any color you like, transforming your wooden surfaces.
There are many variations of stains and paints, with each performing similar tasks but in different ways. Here are a few worth mentioning:
- Gel stain.
- Epoxy paint.
- Oil-based paints.
- Water-based paint.
- Acrylic paint.
- Liquid latex.
- Polyurethane varnish.
- Epoxy resin.
- Polycryl.
- Penetrating stain.
Buy the Best Wood
Be wary of cheap wood. Often, it is of inferior quality, full of knots, and stored incorrectly. Check the wood carefully before you splash the cash. Straightening wood is a long and arduous process, so why buy warped lumber in the first place?
A great way to check if it is straight is to hold it next to your cheek and stare down the length of the wood. Turn it over to reveal any warps or kinks. You could also grab another piece and compare them.
With engineered wood, check the edges where the glue is exposed. Are there any gaps, or can you see the layers starting to split? This is caused by water ingress.
Don’t Dry Out Your Wood
When wood dries out, it warps through a lack of moisture. Rapid water evaporation will cause your wood to bow as it becomes brittle. There are two ways to tell how much moisture your wood holds: a moisture meter or a humidity meter.
A moisture meter reads the water content of the wood. It has two pins that you press against the timber to get the reading. Humidity meters monitor the ambient temperature inside the space where the wood is stored.
FAQs

What Type of Wood Doesn’t Warp?
Redwood is highly resistant to warping because it has dense fibers that contain an internal chemical to protect against moisture. Cedar and oak are also dense woods that rarely warp.

Can I Soak Wood to Bend It?
Water helps to make the wood supple. You could also use ammonia, although you need a space with excellent ventilation because ammonia irritates your eyes and throat. Pour the ammonia onto a rag and dab it onto the wood. As it absorbs, it softens the fibers.

Should I Remove the Finish Before Fixing Warped Wood?
As a general rule, you should remove the finish before attempting to straighten the wood. Some treatments increase the wood’s rigidity, making it challenging to bend.

Can I Use a Table Saw to Straighten Wood?
A table saw is an excellent tool for cutting kerfs to straighten wood. It is a lot faster than using a hand saw, and you get better accuracy. You can also use your table saw in conjunction with the fence (the guard used to guide the workpiece) to make rip cuts along the wood grain.
Removing kinks and imperfections leaves you with straight wood, fit for use as a building material.
The Wonder of Wood
Wood is such a tactile material; is it any wonder that we love using it as a decorative and building material? However, if stored incorrectly, it warps, splits, and rots. Given that wood is so expensive, knowing how to keep it and treat it is crucial for the best results.
Don’t let your wood go wonky and your boards bend.