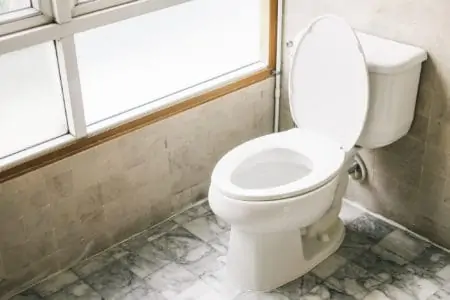
Knowing how to replace a toilet flange is a valuable skill, especially if you spot water leaking from your toilet’s base. If there is no apparent reason for the leak, replacing the toilet flange may be your only option.
We show you how to remove a toilet flange, estimate the cost, and give you pro-level tips for the best results.
Key Takeaways
- Signs of a faulty toilet flange: Pooling water at the base, mold growth, and a wobbly toilet.
- Types of toilet flanges: Plastic, copper, cast iron, aluminum, stainless steel, and brass.
- Steps to replace a toilet flange: Remove the toilet, measure and purchase a new flange, install the new flange, and reattach the toilet.
- Cost of replacement: Hiring a pro could cost $200-$500, while doing it yourself may cost $30-$150 for the flange.
When to Replace a Toilet Flange
Pooling water at the base of your toilet is the first sign that you have a faulty toilet flange. It may seem like a minor thing, but it could contain waste water from the toilet.
Polluted water could pose a health risk to you and your family. You may also spot mold growing around the toilet’s edge, where it connects with the sewer pipe. This is another sign that water is leaking.
Another signal that your flange is broken is when the toilet rocks when you sit down to pee. It could be loose mounting bolts, but it could also be a broken flange.
Toilet Flange Installation Diagram
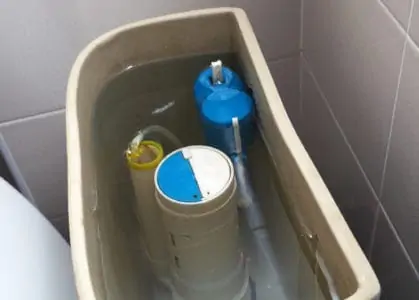
A toilet flange seals the connection between the sewer drain and the toilet, anchoring the toilet to the floor. It typically consists of a circular ring with bolt mounts that secure the toilet to the flange.
They are constructed from PVC, rubber, brass, and other materials and have a rubber or wax seal to create a watertight connection. Water will leak out without a toilet flange and pool on your wood floor. And that’s when rot sets in!
Types of Toilet Flange
From brass to plastic and cast iron to aluminum, several types of toilet flanges are available. But which one should you buy? Let’s find out.
Plastic Toilet Flange
Plastic toilet flanges are by far the most common flanges in use in US homes. Most are constructed from PVC (polyvinyl chloride), the same material as most plumbing pipework. They are cheap and easy to work with and can be swapped out with minimal fuss.
Copper Toilet Flange
Copper is a soft metal, so a copper toilet flange easily molds to fit a variety of openings. It is corrosion-resistant, so it will last the distance, but they are more expensive. You are also less likely to see them used in modern homes.
Cast Iron
Cast iron was a commonly-used material in construction back in the day. Cast iron flanges are extremely durable, but they are heavy and expensive. You are unlikely to have (or need) one in a domestic setting unless you live in an older property.
Aluminum Toilet Flange
Aluminum is extremely light and resistant to rust, making it a great option for commercial flanges in high-use areas. Aluminum is also quite pricey compared to plastic and other materials.
Stainless Steel Toilet Flange
Stainless steel is another durable metal. It consists of chromium, nickel, and other metals to create an alloy resistant to corrosion. Like other materials, steel is also expensive compared to a budget PVC flange.
Brass Toilet Flange
Brass toilet flanges are another corrosion-resistant option. They are less common than other materials but, once installed, will last forever.
How to Replace a Toilet Flange
Water leaking from the base of your toilet is no fun. It causes untold damage if left unchecked and could be a health hazard. Let’s swap the old damaged flange for a new one.
What You’ll Need
- Screwdrivers (flat and Phillips)
- Adjustable wrench (a staple of every plumber’s repair kit).
- Rags.
- Replacement flange.
- Tape measure.
- Putty knife.
- Antibacterial wipes.
- Rubber gloves (optional).
- Old newspaper.
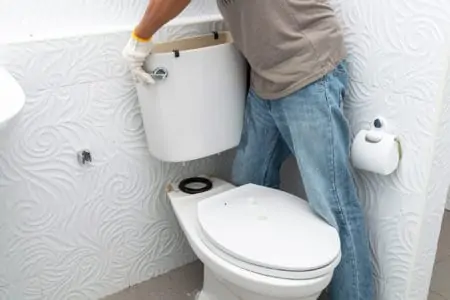
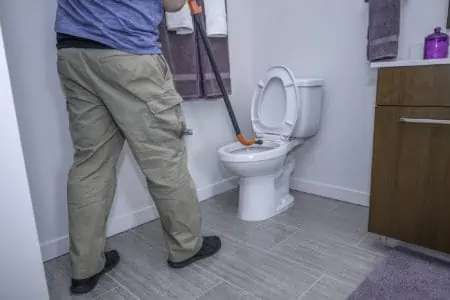
Removing the Toilet and Flange
Before replacing the old flange, we need to remove the toilet. Here’s how to do it.
1. Shut Off the Water
You can either turn the knobs located on the water inlet pipes behind the toilet, or isolate the supply from the main valve outside the property. Turning the knob clockwise stops the flush tank from refilling.
Flush the toilet repeatedly until the flush tank and bowl are empty.
2. Lay Down Newspaper
Make a clear space to the side of the toilet and lay down several layers of newspaper. This is where you will place the toilet once you remove it. It needs to be close by but far enough away that you can still get access to the flange.
3. Unscrew the Water Supply Hose
Remove the water supply hose connecting the toilet with the pipe in the wall. Most should unscrew by hand, but use the adjustable wrench if the threads are tightly wound.
4. Remove the Mounting Bolts
Locate the two mounting bolts that hold the toilet to the flange and floor. Unscrew them using the wrench and remove the bolts.
Take Care
Keep the bolts and nuts in a safe place because you will need to reattach the toilet later.
5. Get Help
Toilets are heavy, weighing between 65 and 120 pounds. If you doubt your strength, enlist help from a trusty volunteer. If you are happy to lift it solo, straddle the toilet and grip it tightly behind the bowl.
Keep your back straight and use your leg muscles to lift the toilet and then set it down on the blanket of newspapers.
6. Remove the Wax Seal
Use the putty knife to lift out the old wax ring that sealed the toilet to the sewer pipe. It should scrape away easily enough.
7. Remove the Screws
Locate the four screws that hold the flange to the floor and remove them with the screwdriver. You are likely to have Phillips screws, but some older systems use flathead screws.
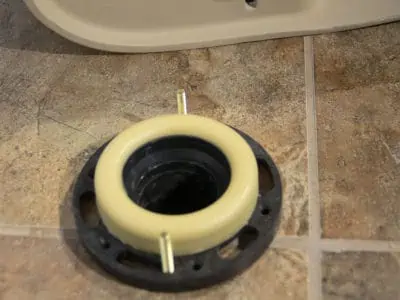
8. Remove the Flange
With the screws out, lift the flange from the drain opening. You might want to don your rubber gloves for this bit because there will be a lot of “dirt” down there.
Place the flange on the newspaper next to the toilet. Block the sewer opening with the old rags to prevent smells and gasses from leaking into the house.
Top Tip
If you don’t have gloves, use antibacterial wipes to clean your hands. You can then wash your hands properly when you’ve finished the project.
Measuring for a New Flange
Sizing the replacement flange is crucial if you want to avoid future leaks. Get it wrong, and all this work will be for nothing.
1. Use the Tape Measure
When replacing a rusted or broken toilet flange, you must measure the drain to get the right size. Then pop to the hardware store or order your new flange online.
2. Use the Old Flange as a Template
A quick and easy way to accurately size the flange is to use the old one as a guide. Matching the two up makes the task easier. The only downside is that you will need to take the old flange to the DIY store.
It also helps you purchase the new wax ring. You should get new bolts and screws with the flange.
Top Tip
Run the flange under the faucet to clean it and place it in a sealed plastic bag.
Installing the New Flange
With all the old elements removed and the drain exposed, you are ready to install the flange.
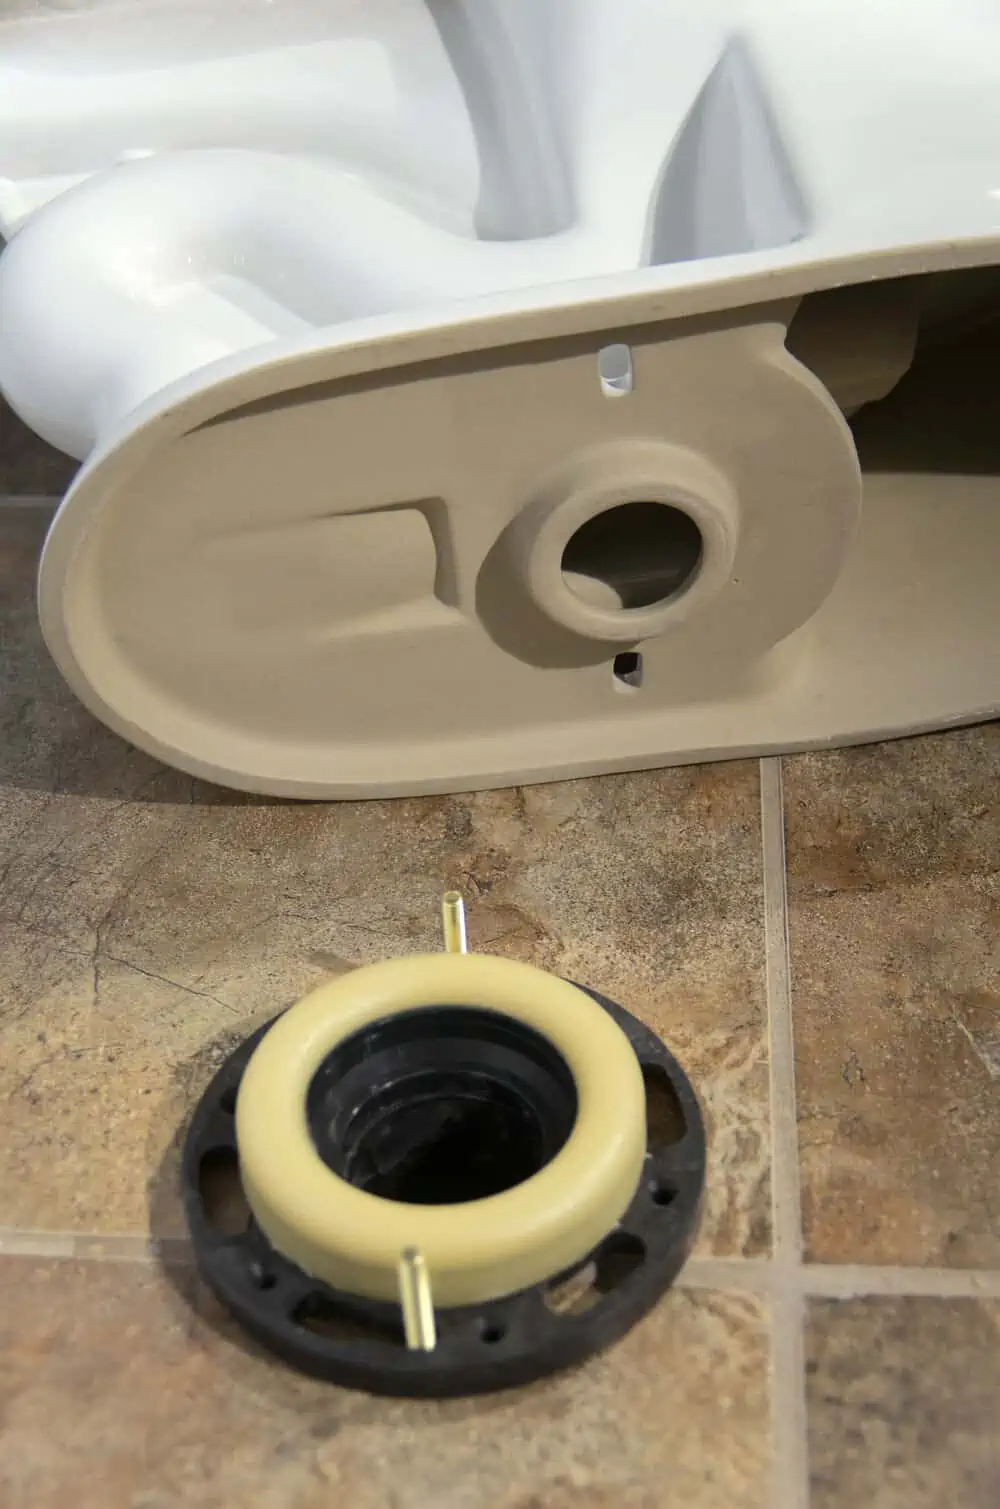
1. Fit the New Flange
Remove the rag from the drain entrance and place the new flange over the pipe. Check that the fit is good and it sits flush with the floor. Attach the flange with the screws, ensuring there are no gaps.
You should have two bolts sticking up from the flange to mount the toilet.
2. Attach the Wax Seal
Flip the toilet on its side and slide the wax seal over the waste pipe that fits into the drain. Be careful not to over handle the seal, or you risk misshaping it.
3. Attach the Toilet
Lift the toilet so that it is positioned over the flange. Get some help to do this because your toilet is heavy. Ensure the mounting bolts align with the holes on either side of the toilet. Gently lower the toilet onto the bolts.
Use the adjustable wrench to tighten the nuts to secure the toilet.
Take Note
Before tightening the mounting bolts, press down on the toilet to ensure the wax seal is secure.
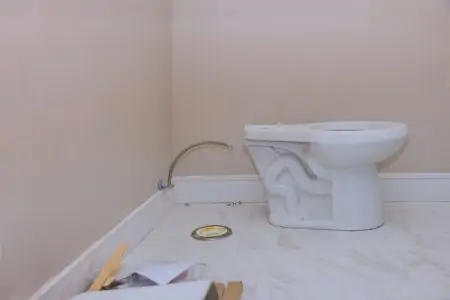
4. Attach the Water Supply Hose
Reach behind the toilet and attach the water supply pipe. Use Teflon tape to get the tightest seal.
5. Turn the Water On
Turn the water back on and allow the flush tank to fill. Check behind the toilet for leaks. Now, flush the toilet and let the bowl fill.
Keep an eye on the base for pooling water. If it leaks, something has gone wrong, and you will need to start the process again.
Cost to Replace a Toilet Flange
Keeping costs as low as possible helps you control your budget. So, what are the differences between hiring a pro and doing the work yourself?
Hiring a Pro
Most plumbers have a minimum call-out charge to protect their cost base. If someone travels thirty minutes to complete a job that doesn’t even cover their labor rates and fuel, it has a negative cost effect.
Expect to pay somewhere between $200 and $500, depending on where you live and local demand.
Doing It Yourself
Working out the costs when fitting the flange yourself is a lot simpler. There are no labor rates to consider, so it boils down to the flange price. That will set you back between $30 and $150, depending on the type of flange you buy.
Some materials are more expensive. The price of a PVC flange is a fraction of the cost of a cast iron or brass one.
Tips for Removing a Stuck Flange
Your old flange will lift out easily from its setting in an ideal world, but what do you do if it gets stuck? If you damage the sewer pipe, it could lead to costly repairs. Here are some handy tips to help you out.
Use a Putty Knife
Slide the putty knife into the gap between the flange lip and the floor. Gently twist the knife to lift the flange upwards. Do this around the perimeter of the flange.
It could take some time, but it is the safest way of ensuring you don’t damage the waste pipe.
Use Lubricant
WD-40 is an ideal product to use on your stuck flange because it lubricates and cleans. Use the directional nozzle to penetrate the tiniest gaps and liberally spray the flange. Wait while it gets to work.
After about 15 minutes, wiggle the toilet flange to see if it comes free. Use the putty knife technique in conjunction with the lubricant if it needs more persuasion.
Use Pliers
Grip the top with pliers rather than chipping around the edge of the flange and damaging the downpipe. It gives you added lift and may be enough to get it free. Maybe tap the top of the flange with a rubber mallet to dislodge the blockage first.
FAQs

How High Above the Floor Can a Toilet Flange Be?
Your toilet flange installation should be no more than a 1/4-inch above the floor level.

How Do I Know If the Wax Ring Needs to Be Replaced?

Can You Put a New Toilet Flange Over an Old One?
You can’t bolt a new flange over the old one if the flange is broken. You can interchange flange components if you buy like for like, or use a flange adapter that attaches to the existing flange.

How Long Does Toilet Flange Last?
A correctly installed toilet flange will last for 20 to 30 years before replacing it. Your flange becomes more secure over time because it embeds and seals with age. New plumbing is more prone to leaking because the seals haven’t had a chance to bed in.
The Last Word on Flanges
Toilet flange replacement is a simple enough task. It will take a couple of hours and requires minimal plumbing skills.
Although it’s dirty work, it is satisfying to know that you replaced the toilet flange yourself and saved a tidy sum of money in the process. However, if you feel out of your depth, call in the pros and get the job done for you.