Doesn’t everyone know how to light a water heater pilot light? You’d be surprised how many people struggle and need the services of a professional contractor. Luckily, it is a simple task to perform once you learn the technique.
We show you how to light a pilot light, where to locate it, and offer troubleshooting tips to help you get it lit.
Key Takeaways
- Locate the pilot light on your water heater by checking for a small access panel or viewing window.
- Follow safety precautions by checking for gas leaks and turning off the gas supply before relighting the pilot light.
- Relight the pilot light using either an electronic igniter or a manual method with long matches or a wand igniter.
- Common reasons for pilot light issues include thermocouple failure, dirty pilot orifice, fluctuating gas supply, and improper airflow or drafts.
Where Is the Pilot Light on My Water Heater?
To locate your water heater pilot light, you will probably have to remove a small access panel at the base of your water heater.
Modern water heaters have a small viewing panel for the pilot light instead of a removable panel. You likely have an electronic igniter if you have a viewing window, whereas heaters with removable panels are manually operated.
How to Light a Water Heater
Before we begin, you will need to perform a few safety inspections to check for gas leaks. Get on your hands and knees and smell the heater for gas. If you can detect the faint odor of rotten eggs, stop what you’re doing and call in the pros.
Also, listen carefully for a faint hissing sound, which might indicate a gas leak.
Take Note
Gas is odorless, so to make it detectable, gas companies add a substance called mercaptan to make it smell like eggs or sulfur.
What You’ll Need
- Screwdriver.
- Flashlight.
- Long matches or wand igniter.
Automatic Pilot Light
Automatic pilot lights are easier to reignite because they don’t need a naked flame. However, the steps before igniting the flame are the same for automatic and manual systems.
1. Read the Instructions
Check the guidance inside the panel for the best lighting instructions. If your water heater lacks a removable panel, the instructions will be labeled next to the pilot light viewing window.
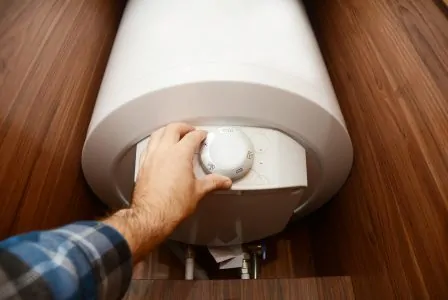
2. Prepare to Reignite the Pilot Light
Turn the thermostat down to the lowest setting. You will find the temperature setting located on the front of your heater near the pilot light window. If it isn’t near the window, it will likely be located near the drain valve.
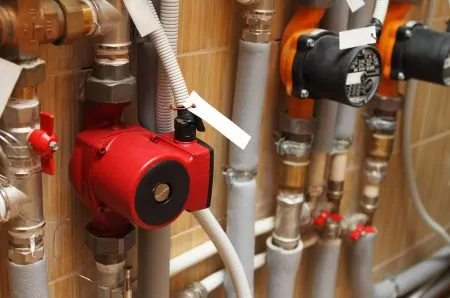
3. Locate the Regulator Valve
The regulator valve usually sits next to the temperature control. It regulates the gas flow to the pilot burner beneath the water heater.
Turn the regulator knob to the off position and wait 10 minutes. This allows residual gas to clear the chamber for safety reasons.
4. Restart the Pilot Flame Electronically
Grab the flashlight and locate the pilot viewing window. Most ignitor switches are red and located a few inches from the temperature gauge. Turn the regulator valve back to the pilot setting.
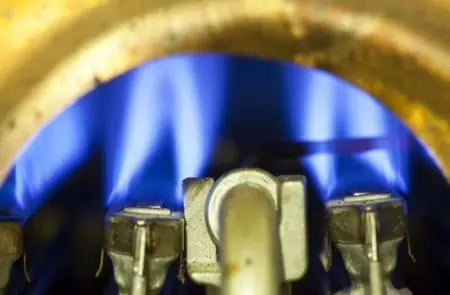
Press the igniter switch, and the pilot flame should ignite. If not, retry until it does. Hold down the switch for a full minute to allow the thermocouple sensor to reheat.
5. Turn the Gas Valve On
Once the pilot flame is burning, turn the temperature setting back up. This tells the main burner under the tank to heat the water to the correct temperature.
Manual Pilot Light
Manual pilot lights are typically found on older hot water tanks. Systems without igniters are harder to restart and take a little more effort.
Top Tip
Have someone hold the flashlight so that you can clearly see what you’re doing.
1. Restart the Pilot Flame Manually
Follow all the steps for lighting an electronic pilot light, but instead of pressing an igniter switch, you will need to apply a naked flame to light the water heater pilot light.
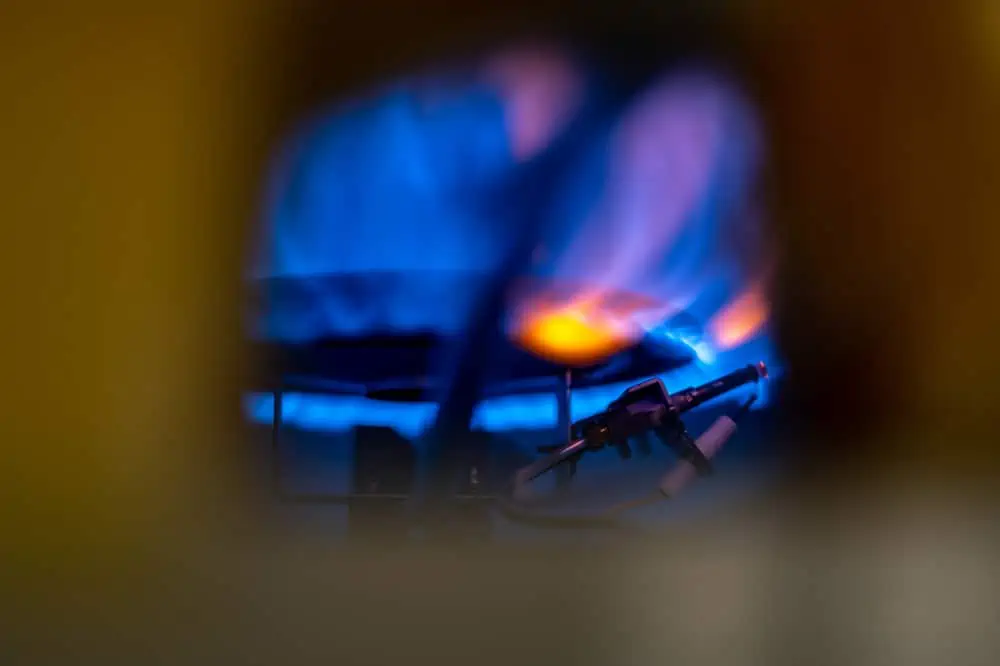
Turn the gas valve back on and hold it for 10 minutes. This allows the gas to start flowing into the system. Keep holding the valve down and grab either a long match or a wand igniter to light the flame.
Safety Note
Don’t use standard size matches or a cigarette lighter, as your fingers will be in close proximity to naked flames.
Leave the valve pressed down for at least a minute to allow the flame to stay lit. Then release it, and the system is operational.
2. Set the Temperature
Turn the thermostat back up to ignite the heater beneath the hot water tank. This allows the water to heat to the desired temperature.
How to Light Hot Water Heater Without Igniter
The simplest way to light a water heater if the igniter button malfunctions is to use a bbq fire lighter. Here’s how to do it:
- Locate the plate giving access to the pilot light chamber. Sometimes there are secondary inner plates, so remove them too.
- Switch off the pilot light and wait 10 minutes while the gas residue dissipates.
- Turn the thermostat to low and switch the pilot control to pilot.
- Light the bbq lighter on the stove, push down the on/off button and touch the flame to the pilot.
- When the pilot lights, hold the on/off button down for a further 30 to 40 seconds. Turn the switch to the on position.
- Replace the plates and turn up the thermostat and the heater kicks into life.
Reasons Why Your Pilot Light Goes Out
Relighting your pilot light is one thing, but looking at why it goes out may reduce more significant problems in the long run. The good news is that well-known brands like Rheem and Honeywell provide a ready supply of spares should you need to make repairs.
Safety First
Always turn off the gas before troubleshooting water heater issues.
Here are a few common reasons you should consider:
Thermocouple Failure
Thermocouple failure covers a broad spectrum. It could be a complete shutdown and need replacement, or the thermocouple is just dirty and needs a clean.
Broken Thermocouple
Thermocouple sensors break or burn out, and when they do, they shut down the gas supply to the system. They are simple to replace, but local building codes may dictate that you need to call a professional because of the dangerous nature of the work.
Dirty Thermocouple
Soot build-up is a common problem that causes the thermocouple to malfunction. If the sensors don’t detect the pilot flame correctly, it shuts down the gas supply, and your water heater stops working.
Cleaning a thermocouple sensor is pretty straightforward. You can even slide a dollar bill between the two sensors to remove the grime. This usually works to get your system back up and running.
Another method you could try is a can of compressed air to blast away the soot. This Falcon Dust Disposable Cleaning Duster is an ideal product because it comes with a directional nozzle.
Misaligned Thermocouple
The thermocouple rods need to be correctly aligned so that it detects the pilot flame and prevents the gas from shutting off. Over time, it could become misaligned, but the good news is it can be easy to remedy.
A long nose pair of pliers can bend the rod back in shape. However, if you lack confidence, get a professional to service the water heater.
Dirty Pilot Orifice
Just as the thermocouple gets dirty, so too does the pilot orifice. This is where the gas feeds the flame, so if something is blocking it, you will need to clean it. If you have an open pilot flame housing, blow into it or take a soft-bristled brush and sweep away the dust.
If the pilot flame sits behind a glass screen, follow the instructions to remove the glass and perform the same exercise. You could also use a pin to unblock the orifice.
If that doesn’t solve the issue, call in an expert to do the work.
Fluctuating Gas Supply
When the gas grid experiences peak periods, it lowers the gas pressure to stop the system overloading. If that happens, you may see a drop in performance on your water heater, and in some cases, the pilot light extinguishes.
Speak to your neighbors before you start ripping the water heater apart. They may have the same issue. Get in contact with your gas provider if the problem persists, especially if yours is the only supply affected.
Faulty Gas Regulator
It may not be the water heater that’s at fault. A broken gas regulator on your gas meter outside could be the cause. This is probably bad news because it is a more complex job to fix, and you’ll need to call your local gas utility company.
Improper Airflow or Drafts
If your pilot light goes out overnight but relights without a problem, it could be the result of a strong draft blowing it out. It does occasionally happen on exceptionally windy days.
However, if the pilot light goes out and won’t turn on, it could also be a leak in the furnace output duct. You may need to call in the experts if that’s the case.
FAQs

How Do You Know If Pilot Light is Lit?
The first sign is that you can see the flame in the viewing panel. The second way of telling is when you hear a slight whooshing sound as the heater kicks in. That indicates that it is heating up, which requires the pilot light to be lit.

Do Electric Water Heaters Have Pilot Lights?
Electric heaters don’t have a pilot light because they don’t use combustion to create heat. The heat comes from heating elements in the bottom of the tank.
How to Relight a Water Heater
Relighting a water heater is much easier than other DIY tasks, but it could be a significant problem if the pilot light goes out. Sure, they go out from time to time, but if your pilot light does this repeatedly, it’s time to do some investigation.
Good luck relighting your pilot light, and don’t forget to keep on top of your maintenance schedule to keep your water heater working for longer.