Window blinds are an excellent alternative to curtains and drapes. However, some companies charge a small fortune to measure and fit window blinds. Save yourself some cash and do it yourself; after all, they are practical and easy to install.
We explain the entire process of installing blinds, right from the measuring stage and including the different types of blinds available.
Key Takeaways
- Installing window blinds is easy and cost-effective when done correctly.
- Choose between inside or outside mounts depending on your preference and window type.
- Measure your window carefully for a proper fit and select the right type of blind for your room.
- Follow step-by-step instructions to attach brackets and install the blinds successfully.
Is It Easy to Install Blinds Yourself?
It is easy to install blinds yourself, as long as you use the correct tools and proper technique. You don’t need to pay out vast sums by getting the professional in. Simply follow the steps listed below.
Where Should I Place My Mount Blinds?
Whether inside the frame against the jamb or outside above the window, deciding where to mount your brackets is a matter of preference.
Inside Mounts
Inside mounts look neater, making it the most popular choice. They also block out the light better because the blind is inside the recess and closer to the window.
The other advantage of mounting the blind in the window recess is you don’t need to drill into the visible part of the wall. Instead, the drilling is concealed under the recess, making it less unsightly.
Outside Mounts
Some window recesses are too shallow to accommodate a mounting bracket. Also, mounting the bracket on the outside means you don’t have to drill into the wooden or plastic window frame. If you ever change the blind or remove it, the holes in the frame will look unsightly.
Also, some frames, like metal or aluminum cannot be drilled, so you have no option but to either drill the recess or the outside wall.
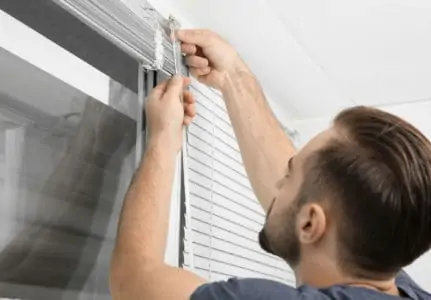
How to Install Window Blinds
Fitting window blinds is pretty straightforward as long as you gather the correct tools. It makes the whole process easier, and you are less likely to make mistakes. Remember that drilling into walls and window frames leaves a permanent hole in the surface.
What You’ll Need
- Drill.
- Crosshead screwdriver.
- Drill bits (Various sizes).
- Anchors.
- Hammer.
- Vacuum cleaner.
- Dropcloth.
Buying the Right Blinds
Every project starts with making good choices. Once you’ve decided whether to mount inside or out, selecting the type of blind is the next big step. There is a wide choice out there, from cellular shades and mini blinds to Roman and cordless varieties.
If you’re doing a window blind installation in the bathroom or kitchen, it might be better to opt for an aluminum or plastic model. Bathrooms and kitchens have high moisture levels, which encourages mold growth.
Before you get to the fun bit of shopping for the blind, you’ll need some measurements first. Remember the old adage “measure twice, fit once” if you want to avoid the embarrassment of returning the blind because it didn’t fit.
Measuring the Outside Mount
Measure from the top edge of the frame to the bottom of the sill (if your window has one). If it doesn’t have a sill, measure to the base of the casing. Depending on where you place your headrail, the blind needs to extend at least one and a half to three inches below the sill.
Now measure the width of the window from the frame where it meets the recess to the opposite side. Your new blind needs to have at least one and a half to three inches of overhang on either side of the recess.
Measuring the Inside Mount
Grab the tape measure and place it inside the window recess where the casing meets the wall. Measure the top, middle, and bottom, and use the smallest measurement as your guide if there are any discrepancies.
The blind should extend to a length between one and a half and three inches below the base of the window casing. You don’t need an overhang because the blind is measured to size.
Attaching the Brackets
Getting this bit right is crucial. If the measurements are incorrect, the blinds won’t hang perfectly horizontal. However, the process differs between inside and outside mounts.
1. Sizing Outside Brackets
Remove the blind from the packaging. If your model comes with bracket templates, use them for the best results. Failing that, hold the blind up to the wall, ensuring it is centered and level with the window casing. You can check this by using a spirit level.
Grab a pencil and mark below the headrail (the top part of the blind) at either end. Now measure 0.25 inches from this pencil line and make a second mark for the brackets.
2. Fitting Outside Brackets
Open the bracket door and place it against the wall, inside the pencil mark. There are two sides with predrilled holes. One should be facing you, and the other should face the center of the window. The open bracket door should face into the room.
Mark the drill holes with the pencil, and remove the bracket.
3. Sizing Inside Brackets
Place the headrail against the window frame and draw two pencil lines on either end of the blind. This process is simpler because you’ve already measured for the blind.
4. Fitting Inside Brackets
Open the bracket door and place it against the side of the window recess at the top. Make two pencil marks to denote the drill holes and remove the bracket. Repeat this process for the other side.
5. Drilling the Brackets
Each bracket comes with two screws. For interior mounting, take the drill and insert a drill bit 0.063 inches in diameter. The hole needs to be slightly smaller than the actual screws because they need to grip the material.
For outside mounting, the hole needs to be slightly larger to accommodate the anchors. Make the holes, repeating the process on the other bracket. Now use the screwdriver to fix the brackets in place.
Now you’re ready to move to the next phase of fitting the actual blind.
Installing the Blinds
1. Snap the Valance Clips In Place
Not all blinds come with a valence; however, if it does, the clips attach the headrail to the valance. The valance makes the headrail that bit more appealing. The clips snap over the front of the headrail before hanging it.
2. Insert the Headrail
Place the headrail into the brackets and snap the bracket doors shut. You will hear a clear snapping sound as the bracket locks in place.
3. Attach the Valance
Raise the valance up to the headrail and insert it into the valance clips to hold it in place.
4. Attach the Blind Wand
Some blinds have the wand pre-attached. If it isn’t, slide back the plastic sleeve to reveal the hook and insert it into the corresponding bracket on the blind. Now slide the plastic back to conceal the hook.
Different Types of Window Blinds
Compared to curtains and drapes, there are several types of window blinds. This is great news because you can easily find a blind that matches your decor scheme.
Roman Blind
Roman blinds are excellent for blocking out sunlight. The material folds into pleats when the blind is open and hangs flat when closed. They are a simple design, utilizing just one piece of material with rods inserted at equal distances.
Mini Blind
As the name suggests, a mini blind is a type of Venetian blind, but the width of each slat is typically between 15 and 25mm. The slats are normally made from aluminum that can turn up or down when you pull the cord in different directions.
They are an excellent option for smaller windows, where you still want a degree of privacy. Mini blinds are also useful for glazed front doors.
Cellular Blinds
Sometimes called honeycomb shades, cellular blinds are made up of a series of cells that expand when open. Typically made from fabric, paper, and other lightweight materials, they give high levels of heat retention and effectively block out light.
FAQs

Is It Cheaper to Install Your Own Blinds?
Given that the blind itself is your only expense, it is a lot cheaper. Getting someone in to do it means paying labor costs.

Do You Need a Drill to Install Blinds?
The drill is necessary to make pilot holes for the screws. You could use a screwdriver if you are mounting the blind inside the recess on a wooden frame. However, you still risk splitting the wood.

How Much Space Is Needed for Inside Mount Blinds?
The minimum recess you need is 2.375 inches to hang your blinds inside. Any less, and the space is too shallow, and the blind will protrude.

Can I Use Command Strips to Hang Blinds?
You can use command strips to hang blinds. They adhere to wood, metal, vinyl, drywall, and painted surfaces. The main advantage of using command strips to secure your blinds is that they leave no damage on your wall.
This is ideal if you live in a rented home where drilling is prohibited.

What Type of Blinds Are Best?
Which blinds are the best depends on personal opinion, but the most popular blind in recent years is the cordless variety. The cord can be dangerous around children if they get themselves entangled.
The Last Word
DIY installing new window blinds is very satisfying, and it creates an immediate impact on your living space. It is a fairly quick process and easy to do.
The next time you want to replace your window coverings, consider hanging a blind instead of curtains or drapes. It could be more cost-effective and simpler to achieve.