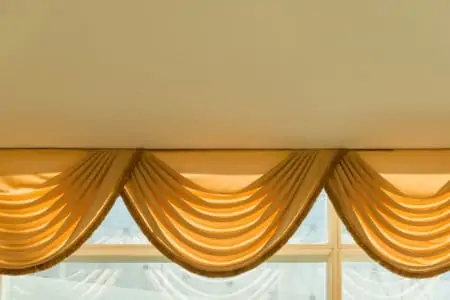
Window scarves are a cheap and easy way to add a drop of elegance to your home. But hiring a designer to do the work can be expensive.
Luckily, you can do it yourself! If you don’t know how to hang a window scarf, that’s okay. We’ve got all the tips you need to do it.
Key Takeaways
- Measure the fabric needed: Measure the length and width of your window, taking into account the desired drape and tail length.
- Choose a hanging method: You can use a curtain rod, hooks, or swag holders to hang your window scarf.
- Drape the scarf: Loop the scarf over the rod or hooks, creating a U-shape, and adjust to achieve a balanced and elegant look.
- Experiment with styles: Try layering multiple scarves, using different patterns, or tying bows for a unique and eye-catching window treatment.
Different Ways to Hang Window Scarves
Window scarves are sheer curtains that serve as window treatments for several different room types. They can be hung over rods or hung with hooks, and even work on windows with blinds.
If your window overlooks an attractive view, hanging window scarves may complement your general design. They contribute a touch of elegance without interfering with the light’s flow or blocking the vision. There are several different ways to hang a scarf.
Layers
If you want to give your windows a more regal appearance and add drama, you can use many scarves. Experiment with a variety of textiles to achieve the style you like. If you have an exceptional outdoor view and a lovely window to frame it, you can finish the frame with layered window scarves.
U-Shape
Scarves are frequently hung by hooking them over either end of the curtain rod. The scarf’s center will hang in a “U” form in the space between the curtain rod and window.
Middle Rod Loop
Another classic method of hanging the scarf around the curtain rod for large windows is the middle rod loop look. Place the cloth below the curtain rod in the center and back up over the top to create a wavy effect.
Over Hooks
You can eliminate the curtain rod entirely in this situation, as there will be no actual curtains to hang. You just need something to drape the scarf from. Just add hooks on the upper corners and in the center of the window. These work exceptionally well on bay windows.
How to Hang a Window Scarf Over a Rod
Yes, it might look easy, like you just drape the curtain in a relaxed way. But there’s a trick to it.
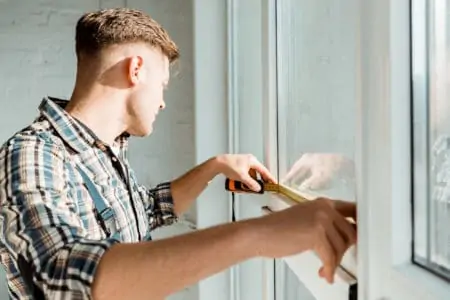
1. Determine the Amount of Fabric
Grab your measuring tape.
- Measure down from the curtain rod to the desired location for the fabric’s ends.
- Measure the width of the curtain rod.
- Double the number to allow for extra fabric to drape your window scarf and jot it down.
- With the length of cloth you need, purchase your fabric.
2. Loop the Scarf on the Sides
On each side, loop the scarf over the curtain rod’s ends. Allow the curtain scarf’s center to hang down in a “U” form in the center of the curtain pole and window. Ensure that each side has an equal amount of fabric and allow the ends to fall gloriously.
3. Optional: Loop the Scarf in the Center
Determine where the middle of the rod is. Thread your window scarf under and behind the center of the rod. Bring it back to the top for a wavy drape effect. Hook the window scarf on the sides, ensuring it falls down at an even length on both sides.
How to Hang Window Scarves Without a Rod
Don’t have a curtain rod? Don’t fret! I’ve got great techniques you can try.
Using Hooks
1. Measure the Distance
Grab your measuring tape and make a mark three inches above the window, on each side, past the corners.
Then measure the distance between the two marks and make another pencil mark right in the middle.
2. Drill the Holes
Place your chosen hook over the center marking and use your pencil to mark exactly where the hole needs to be drilled. Put one screw in the designated hole and drill to secure it in place. Do the same for each hole and for both side hooks.
3. Measuring for the Fabric
You’re going to have to take a few measurements to determine how much fabric is needed for the window scarf. First, measure the length of the window from one of the side hooks. Take it all the way down to where you want your window scarf to dangle.
Then measure across the window from one side hook to the other. Double the number to make sure the scarf is long enough for both drapes.
With this, you’ll have the length and width of the finished look. This will determine the total length of fabric you need to buy. Then you can hang the scarf, knowing it will drape beautifully.
4. Placing the Scarf
Determine where the center of the scarf is (use a tape measure if needed) and hang it on the center hook. Put the scarf on the two side hooks as well, making sure they dangle down at identical lengths.
Using Swag Holders
While swag holders definitely add a lot of “swag” to your window treatments, you can also use sconces as an alternative. The method for hanging window scarves with sconces is pretty similar to the one described below.
1. Determine Hook Location
Determine where the swag holders should be placed. Common locations are at the top corners of your window or above the frame.
2. Attach the Hooks
Insert the screws in the holders if you’re mounting them on the window casing. Drill tiny pilot holes where you want to place your holders. Turn them by hand to make sure they fit tight against the frame.
3. Attach the Rod and Wings
Place the threaded rod into the hooks. The hooks should be turned until they fit snug against the wall.
4. Drape the Cord
Drape a length of cord over each hook, pulling it down in the center to create a perfect U-shape.
5. Consider Tail Length
Determine how long you want the tails to be. Keep in mind that the parts of the scarf that hang on the sides don’t always have to be symmetrical. Mark on the cord where you want the tails to end on each side.
6. Measure for the Scarf
Remove the cord from the hooks and measure the distance between each of the markings you made on the tails. This is the length of scarf you’ll need.
7. Pleat the Scarf
Lay the scarf on a smooth surface and hold the fabric like an accordion across its length. Each pleat should be equal and measure seven or eight inches.
The length of the right tail should be measured from the right end of the scarf. Pin the pleat’s bottom edges together with a safety pin at this distance. Take care of the other tail in the same way.
8. Hanging the Scarf
Turn the pleated window scarf around. Put your hands underneath the scarf at each pin’s location. Take a step ladder and hang your scarf from each of the hooks. It is best to have the scarf’s backside and the pins facing away from you at all times.
9. Final Adjustments
Adjust the pleats to your desire by lowering the scarf’s center. A safety pin is all that is needed to keep your scarf in place once you’ve achieved the ideal look. To hide the pins, place them between a few pleats.
Additional Ideas for Draping Scarves
It’s the small details that can make a world’s difference, so let’s check out some ideas on how to drape a scarf in more unusual and eye-catching ways.
- Add different scarf layers to make the window more elegant/colorful.
- Tie the scarf on the side using pretty bows.
- Play with different patterns when adding a second scarf.
- Drape the second scarf differently, so both scarves are visible.
FAQs

How Long Should My Window Scarf Be?
The scarf’s length is determined by your desired finished aesthetic and the size of the window. The general consensus is for the ends to hang down at least 2/3 the length of the window. While still providing a gentle U-shape over the top of the glass.

How Do You Make a Rosette with a Window Scarf?
Poke the scarf out by inserting it from the back of your hook or holder and pulling it out. You can produce a rosette-like pattern by gently pulling the scarf from the front of the stand. Tinker with the fabric rosette until you’re satisfied with the results.

How Do You Keep a Scarf Valance from Slipping?
The best way to achieve this is by attaching the valance underside to the rod’s top using two-sided tape.
Final Words
If we’ve answered all your questions on how to hang a window scarf, it’s time to think about fabrics and colors. Think about what goes well with your existing decor and add fancy window treatment accessories for that extra wow factor.