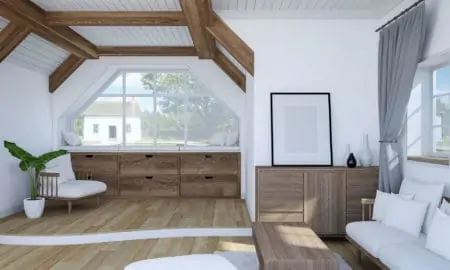
Bay windows are dead spaces without a window seat. Building a window seat enhances your space and adds an extra layer of luxury. Take advantage of the sunlight, take in the view, or relax with a coffee watching the world go by.
Want to know how to build a window seat in easy-to-follow steps? You are in the right place as we show you how to DIY window seats.
Key Takeaways
- Measure the dimensions: Accurately measure the width, depth, and height of your bay window for a proper fit.
- Gather materials and tools: Collect the necessary supplies like 2x4s, plywood, beadboard, and various tools for building and finishing the window seat.
- Construct the frame: Build a sturdy frame using 2x4s, ensuring it is level and securely attached to the wall and side supports.
- Finish the seat: Apply trim, caulk, sand, prime, and paint the window seat for a polished look that matches your home’s decor.
DIY Window Seat Plan
All good projects start with planning, and your window seat is no exception. A window seat will enhance any space, from a kitchen to a bedroom. To create a homemade bench, you will need accurate measurements and a detailed design.
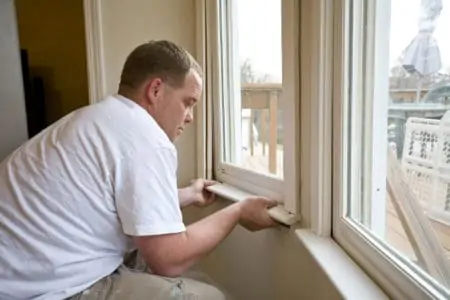
Measure the Dimensions
While rarely straight, you will need to start on a flat wall. Also, corners are rarely perfectly square, so you can be thankful for that piece of trim to hide a multitude of sins.
That said, you need the measurement to be as accurate as possible. An ideal height for a bay window seat is 19 inches from the floor. This gives you ample storage, and it feels comfortable when you sit. Allow 0.75 inches under the window sill for the plywood seat.
Remove the baseboard and measure out from the wall to the required depth of the seat. Next, measure the width of the bay window. Remember that the walls on either side of the bay are angled, so you will need a maximum and minimum measurement.
How to Build a Window Seat
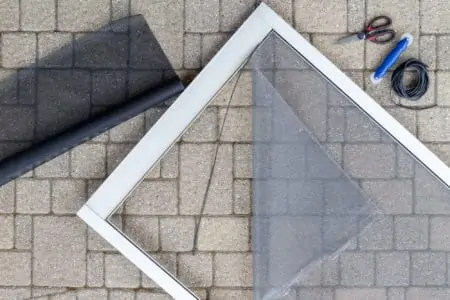
Now you have your measurements, it’s time to grab the supplies and materials you will need to create your built-in seat. You will also need the correct tools. Most DIY projects go awry because of poor preparation and sourcing the proper tools.
Don’t risk failing before you even start.
What You’ll Need
- Two 10-foot strips of 2×4.
- Four lengths of eight-foot 2×4.
- One 4×4-foot sheet of beadboard.
- 24-feet of 1×4 poplar strips for the trim.
- One 4×8-feet of 0.75-inch plywood board.
- 12-foot of 0.75-inch cove molding.
- Two 30-inch piano hinges.
- Liquid nails.
- Silicone caulk and gun.
- Wood putty.
- Sandpaper.
- Primer.
- Paint and brush.
- Three and a half-inch wood screws.
- Wall anchors.
- Three and a half-inch nails.
- A hammer.
- Miter saw.
- Spirit level.
- Stud finder.
- Nail punch.
- Circular saw.
- Face mask.
- Protective gloves.
- Goggles.
Take Note
The time it takes to build your window seat should be about eight hours. The total cost of materials and tools will be between $280 and $550, depending on what you need.
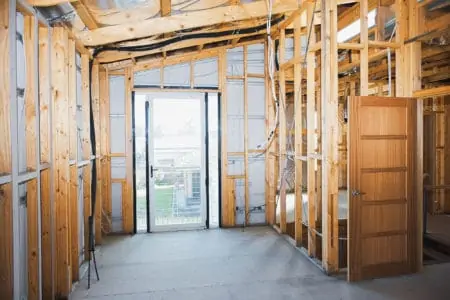
Framing the Seat
Before You Begin
Don your face mask, gloves, and goggles to protect yourself during the construction process.
1. Finding the Studs
Use the stud finder to locate the studs in the wall. While most studs are typically 16 inches apart from the center, there are variations. Mark the location of the studs.
2. Build the Frame
Attach a strip of 2×4 wood using three and a half-inch screws. You will need the spirit level to ensure that the baton is level. To find the length, measure the wall beneath the middle section of the bay.
The top of the baton should measure 18.25 inches from the floor. This allows for the 0.75-inch plywood board for the seat. The baton at the back doesn’t need to be angled; just leave about two inches at either end where the other supports meet.
These batons are hidden, and mitering them adds no structural integrity to the seat.
Now remove the baseboard inside the bay recess. This allows you to build the frame flush to the wall and avoids tricky cutting and shaping. Now you can get started on the front frame.
Building the Body
While this isn’t the most glamorous part of the build, it provides a solid basis for progress. Getting the basics right ensures that the seat will last the distance.
1. Building the Front Frame
Use two lengths of 10-foot 2x4s and cut them to size, angling the ends to 45 degrees to match the angle of the wall. Use the spirit level to ensure that the front panel is the same height as the back support.
Because we know the overall height of the structure and the width of the 2×4, we can calculate the strut heights. For example:
- Overall size: 19 inches (including plywood seat height).
- Height of seat structure: 18.25 inches (minus plywood seat height)
- 2×4 strips top and bottom equal 8 inches in width.
- Support struts measure 10.25 inches.
This design calls for four panels, so you will need five support blocks. Cut two strips of 2×4 and miter the ends to 45 degrees. Screw them to the side walls to give the seat added support. Now screw the corners of the front panel into the 2×4 to lock the corners.
Measure and cut three sections of the 2×4 and place them across the middle of the seat from the baton attached to the bay wall to the front frame. Screw them in place using the three and a half-inch screws.
2. Building the Face Frame
It is easier to build the front face in the workshop. A face frame adds structural strength to the seat and neatens the final result. Measure the front section of the window seat and cut two pieces of 2×4 with 45-degree mitered ends.
Now cut five sections of 2×4 for the stiles (vertical pieces) and screw them in place evenly along the length of 2×4 strips. Fill any screw holes with wood filler.
3. Cover the Front Wall of the Seat
Take the beadboard and measure and cut it to size to fit the front of the seat. Use the liquid nails to glue it in place and secure it to the frame using nails and a hammer. Now you are ready to fit the face frame.
Apply liquid nails along the rear of the face frame and press it against the seat frame. Align the top of the face frame with the top section of 2×4, ensuring it is flush. It doesn’t matter if there is a slight gap at the base of the seat because the quarter-round strip will cover it.
Now nail the face frame in place and use the nail punch to conceal the nails. Do this across the seat wherever you have used nails and fill the holes with wood filler.
Now would be a great time to caulk the edges of the seat where they meet the wall to close any gaps.
4. Build the Seat
This seat comes with a hinged lid, so you will need to build in a narrow, five-inch strip against the back wall. This enables the seat to rest against the window when opened and allows you to secure the hinges. If this strip is any narrower, the lid won’t stay up.
You will need four 0.75-inch plywood pieces. The first section fits against the bay wall and has 45-degree angles on each end to fit flush against the two angled walls.
Measure from the edge of the seat to the front edge of the five-inch strip to get the width of the lid. You will need to allocate a 0.50-inch overhang at the front so you can lift the lid. You could measure and cut two lid sections, but we chose one.
Before installing the five-inch back section, it is easier to attach the piano hinge onto the main part of the seat and then fit it. Piano hinges come in 30 and 48-inch lengths. Fitting two 30-inch hinges ensures the hinge runs the entire length of the seat for rigidity.
Now attach the lid to the piano hinge.
Top Tip
Mount the hinge screws into the top section of the plywood rather than along the edge. This is because the screws won’t have enough material to grip, and the hinge will fall off.
Before attaching the hinged pieces to the seat frame, you need to measure and cut the two side pieces. Lay the lid and back piece in situ and use it as a template to get the measurements for the side sections. Leave a 0.063-inch gap in case the wood expands.
Now it’s time to assemble the top of the seat. Run a strip of liquid nails along the frame where the five-inch strip will go and nail it in place. Do the same with the side sections of the lid. Then use the nail punch to help conceal the nails and fill the holes with wood putty.
Finishing the Seat
Now comes the fun bit. This is where you get to see your hard work come to fruition. Choose a color that matches your color scheme, and take your time to get the finish right.
1. Cut the Trim
Take the poplar trim and measure along the back and sides, then measure both sides of the front panel. Now cut them to size and fix them with liquid nails. Use the quarter-round strip at the seat’s base and glue it in place.
2. Time to Caulk
Run a caulk line along the seat’s back, sides, and front-facing panel where it meets the wall. Wet your finger and smooth it down, ensuring all the gaps are filled. Allow the allocated time for the caulk to dry before moving onto the sanding phase.
3. Start Sanding
Grab the sandpaper and smooth down any rough edges, then wipe the sawdust away. You can use a vacuum cleaner to get the microscopic particles.
4. Primer Time
Grab the masking tape and cover any sections that you want to avoid getting paint on.
Start by laying down the first coat of primer. Follow the instructions for the drying times; when the first coat cures, paint on a second coat. After it dries, you are ready for the topcoat.
For the smoothest results, sand between each coat of primer to remove any brush marks.
5. Topcoat Time
Because the seat has many irregular surfaces, you will get better results with a paintbrush. Apply the first coat of paint and follow the instructions for the drying times. When the allocated time has passed, lay down a second coat and leave it to dry.
Again, for the smoothest results, sand between coats.
Extra Additions to a Window Seat
You can have so much fun getting creative when building a window seat. You can create additional features like shelving or cabinets to give you extra storage.
With Bookshelves
Given that most window seats are ideal for sitting and reading, having one with bookshelves makes sense. Instead of building the frame for a paneled front, you need to leave the front open and install shelving instead.
This would require additional batons attached to the walls, but it can be done. The only downside is you would eat up all that additional storage beneath the seat.
With Cabinets
Instead of having a liftable lid, why not cut two doors into the front of the seat. It would be easy to do because you can build the frame to accommodate the doors. Building a seat with storage is all well and good, but it has to be accessible. Cabinet doors give you that benefit.
You could build your window seat around an existing unit with drawers or cabinet doors. You could also create it around the same design as the four panels featured in our how-to guide. Simply leave the two inner panels open to attach cabinet doors.
Adding Lighting
Attaching lights is a great way to enhance your window seat. You would need to get a professional to wire them in, but creating the recesses is easy. All you need is a hole saw, like this DeWALT set, and LED lights that match the hole size.
Adding Plants
Plants help to soften the overall look of your window seat. It also makes the space far more inviting to sit and contemplate. Simple pots with small plants will look the best because they don’t take up too much room on the seat.
You could also add height with a plant stand placed on either side of the seat or hang them from the ceiling. This helps make the space feel secluded and private.
FAQs

Can You Build a Window Seat Over a Radiator?
You can build a window seat over a radiator, but you need to factor in the vents to allow the heat to escape. Having a radiator next to your window seat makes the space warm and inviting.

Can You Build a Removable Window Bench?
You can build a removable bench, but you need to construct a free-standing frame. You also need lockable casters, which maneuver easily and lock in place.

Can You Build a Window Seat for a Curved Window Bay?
Building a window seat for a curved bay window seems complicated at first, but it can be accomplished with the right plan, tools, and knowledge. The secret is to build it in sections and then screw them together to create that rounded look.

What Wood Should I Use For My Window Seat?
The best wood to use is 2×4 for the frame and furniture-grade plywood with a birch veneer for the seat.
Take a Seat
There is no doubt that window seats add a touch of luxury. Be it the bedroom or kitchen, having the space to just sit and watch the world go by is relaxing and good for the soul.
So, if you have a bay window that looks like it could benefit from a window seat, grab your tape measure and tools, and get started.