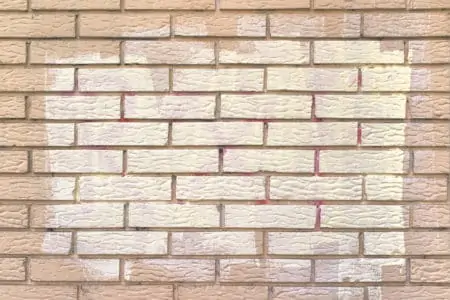
Getting paint off brick is a challenge. Brick is porous, so the pigment absorbs into the fabric of the wall, making it more difficult without damaging the wall beneath. So, knowing how to get paint off brick is a useful skill.
We show you how to remove paint from brick walls using several tried and tested techniques and a few that just might surprise you.
Key Takeaways
- Identify paint type: Water-based (acrylic) or oil-based paint.
- Choose a warmer day to prevent brick damage.
- Use chemical (paint strippers) or mechanical (pressure washer) methods.
- Wear protective gear and follow safety precautions.
Removing Paint From Brick: The Important Factors
To successfully remove paint from brickwork, you must first understand a few crucial things because a little bit of knowledge goes a long way.
Formula
If you want to get that paint off your brick wall, you need to know what type of paint you are dealing with. There are two types of paint: Water, or acrylic-based and oil-based. Water-based paints scrub clean with soap and water, whereas oil-based products need mineral spirits or thinner to lift them off your wall.
You cannot remove oil paints with soapy water, and you cannot shift water-based paints with mineral spirits.
Temperature
There are external factors that can have a damaging effect on your brickwork. Extreme cold can cause the exposed bricks to crack, so it is recommended that you choose a warmer day to attempt paint removal.
That way, once the brick is exposed, you have time on your hands to prepare the surface and repaint it without exposing it to the damaging effects of the weather.
Materials
The materials you use to get the paint off could have a detrimental effect on your wall. Scrapers, wire brushes, and scourers scratch and wear away the surface of the bricks, leaving permanent damage. You might get most of the paint removed, but you will also scar the brickwork.
It might be better to skip the obvious solutions and think outside the box.
Methods for Paint Removal
There are two main methods for removing paint: chemical and mechanical. Let’s look at both techniques to decide which is the best.
1. Chemical
Paint Strippers
Caustic paint strippers should be handled with extreme care. They are highly corrosive, and if they make contact with your skin, they will burn. To keep yourself safe, wear protective gloves and always wear goggles and a face mask.
The goggles protect your eyes from splashes, and the face mask prevents overpowering fumes causing you health issues like nausea, headaches, and sore eyes and throat.
Strippers come in liquid and paste formulas, so if you are cleaning paint from vertical surfaces, you would be better using a paste. If you use a liquid-based paint stripper, it simply runs down the wall because it is too thin.
Avoid strippers with methylene-chloride as an active ingredient, and don’t use a spray stripper.
Peel-and-Strip
Some products are designed to be covered in a layer of paper to keep the stripper moist to keep it actively working. The theory is the paint then bonds with the paper to be peeled off like a sticker.
This works much better on smoother surfaces like plaster and concrete, but it is less effective on brickwork, which is porous.
Muriatic Acid
This is a corrosive acid that seeps into cracks and porous surfaces to dissolve the paint. It is highly toxic and should only be applied with the correct protective equipment like gloves, face mask, and goggles.
TSP – Trisodium Phosphate
A strong soapy solution may be sufficient to remove lighter paint stains from your wall. TSP is similar to paint stripper in many ways, and coupled with a scrubbing brush, could be an effective paint removal method.
Don’t forget to wear protective clothing to keep you safe from splashes.
2. Mechanical
Scrub Brush
Some good old-fashioned elbow grease always works wonders when it comes to removing paint from brick walls. The scrubbing brush should work in tandem with the TSP or the muriatic acid, but remember to wear protective clothing as well as goggles and gloves.
Pressure Washer
A pressure washer is one of the best ways to remove paint from your walls. It is quick and effective and removes all sorts of dirt and grime from your brick wall, including old paint. For the best results, combine the pressure washer with a chemical stripper to avoid getting too close to the wall.
It keeps you dry, stops you from getting splattered with corrosive chemicals, and protects the brickwork.
Sand Blasting
Sand blasting is the most rigorous way to remove paint from your brick wall, but the problem is it removes mortar and damages the surface of your bricks. This is the method of last resort, to be tried when all else has failed.
You can sand blast yourself, but it is dirty work and extremely noisy, so why would you want to? Call in the pros and get it done properly without the hassle. They will also have more experience removing paint, so they know how to do it with minimal damage to your wall.
What Tools You Need
Before we get into the nitty-gritty of how to remove paint from a brick wall, you will need to know what tools to keep to hand. Almost every DIY task is made so much easier with the right tools, so preparing before you begin ensures you get it done with minimal stress.
Here’s what you need:
- A stiff-bristled wire brush.
- Soft-bristled brush
- Paint stripper.
- Putty knife.
- Garden hose.
- Drop cloth.
- Plastic sheets.
- Painters tape.
- Goggles.
- Face mask or respirator.
- Gloves.
- Correct clothing, including a long-sleeve shirt.
- Drywall knife.
- Peeling strips (optional).
How To Remove Paint From Brick Wall in 6 Steps
1. Test a Small Area First
Before leaping in with both feet, you need to check a small area of the brickwork with the paint stripper. Try it on a spot in the corner or out of the line of sight, working on 2 to 3 bricks at the most.
Use the putty knife and work the stripper paste into the chosen area, then cover it with plastic sheeting. Wait for 30 minutes before checking to see if the paint has lifted.
If you don’t see the paint shift, try again with the stripper paste or swap it for another brand.
2. Clean and Prepare the Wall
Once you are satisfied you have an effective method, and the test area yields the right results, you need to clean the wall before applying the stripper to the rest of the affected surface.
Grab the garden hose and wash down the surface of the brickwork. Use the wire brush to scrape off any layers of flaking paint, then wash it down once more. Cleaning down the bricks is not necessary to apply the stripper, but it makes the process a lot easier.
Wait for 12 hours for the bricks to dry, but if you can wait 24 hours, even better because the wall must be entirely moisture-free for the paint stripper to work.
Lay down the drop cloth at the foot of the wall to catch any falling debris from the wall during the stripping process. Use decorator tape to hold it in place.
3. Think Safety
So, the wall has dried, and you are ready to begin. It’s time to don your safety equipment. Put on appropriate working clothes and wear a long-sleeved shirt. You’ll also need to put on your goggles, face mask or respirator, and protective gloves.
4. Apply the Stripper
Start by spreading the stripper paste using the putty knife, working it into every part of the brickwork. Spread it about as thick as butter on a slice of bread. Cut your plastic sheeting into sections so that when you finish one area, you can apply the plastic to keep the stripper moist.
You will need to work quickly as you cover the entire affected area because the moment you apply the stripper, it will start to set.
5. Remove the Paint
Leave the sheeting on the wall for about 30 minutes. Peel back the sheeting carefully, and the stripper and paint should peel away, leaving clean brickwork.
Remove the remaining plastic sheets, and most of the paint should come off. If there are any stubborn spots remaining, grab the putty knife and scrape the paint by hand. You will need to be vigorous, but try not to scar the brickwork.
You may need to reapply the stripper and cover it again, waiting a further 30 minutes.
6. Clean the Wall
Grab the garden hose again, spray water on the wall and then scrub the brickwork with the soft-bristled brush to remove any traces of the paint stripper. Wait another 12 hours for the wall to dry before checking your handy work.
FAQs

How Do You Get Dried Paint off of Brick?
The best technique is to use a paint stripper and cover it with plastic sheeting. Wait for 30 minutes, and then peel it off. The other effective method is to use a pressure washer, although it might still leave some residue on the wall.
If you are left with a faint layer of paint, it might be an idea to combine both methods by removing the bulk with a pressure washer and then apply a layer of stripper to lift off the residue.

Does Vinegar Remove Paint From Brick?
Vinegar is a great way to remove the stubborn spots left behind after applying the paint stripper. Dab a generous amount onto a rag and press it onto the paint. Do this repeatedly, and the paint should lift off.

Can Paint Be Removed From Exterior Brick?
Paint can be removed from exterior brick, using a paint stripper, or a pressure washer. There are several alternative techniques to get rid of paint from brickwork.