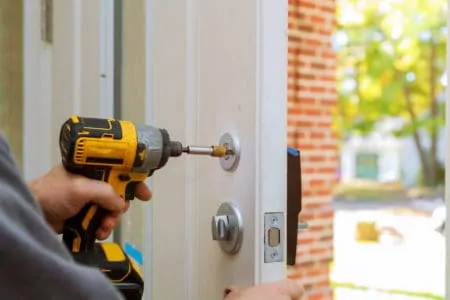
When you lose your keys or accidentally break a lock, drilling it out is your last resort. Removing a lock in this way will grant you access to whatever it is that you are trying to open, but it will also permanently destroy the lock cylinder.
Drilling a lock means it will need to be replaced, but a new lock cylinder is far less expensive than buying a new door. If you have never done it before, it is important to know how to do it properly to avoid damaging the surrounding door.
Before you grab your drill, read this article where we explain how to drill out a lock in six simple steps. This will ensure you have the appropriate tools and do it properly.
Key Takeaways
- Check the lock type before drilling. Tumbler locks are easiest to drill, but locks with anti-drill pins or hardened steel pins are more difficult and may require professional help.
- Use the appropriate tools. A variable-speed power drill with high-speed steel (HSS) drill bits (⅛-inch and ¼-inch) is recommended, along with a hole punch, hammer, and flat-headed screwdriver.
- Follow proper drilling steps. Hammer a guide point, start drilling with the ⅛-inch drill bit, apply steady pressure, increase to the ¼-inch drill bit, insert the screwdriver, and turn the lock mechanism.
- Consider alternative methods before drilling. Try picking or bumping the lock, and ensure you have a replacement lock and the owner’s permission before drilling.
Can Your Lock be Drilled?
Before you try to drill out a lock, it is important to check which type of lock it is. This will affect how easy it is to drill out and whether or not it will be possible for you to drill it out at all.
Tumbler locks are the easiest type to drill out, but any extra security features will likely make your task far more difficult. If you are concerned that the job might be too complicated or that you might damage the door, it might be best to call in a professional.
Don’t Do This
If your lock has a hardened steel pin or a ball bearing in the middle pin, it will also be extremely difficult to drill. Again, you should hire a professional locksmith rather than risk making the problem worse.
Things to Double-Check Before Drilling
Try Picking the Lock
Raking is the best way to start picking a lock, especially if you are unsure which type of lock you are dealing with. If you can’t feel the inner workings of the lock and you aren’t sure how to pick it manually, try a pick gun. This could save you a great deal of time.
Try Bumping the Lock
Bumping the lock is only effective with certain types of locks. This technique was developed back in the 1970s as a way of making it easier for locksmiths to disassemble locks (1).
Insert a bump key two-thirds of the way into the lock. If you lightly tap the key with a hammer, the lock chamber might pop out. You can try this 20 or so times but if it hasn’t worked by that point, it is unlikely that it will.
Get a Replacement Lock
Before you drill the lock, make sure you have a replacement ready to slot in. You don’t want to open your front door if you will be unable to lock it again.
Get the Owner’s Permission
If you don’t own the building that you are trying to gain access to, make sure you get permission from the owner before drilling out a lock. This process will destroy the lock, so explain that this is the last resort and that you need to gain access urgently. Your landlord might have a spare key, so always check with them before turning to a drill.
What You Will Need
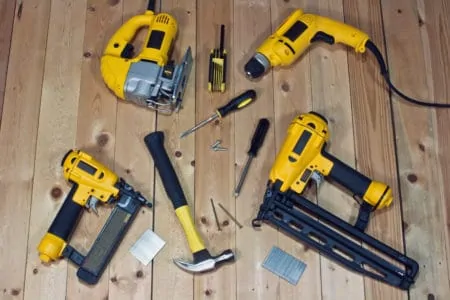
Drilling a lock doesn’t require precision tools, but you will need a well-maintained drill and various drill bit sizes.
- A variable-speed power drill that is strong enough to penetrate the lock.
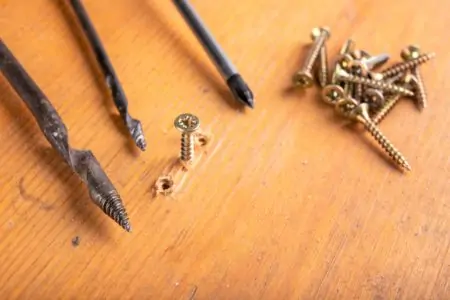
- A selection of high-speed steel (HSS) drill bits. Start with a ⅛-inch bit for the initial hole and a ¼-inch bit to make it larger.
- A hole punch for the bit to mark where you will drill the hole.
- A hammer to strike the hole punch.
- A flat-headed screwdriver that fits the lock’s key slot.
- A plastic sheet to catch any filings.
How to Drill a Lock
1. Hammer a Guide Point
Place the punch at the top of the lock, just below the dividing line between the outer and inner lock. This is sometimes called the shear line. This point is the exact height needed to drill into the tumblers.
Firmly tap the end of the punch with your hammer two or three times until there is a visible indentation.
2. Start Drilling
Drill a hole through the lock cylinder using the ⅛-inch drill bit. This will destroy the pins inside the lock, allowing you to force it open. Most locks have five tumbler pins, but some have six or more.
Each pin you hit will increase the resistance against the drill. You should feel this ease off after you drill through each pin.
3. Apply Steady Pressure
As you drill, apply steady pressure, making sure the drill stays level at all times. This will help you avoid damaging the surrounding door. Use the drill on a slow setting as this will make it far easier to use.
4. Increase Drill Bit Size
Once the initial hole is drilled, switch to a ¼-inch bit, or any size that you think will be appropriate for your lock. This will further break up the pins, making the lock easier to open.
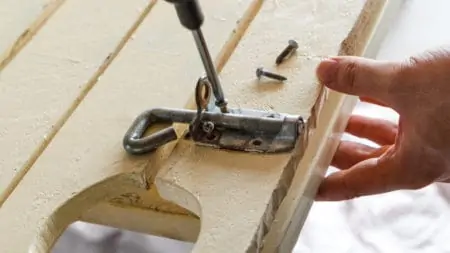
5. Insert the Screwdriver
Insert the screwdriver into the lock and turn it as you would with a key. If you drilled through the pins, the lock should turn. If not, you might need to destroy the entire lock mechanism.
6. Destroy the Lock Mechanism
If the lock won’t open after drilling it, use a ¾-inch bit to drill through the entire assembly. If you want, you can use a hole saw or a specialist tubular lock bit. The lock should now open.
How To Drill Out a Lock with a Key In It
If you can’t open a lock because a key has snapped off in it, drilling should again be your last resort. This can damage the lock beyond repair if done inaccurately.
1. Choose the Right Drill Bit
Use a ¼-inch bit to drill into the lock cylinder to the depth you expect the key to reach. The cylinder is the part of the lock that turns when you twist the key. Only drill into the cylinder and not the lock housing.
2. Turn the Lock Mechanism
Once you have removed sufficient debris from the lock cylinder, remove as much metal as you can and any pins. This will enable you to turn the lock mechanism and open the door.
3. Buy a Replacement Cylinder and New Key
Once you have removed the cylinder, take it to a lock specialist to buy a replacement.
Can I Drill Out a Master Lock?
You can often drill out a master lock, although this won’t be possible with every lock. Use a drill with a ¼-inch bit and ensure you drill through the center of the mechanism. This should destroy the locking mechanism.
This process differs from a tumbler lock because you need to aim for the upper part, near the key slot.
It is possible that doing this will fail to open the lock, but it will also disable the lock from being opened if you want to prevent anyone else from doing it.
Can a Lock Drilling Template Make Drilling Easier?
Drilling templates provide a guide for where to insert the drill, rather than guessing or using trial and error to find the correct spot. They speed up the process and should make your job easier. They are widely available for various lock styles, so it is important to know which type of lock you have before buying one.
Tips for Drilling Locks
- Use a lubricant such as water or synthetic oil to reduce the resistance on the drill bit. This will also make your drill less likely to get stuck in the lock.
- Always keep the drill on its slowest effective setting. This will allow you to feel changes in resistance as the pins fall.
- Keep the drill straight. If you drill at an angle, you risk damaging parts of the lock other than the cylinder.
- Don’t blow into the lock to clear the debris as shards of metal could come back at your face.
- Use high-speed steel (HSS) drill bits. They have the strength to chew through the metal in the lock.
- Place sticky tape over the punch hole to give the drill more purchase when drilling your initial hole.
FAQs

How Long Does It Take to Drill a Lock?
Drilling a tubular lock takes between five and ten minutes, on average. This timeframe varies significantly depending on the type of lock in question, if you have done this before, and whether or not you have the right tools.

How Much Does It Cost to Drill Out a Lock?
If you want to call in a locksmith to drill out a lock, it will cost you between $97 and $215, according to Bobvila. Of course, the end price varies depending on several factors.
It’s inevitable that old locks will wear out and need to be replaced.
Still, occasionally the key wears out before the lock does. If a key breaks off inside the lock, you should contact a locksmith to have it extracted. This is especially handy if the key snaps off in the ignition.
A brand-new car key with a transponder synchronized to your vehicle’s security system ranges from $75 to $400. If you’re locked out of the house, hiring a locksmith to let you back in would likely cost you nearly fifty dollars.
Although locksmiths often work during regular business hours, most people first become aware of an issue with the locks on their home or vehicle when they are getting ready to work.
This indicates that you should prepare yourself to pay a somewhat higher charge for the services of a locksmith between the hours of 7 and 10 in the morning.
You may be charged $75 to $125 per hour rather than $50 to $100 per hour. You can phone the locksmith’s after-hours number, but the service will cost extra. You should budget between $150 and $250 for the average cost of an emergency visit.

What Is the Best Drill Bit to Use to Drill Out a Lock?
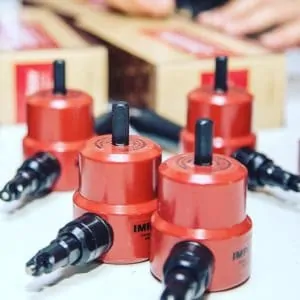
One of the most effective drill bits designed specifically for locks is the Screw X-Tractor Damaged Screw Extractor Drill Bit.
Its two-step operating feature is one of its defining characteristics. Also, it’s packaged in a metal case that is neatly structured and may be used for easy storage.

Can I Drill Out a Deadbolt Lock?
You can, but it should be your last option because it’ll probably destroy the lock. But, if you have to, follow these quick steps.
Adjust the tip of the power drill so it’s as tight as possible. Lubricant should be sprayed onto the drill bit so it’s thoroughly covered.
Also, apply the lubricant to the lock’s interior and the area surrounding the keyhole, then position the drill bit’s point above the center of the keyhole.
Pull the trigger and maintain a light but consistent amount of pressure on the drill as you work to insert the drill bit into the keyhole.
Applying some lubricant to the drill bit as it works its way through the keyhole will prevent the bit from becoming damaged due to friction. Do this step as often as necessary until all the tumbler pins are worn down.
With the deadbolt driller, drive a screwdriver through the hole and turn the lock to unlock it.

How Much Does It Cost to Replace a Door Lock?
Depending on the door hardware you have, changing a door lock can cost anywhere from $45 to $500. But, your overall cost will vary depending on the door type and the number of locks involved.

Is It Cheaper to Break a Window or Call a Locksmith?
There are too many variables that come into play here to give a straightforward answer to this question. If you have to break a smaller window, it might be cheaper to replace the window than to call a locksmith.
It also depends on the complexity of the lock, as more complicated locks will end up in higher locksmith fees. Also, calling a locksmith during extra hours is considered an emergency and will cost you more.
However, breaking a window makes a lot of mess, and your property will be exposed to burglars until you can get a replacement. For a fast fix, it’s always better to call a locksmith.
Let’s Drill Down
Drilling a lock to open a door is cheaper than calling in a locksmith, especially if you do it yourself, but you risk damaging the lock’s housing and even the door if you aren’t careful. If you want to avoid further damage or don’t have the required tools, call in a professional.
Before you decide whether or not to drill your lock, try to find out what type it is. You are unlikely to successfully drill a lock with ball bearings or anti-drill pins with standard tools, but you should be able to remove a standard tumbler cylinder without too much difficulty.