Stripped screws are a pain to remove. The head is stripped out, making it impossible for your screwdriver to gain a grip. So, what do you do if you have a stripped screw?
We show you 9 simple ways of how to remove a stripped screw.
Key Takeaways
- Switch screwdrivers or driver bits for better grip when removing stripped screws.
- Use pliers, steel wool, or abrasive powder to increase grip and remove the screw.
- Cut a new groove with a multi-tool or use a screw extractor for stubborn screws.
- Try lubricating with oil or using rubber bands to improve grip and remove the screw.
How To Remove a Stripped Screw
Let’s run through the 9 ways you can easily remove a stripped screw.
1. Switch Screwdrivers
Suppose you have a rounded crosshead or Phillips screw, swap to a flathead screwdriver. Pressing hard sometimes helps the screwdriver tip gouge a new groove, allowing you to remove the screw.
Top Tip
2. Switch Driver Bits
If you are using a drill/driver, swap the bit for one larger than the screw head. Bigger drivers distribute the weight better across the surface of the screw head, making it easier to get it moving. Always use the slowest speeds when doing this to increase the torque.
3. Pull With Pliers
If the screw is only partially inserted and you can grab the end with pliers, you should get enough grip to twist the screw free manually. Try and use locking pliers for a better outcome, and even if the screw is partially available to grip, you should still get enough purchase with the pliers.
4. Go Manual
If you are trying to get the screw out using a drill/driver, swap to a manual screwdriver. Changing the way you remove the screw, even going manual, can have better results. You get greater control of the torque with a manual screwdriver, enabling the screw to move slowly.
Drill/drivers often use too much speed, causing the driver bit to walk in the screw head, stripping it further.
5. Use Steel Wool
Steel wool can provide extra grip to your stripped screw. Insert some steel wool between the screw head and the screwdriver to increase purchase. Now start to turn the screwdriver and the screw should move.
6. Cut a Slot
Use a circular cutting disc like a Dremel or a multi-tool to cut a slot for a flathead screwdriver. Cut the groove across the entire diameter, creating a beveled line for the screwdriver to grip. Now insert the screwdriver and start to turn the screw slowly.
There are 2 ways you can use the screwdriver to remove the screw:
- Insert the screwdriver and push down with force to get the grip you need.
- Insert the tip of the screwdriver into the corner of the groove and start to tap with a hammer. The motion turns the screw bit by bit until it loosens enough.
7. Use Abrasive Powder
This method is similar to the wire wool technique. The abrasive powder coats the screw head and increases the grip of the driver bit. Sprinkle a small amount of abrasive cleaning powder or fine grit sand onto the screw head, and then insert the driver bit to turn the screw.
In many cases, the powder provides enough grip to prevent the screw from slipping.
8. Drill the Screw
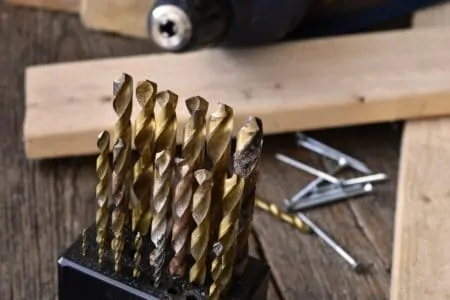
You can buy a dedicated extraction tool, but this is a cheaper method because all you need is a drill and a set of metal drill bits. Place a smaller drill bit in the center of the screw head, and drill down about 0.20 inches.
Now swap the drill bit for a driver and insert it into the hole. You often find that the driver slides a bit deeper into the screw, giving it enough traction to turn it free.
If you have a manual screwdriver, use the hammer-method to get the screwdriver to bite into the hole, creating a new set of grooves. Then, turn the screwdriver slowly with steady pressure.
9. Hit It With a Hammer
Sometimes, striking the screw with a hammer loosens it enough to get it to turn. The shock frees the screw just enough to twist it, although this is a last-ditch method after you’ve tried everything else because you risk snapping the screw.
Also, if the screw is partially inserted, hitting it gently from side to side might wiggle enough of a gap between the screw and the material to get it to turn.
Top Tips for Removing Stripped Screws
There are hints and tips you can use to make the task of removing a stripped screw much easier. So, what are the best tricks the professionals use to remove stripped screws? Let’s find out.
Use Oil
Oil is a great lubricant for loosening partially inserted, stripped screws. Make sure you keep the oil away from the screw head. Place a couple of drops of oil around the base of the shaft, where it enters the material, and allow it to soak in.
After a few minutes, using any one of the above methods, start to turn the screw. The oil should reduce the friction between the screw and the material, letting it move freely.
The great thing is that cooking oil is as effective as well-known branded lubricating oils.
Grab the Glue
Glue a nut to the head of the screw and wait for it to set. Now grab a wrench or socket set and remove the screw. This method depends on your skill level because you don’t want the nut adhering to the wood or metal.
If you don’t have a nut, squirt a tiny amount of glue into the center of the screw head and then push the screwdriver into the wet glue. Wait for it to harden and begin turning the screw.
Hopefully, the glue will be strong enough to give you the purchase you need. The only downside is you might need to chip the glue away from your screwdriver after the screw is free.
Buy a Dedicated Screw Extractor
These tools can be purchased from any DIY store for a few dollars, although some are better than others. They work by cutting a new head into the screw that allows the drill to remove the screw.
These specialist drill bits have a reverse thread that bores into the screw and then grips to twist free.
Cut a Groove in the Wood
Another great way of removing stripped screws deep in the wood is to cut a groove around the head to reveal enough of the screw to insert a pair of pliers to twist it free.
Use Rubber Bands
Rubber bands increase grip. How many times have you used a rubber band around the rim of a jar lid to get extra traction? This is the same method, only you should place the rubber between the screw head and the driver.
Cut the band with scissors and lay it across the stripped screw, then insert the driver, pressing with force as you turn the screw.
This method might work better with a manual screwdriver, thanks to you having better control of the torque.
FAQs

How Do You Remove a Stripped Screw from a Door Hinge?
Removing a stripped screw from a door hinge can be annoying, but it’s not impossible. You’ll need a power drill with a suitable drill bit, a screwdriver, and replacement screws.
You might be able to pull out the screw easily, even if it’s stripped. Sometimes it’s as easy as pulling the screw out with pliers. Make an indentation if you can’t pull out the screw and a screwdriver isn’t helping. This can help you turn the screw.
A screw extractor can also be helpful. You can always use a power drill with a matching drill bit if you don’t have one. Drill the entire screw out as a last resort.

How Do You Remove a Stripped Screw with Duct Tape?
The duct tape method will only work if the screw is barely stripped. Grab your duct tape and place some of it on the top of the screw head, ensuring you cover it entirely.
Place the screwdriver in the proper slot on top of the screw over the duct tape. Turn counter-clockwise by applying pressure. The tape’s role is to cover the gaps that otherwise stand in the way of screw removal.

How Do You Remove a Screw with a Stripped Head by Hand?
Removing a screw with a stripped head entirely by hand is unlikely unless the screw is very loose, and you can comfortably grab it by hand and pull it out. Otherwise, a screwdriver or pliers is the closest to “manual” screw removal.
Quit Cursing at Your Stripped Screws
It’s time to stop shaking your fists at your stripped screws and hoping anger will shift them. You need to get creative, and luckily, as we’ve shown, there are several simple ways to achieve success.
So, the next time you find a stripped screw, think of it as a minor challenge rather than a disaster.