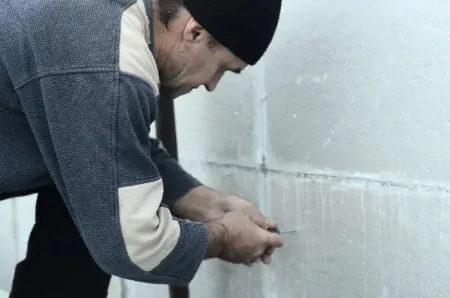
Fixing a stripped screw hole is crucial if you want to reuse the hole. It takes a bit of ingenuity and creativity to achieve satisfactory results, but it can be done.
If you have a shortage of time or limited funds, there are quick fixes you can do. We show you how to fix a stripped screw hole in a few easy steps.
Key Takeaways
- Fix with toothpicks: Insert toothpicks into the hole, apply wood glue, and snap off excess. Allow glue to dry before inserting the screw.
- Use plastic wall plugs: Purchase the correct size, insert into the hole, and then insert the screw.
- Fix with automotive filler: Enlarge the hole, mix and apply filler, insert and remove the screw to create a thread pattern, let it dry overnight, and then re-insert the screw.
- Alternative methods: Use a larger screw or a hardwood plug or dowel with wood glue to fill the hole and provide support for the new screw.
3 Ways To Fix a Stripped Screw Hole
There are 3 main ways to fix a stripped screw hole. They range from easy to challenging, but they are all effective at sorting out the problem.
A Quick Fix With Toothpicks
This is an easy cheat to fix a stripped screw hole. You can also perform this using used matchsticks and cocktail sticks.
1. Plug the Hole
Partially insert as many toothpicks into the stripped screw hole as it will take. You should find 2 or 3 will suffice. Make sure they fit snuggly.
2. Wood Glue
Add a few drops of wood glue to the sticks and spread it evenly, coating the exposed sections. Use your finger or cotton swabs to perform this task.
3. Insert Into the Hole
Gently tap the glue-coated sticks into the wall with a hammer, making sure there are no gaps. If you need to add more glue, do so. When the hole offers resistance, and the sticks will no longer move, give them a firm whack with the hammer to snap off the excess, leaving them flush with the wall.
4. Allow To Dry
Leave a gap of 1 hour to allow the wood glue to dry and for the sticks to fuse inside the stripped hole. The wooden sticks will create the resistance the new screw needs to gain purchase in the wall.
Check the drying times of your particular wood glue as it may differ.
5. Insert the Screw
Once the glue has set, insert the screw, turning clockwise until the head of the screw is sitting flush with the wall.
Using Plastic Wall Plugs
This also an easy way to mend a stripped screw hole.
1. Buy Wall Plugs
Purchase plastic wall plugs from your local hardware store. To get the correct size, take your chosen screw with you to the store and make sure they match for length and diameter.
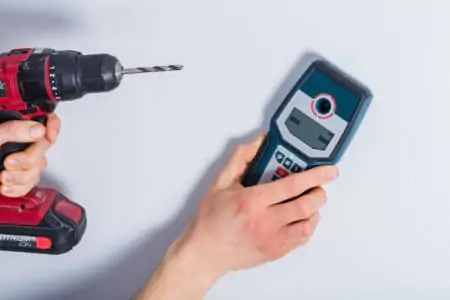
2. Bore a New Hole
If the plugs don’t fit the original hole, you’ll need to drill a wider one. Make sure the new opening is 1 to 2 centimeters longer to ensure the wall plug fits the hole.
If it does fit, skip the drilling and insert the wall plug into the old opening.
3. Insert the Wall Plug
Use a hammer to gently tap the plug into place, making sure the end is flush with the wall, and nothing protrudes.
4. Insert the Screw
Place the tip of the screw into the opening of the wall plug and gently turn the screwdriver clockwise. The screw should ease into the wall plug, offering resistance as it bites into the plastic.
Fixing a Larger Hole With Automotive Filler
1. Bore a Larger Hole
Using a drill, bore a new hole to extend the diameter of the stripped screw hole. Try using a drill bit that’s the next size up. Ensure the opening is larger than the screw itself because the filler needs to have space to grip the screw.
Automotive filler is best suited to bigger openings that take lag screws and bolts.
2. Mix the Automotive Filler
Follow the manufacturer’s guidelines when mixing the filler. Find a piece of cardboard and a putty knife to blend the compounds together to activate the chemical reaction. Most automotive fillers contain putty-like ingredients that harden when mixed.
3. Fill the Hole
Using the same putty knife, scoop up the filler and press it into the enlarged hole. Depending on the size of the gap, this might take a few scoops. Smooth out the top with the wall, so it sits flush.
4. Lubricate the Screw
Using a spray lubricant, wet the end of the screw, making sure it is saturated. WD-40 is a great choice. This helps you remove the screw from the partially set automotive filler.
5. Insert the Screw
Push the screw into the wet putty, twisting it clockwise as you go. Make sure the screw is positioned in the center. The idea is that the screw makes an impression of its thread pattern in the filler as it hardens.
If excess filler spills out, push it back into the hole and smooth it with the putty knife.
6. Wait for Five Minutes
Time a gap of 5 minutes to allow the filler to start setting. Now take the screw out using an anti-clockwise motion. When you remove the screw, you should see the thread pattern inside the hole. Don’t leave it until the automotive filler fully sets, or it will cement the screw in place.
7. Let It Dry Overnight
Wait until the next day to allow the filler to completely set. When you are sure it is ready, insert the screw into the hole, allowing the thread to grip.
Other Ways To Fix a Stripped Screw Hole
There are some other ways to remedy the problem of a stripped screw hole.
Use a Larger Screw
Often, using a larger screw will sort out the issue. Choose a screw that is slightly longer and wider, and try to match the threads, so they are compatible. Screws with a lower TPI (teeth per inch) are more aggressive and bite into the hole differently.
The new screw should chew into the wood, securing the threads and cutting a wider course. This holds it in place.
Using a Hardwood Plug or Dowel
If the stick approach fails, it might be an idea to use a hardwood plug that matches the stripped screw hole size. You can buy dowels or hardwood plugs from hardware stores. Use the same wood glue to coat the edges of the plug and insert it into the wall.
Wait until the glue dries before attempting to insert a screw into the hole. Like the toothpick method, the screw should gain purchase and sit tightly in the spot.
FAQs

What Causes a Stripped Screw Hole?
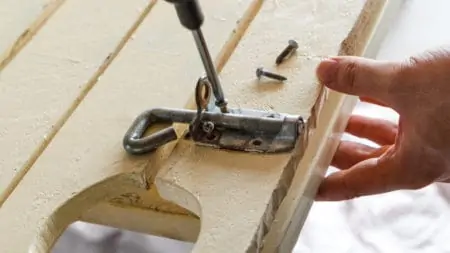
The main causes for a stripped screw hole include applying too much pressure on the screw, over-screwing, or weather impact that leads to expansion and contraction.
When this happens, wooden doors start to sag. If you fail to address the issue in time, the door will likely fall off, especially in an area with high traffic.

What Can I Use to Fill in Stripped Screw Holes in Wood?
The standard way to fill a stripped screw hole in wood is by using dowels, toothpicks, or matchsticks. However, the easiest way is to try and remove the screw entirely and add a larger screw that will quickly fill up the space formed around the old one.
Note the length of the old screw or insert something into the hole to help you measure the depth. You can use a toothpick and mark it at the exit. Pull it out, and you’ll know the depth of the hole and how long the new screw needs to be.
Then, measure the diameter of the new hole and choose a screw that can fit into the hole to fill it.
If you want to use filler materials, consider adding matchsticks or toothpicks into the hole. Add wood glue on top and break whatever material sticks out so the door can close smoothly.
Sand the material around the screw head to level it out. Put the tip of the new screw on the fill material and screw it into the filler.

What Is the Fastest Way to Fix a Stripped Screw Hole in the Wall?
The fastest way to fix a stripped screw hole in the wall is to remove it and add a bigger one. This way, you can fill the gap formed around the old screw. This is also the safest approach because the new screw can take over the role of the old one without having to improvise.
A Job Well Done
These methods are failsafe ways to mend a stripped screw hole. Once completed, they should hold your screws in place, just like a freshly bored screw hole.
All it takes to complete these tasks is a level head and a little patience. Oh, and don’t forget some creativity.