Your concrete patio may not suffer the same punishment as your driveway, but it still gets a lot of wear and tear. Continuous foot traffic, patio furniture, barbeques, and UV rays cause it to fade and stain. However, concrete patio sealers reduce the chances of damage.
We show you how to seal your concrete patio in easy steps and talk you through the different types of concrete sealer.
Key Takeaways
- Seal concrete patios to reduce damage: Concrete sealers protect your patio from moisture, UV rays, and freeze-thaw damage, prolonging its lifespan.
- Types of concrete sealers: Acrylic resin-based sealers form a hard shell, while epoxy or polyurethane sealers create a glossy finish. Penetrating sealers absorb deep into the concrete and repel moisture and oil.
- Timing for sealing: Allow new concrete to cure for 28 days before sealing, and ensure the surface is dry and clean. Apply sealer when the temperature is between 50 and 90 degrees Fahrenheit.
- Sealing process: Clean the surface, remove old paint and stains, apply the sealer (using a spray applicator or brush), and allow it to dry. Recoat after 10 days for best results.
Should You Seal Your Concrete Patio?
Imagine going to the beach without sunscreen or forgetting to wax your car after washing. UV radiation damages your skin and fades paint, so imagine what it does to your concrete patio, and yet some people don’t see the value of protection.
Concrete sealers form a protective seal on the concrete surface to reduce UV damage. They repel moisture and stains, and if you live in a part of the country where you get harsh winters, preserve your concrete from freeze-thaw.
When moisture absorbs into concrete and freezes, it expands, forming cracks, spalling, and pitting on the patio surface. This will eventually cause the concrete to break apart.
Also, applying deicing salt on frozen surfaces aggravates the problem because unsealed concrete is porous. Sealing concrete can be expensive and time-consuming, especially if you have to do it every two years, but the effort is well worth it.
Pros
- Reduces moisture absorption.
- Minimizes UV fading.
- Protects against freeze-thaw.
- Enhances your patio color.
- Makes the concrete less porous.
Cons
- Concrete sealers can be expensive.
- Time-consuming process.
- Needs to be done regularly.
What Are The Best Concrete Patio Sealers?
Concrete patio sealers fall into two categories: water and oil-based products. Each one works in very different ways. Water-based sealers are better at forming a hard seal on the concrete surface, and oil-based sealers are better at penetrating deep into the concrete.
Acrylic Resin-Based Sealers
Acrylic sealers tend to be water-based, so they form a hard shell on the concrete surface to protect against harmful UV rays. Acrylic sealers come in varying formulas, ranging from styrene-acrylic to pure acrylic.
Styrene-acrylic is less durable and may fade or yellow under the sun’s rays, while pure acrylic is much better at coping with outdoor punishment.
Acrylic resin-based sealers can be mixed with other materials to increase durability. Epoxy, polyurethane, or silicone will increase your patio’s ability to repel the elements.
Epoxy or Polyurethane Sealers
Epoxy sealers dry to a hard shell, just like acrylic sealers. However, they can become slippery when wet, making the patio almost impossible to use.
The advantage of epoxy or polyurethane is that you can add almost any decorative material to the mix to customize your design. Or you can opt for a high glass-like sheen to enhance the old concrete.
Epoxy is one of the most expensive options, but it does offer excellent protection against UV rays.
Take Note
When applying the polyurethane, make sure the concrete is completely dry, or you risk trapping in moisture. If that happens, mold, staining, and deterioration set in.
Penetrating Sealers
The best penetrating sealers tend to be oil-based products mixed with silicone, silanes, and siloxanes. These sealers absorb deep into the concrete, form a barrier that repels moisture and oil, and reduce cement damage and staining.
Because the formula soaks into the patio, it allows the concrete to breathe; plus, it preserves the natural look of your concrete. There is also zero risk of the sealer cracking, chipping, or peeling, which protects it for longer.
It could mean that you get five or even seven years of useful life from the sealer, reducing the need to maintain your patio.
When To Seal Concrete Patio
New concrete needs 28 days to fully cure before applying a concrete sealer. Stamped concrete should be bone dry, with zero moisture on the surface before applying sealer. Also, the age of the concrete makes a difference because old concrete is more porous.
Getting the timing right for sealing concrete is as important as detailed surface preparation. Moisture is your enemy, even when absorbed into surrounding grass and soil.
Keep one eye on the weather forecast and monitor the air temperature because you should apply concrete sealer between 50 and 90 degrees Fahrenheit.
How Do You Seal a Concrete Patio?
Sealing concrete doesn’t have to be a chore, but you do need to invest the time to prepare the surface, so it is ready to take the sealer. Our step-by-step guide shows you how to seal concrete in five easy stages.
1. What You’ll Need
- A stiff brush.
- A hose.
- A pressure washer.
- Sand or dry ice.
- Grease solvent.
- A bucket.
- Detergent.
- Muriatic acid.
- Spray applicator.
- Brush.
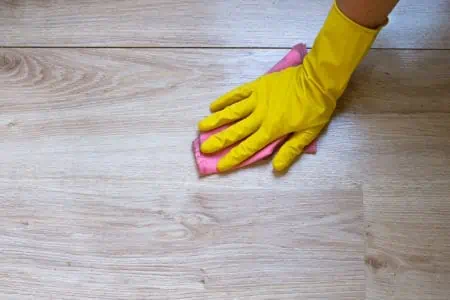
2. Clean The Surface
Dust and dirt collect on the surface of your concrete patio. However, the dirt gathers in the recesses if you have stamped concrete or a textured surface like a fake deck. Before sealing, you need to make sure the concrete is as clean as possible.
Use the hose and spray the patio with water, then clean the surface using a stiff brush. Make sure you work the brush into the joints and gaps, then wash it over with the hose and leave it to dry for 24 hours.
You could try using a pressure washer for stubborn stains like grease. It blasts the surface with powerful jets of water, cleaning the patio.
Bear In Mind
Don’t hold the pressure washer too close to the concrete because it could damage the surface, and watch out for cracks and crumbling concrete.
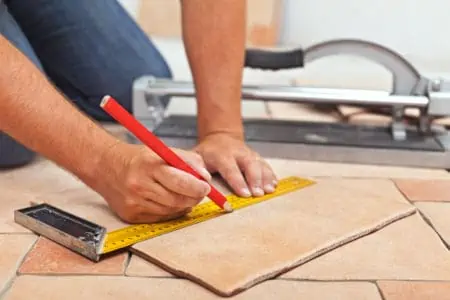
3. Remove Old Paint, Sealer, and Stains
If the patio still has old paint, sealer, and visible stains, you might need to scrub it with sand. You could also grab a bucket of warm water and detergent and pour it over greasy spots.
Using the scrubbing brush, work the detergent into the concrete until the oil or grease stain has lifted. If water and detergent don’t work, you may need to use grease solvent.
If the stains have penetrated beneath the surface of the concrete, you could also try using muriatic acid in small amounts. Now rinse away any residue with warm water and leave the patio to dry.
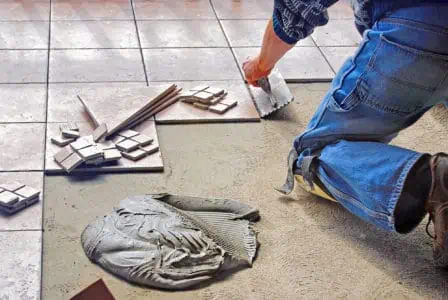
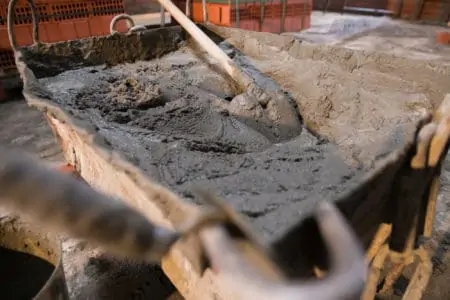
4. Apply The Sealer
Read the instructions before applying your concrete sealer. Most sealers go on with a spray applicator, which is the best method to achieve a smooth and even layer. However, some sealers pour onto the concrete surface and are spread using a brush or roller.
You should always start in the corner farthest away and work backward towards the other end. If you need to apply a second coat, allow the specified time for the first layer to dry. This is typically 24 hours, but follow the instructions for your product’s specific drying time.
Top Tip
Keep an eye on the weather report because you will need to double the drying time from 24 hours to 48 hours between layers if the temperature drops.
Once the second coat is down, leave it to cure and then wash it clean using the garden hose. Now leave the patio untouched for a further 10 days.
5. Recoat After 10 Days
After 10 days have elapsed, grab the hose and give the patio one final clean to remove settled dust and debris. Once dry, use a spray applicator and apply another layer of sealer. Start in the farthest corner and work backward.
If you don’t have a spray applicator, pour the sealer onto the concrete and spread it with a brush. Just keep in mind that using a brush takes a lot longer, and you may not get the same even finish.
Finally, after you have left the first coat of top sealer to cure for 24 hours, apply a second coat and allow a minimum of 36 hours for it to dry.
FAQs

How Often to Seal Concrete Patio?
Depending on the type of sealer you use, you should get between two and five years of protection. Penetrating oil-based sealers are the most robust, with some lasting beyond five years, depending on the amount of sunlight your patio gets.

How Long to Wait to Seal Concrete Patio?
Newly laid concrete patios should cure for a minimum of 28 days before you attempt to lay down a sealer.

Can Old Concrete be Sealed?
You should seal old concrete, but you must remove any paint and grease stains so the sealer adheres. Use concrete filler to repair any gaps or cracks before adding a layer of epoxy or polyurethane to form a hard seal on the surface.

How Long Does Patio Sealant Last?
Most quality patio sealant lasts between two and five years, depending on the product, the footfall, and sunlight levels. UV is the most significant factor because it fades and peels. So, if you live in a sunnier climate, you will need to replace the sealant more frequently.
Seal The Deal
You might think that concrete is indestructible, but Mother Nature always wins. Sealing your concrete patio preserves it for longer, keeps the color locked in, and saves you money in expensive repairs further down the line. Sure, sealing concrete is not a lot of fun, but it is necessary.
And why stop at your patio? Your concrete pathways and driveway could also do with a little TLC to keep them looking good and reduce the amount of maintenance they need.