Is there a room in your home in desperate need of a new floor? Sometimes, all it takes is a new carpet, although it can be tough to install yourself.
But carpet tiles are easy to cut, use, and install! I’m going to show you how to install carpet tiles by yourself and save hundreds of dollars on labor costs.
Key Takeaways
- Choose between tape or glue: Use double-sided tape for small, low-traffic areas and pressure-sensitive glue for high-traffic areas.
- Prepare the subfloor: Clean it thoroughly, check pH levels, and allow tiles to acclimate to the room temperature for 48 hours before installation.
- Measure and cut tiles: Find the center of the room, lay out the tiles, and cut them to fit the room’s perimeter and any corners.
- Install the tiles: Use either glue or double-sided tape to secure the tiles, starting from the center of the room and working outwards.
How to Install Carpet Tiles
First, you should decide which method you’re going with.
Tape vs. Glue
Carpet tile installation is simple. But some factors to consider are selecting the appropriate tile and bonding method. Lifting or relocating carpet tiles may result in unintentional trips or slips, so selecting the appropriate carpet tile and adhesive is critical.
Double-sided carpet tape is an excellent choice for securing your carpet tiles in place for an extended period. It’s made with an incredibly durable adhesive.
Also, it’s simple to utilize double-sided carpet tape. Just cut the tape to size and peel away the backing to use.
Although there are a variety of adhesives available for adhering carpet tiles to the subflooring material, most professionals in the area prefer pressure-sensitive glues.
Pressure-sensitive adhesives are resistant to heavy traffic and can withstand significant weight. Because of its high performance, this type of glue is the most frequently utilized adhesive in commercial applications.
So, it’s best to use glue for your carpet tiles for areas with high traffic. You want to go with double-sided tape for smaller rooms and areas with low traffic.
Important
Don’t mistake easy lay peel-and-stick tiles for regular ones that can be installed with double-sided tape. Peel-and-stick tiles already have adhesive stuck to the back.
With Glue
The key is knowing how to lay carpet tiles to get an even and beautiful-looking floor.
What You’ll Need
- Carpet tiles.
- Tape measure.
- Chalk.
- pH-blocking primer.
- Nap roller.
- Carpet adhesive.
- Knife.
- Floor roller.
1. Clean the Floor
Thoroughly clean the subfloor, avoiding the use of solvents or oil-based substances. Eliminate any remaining adhesives, grease, debris, oil stains, or dirt.
2. Check pH Level
If the pH of the concrete subfloor is between nine and 12, prime it with a pH-blocking primer. This will help prevent any sort of reaction that would block the adhesion of the primer. Cure the primer as directed by the manufacturer.
3. Set the Temperature
Adjust the room’s temperature to between 65 and 95 degrees. Ascertain that the room’s humidity level is less than 65 percent. Allow the tiles to adapt to the room’s temperature for 48 hours before installation.
4. Find the Room Center
Measure each wall and mark the middle using chalk. Connect the middle points of each two opposing walls. The intersection of these two lines is in the middle of the room.
5. Identify Tile Sequence
If you’ve chosen your pattern or not, look at the tile packaging to identify the sequence number. Remove the box with the lowest consecutive number from the stack. When laying down the tiles, begin with the lowest consecutive number and work your way up.
6. Map Out the Room
Layout the tiles on the floor to see how they fit. Start at one of the walls and work your way towards the other.
If you notice less than half a tile width at the perimeter, move the perpendicular tile row towards the half inch. Mark any changes that could result from tile shifting. Put the tiles away.
7. Spread the Glue
Utilize a 3/8-inch nap roller to apply a coat of glue to the floor. A thick and fluffy nap roller absorbs and holds substances like glue.
Consistently spread the glue, ensuring there are no thin patches, even if the floor is smooth. Consult the tile manufacturer’s recommended adhesive thickness.
Only apply the glue in sections, not the whole floor. This is to ensure you have enough time to lay the tiles before the glue dries.
8. Install the Tiles
Start placing the tiles in the room just as you mapped them out earlier. Begin in the center and create a square so that each tile is lined with the two chalk lines.
Align the edges of the tiles while putting two tiles on each side of the square. Fill in the corners between the tiles with a tile to create a larger square. Continue with this process until your tiles meet the walls.
9. Finish the Perimeter
Measure the perimeter tiles by placing a full-sized one on the top of the gap, with the top facing the floor. Use a marker on the tile’s back. Put it on a cardboard piece.
Using a utility knife, align a straightedge with your mark and cut the tile. Arrange the tile so that the cut side faces the wall. Once all tiles are installed, use a 100-pound floor roller to roll over the whole floor.
Allow 24 hours before bringing in furniture or other stuff.
Without Glue
Installing carpet tiles with double-sided tape is a simple and quick home renovation project that transforms your investment property into a modern hideaway. You might also want to learn how to install carpet squares without glue because it’s easier and faster.
What You’ll Need
- Carpet tiles.
- Double-sided tape.
- Scissors.
- Chalk line tool.
1. Divide the Room
Divide the room’s length in half and, with a chalk line tool, draw a line across the room’s center.
This line acts as a beginning point for your carpet tiles, ensuring that each subsequent row is properly aligned with the previous one. Install carpet tiles in even rows, working your way outward toward the adjacent wall.
2. Apply the Tape
Adhere double-sided sticky carpet tape to the underside of each carpet square’s backing. Unroll about one to two inches of tape (based on the width of the tile) and cut it using scissors.
Place one of these pieces on each corner of the tile.
3. Stick the Tiles
Remove the backing on the double-sided tape pieces. Lay a tile piece on the floor, flush with the chalk line or the row before it. Press the tiles firmly onto the floor, with the sticking down. Make sure you apply pressure at the corners. Proceed until all tiles are taped to the floor.
How to Install Carpet Tiles Over Concrete
Carpeting over concrete floors is a simple, cost-effective, and practical solution. It can warm up a cool area, lower noise levels in the workplace, and transform a plain and uninteresting space into something warm and inviting.
Use Synthetic Underlayment
Because concrete is a cold, hard surface and a carpet provides a warm layer on top, there is a risk of condensation collecting on the carpet’s bottom. Invest in a high-quality synthetic underlay to provide additional cushioning that acts as a barrier between the floor and the carpet.
Fill Any Floor Cracks
Fill any cracks in your floor and level the surface using a leveling product. Allow ample time for things to dry completely and maintain a constant temperature that is not too humid in your room.
Check the Moisture Level
Inspect the concrete’s surface for dampness. If this level is abnormally high, a sealer may need to be applied before placing the carpet tiles.
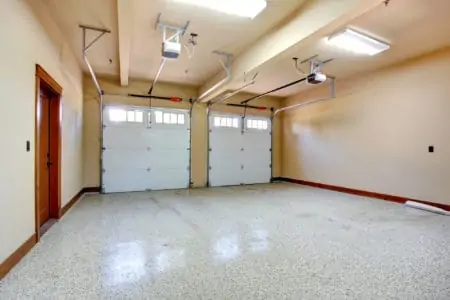
It is equally critical to thoroughly clean the floor to ensure appropriate tile adhesion. This is particularly important if you want to install carpet tiles in the garage or the basement.
How to Install Carpet Tiles on Hardwood Floors
Putting carpet on a hardwood floor is preferable because it protects the surface and adds aesthetic value to the room. It is critical to be attentive to upkeep, as you can’t put a carpet on a damaged floor.
Clean the Floor
When you have wood items, particularly hardwood flooring, it is critical to keep them clean to avoid developing a wood illness.
Before putting the carpet on, it is critical to check for mold or mildew, as if not removed, the carpet will develop mold. Dirt facilitates fungus infestation, which accelerates the decay of wood and the spread of disease.
Install a Water Vapor Barrier
Installing a water or moisture barrier is critical. Several of the benefits of these barriers include the complete elimination of moisture, sealing air spaces, and the protection of the wood and carpet against mold penetration.
Avoid Certain Adhesives
Avoid applying polyurethane or epoxy adhesives. Certain door thresholds are put in place using strong adhesives that can ruin the wood floor’s finish. Instead, use door thresholds that are secured with snaps, screws, or nails.
This ensures that they can later be removed with ease and leave very little damage to the floor beneath.
Go for Thicker Carpet Padding
If the area permits, consider a thicker carpet cushioning. Because you’re increasing the height of the floor, you’ll want to ensure that the room and closet’s doors continue to function properly.
If the doors get stuck or do not function properly, you can undercut or shave the bottoms of the doors. This helps to accommodate the added thickness and height on the floor.
Fix Gaps and Cracks
You can use a floor leveler or wood putty to patch gaps and fix cracks on plywood subfloors. A trowel is used to apply the floor leveler, which is then allowed to dry to a smooth, hard surface. You can lightly sand the floor to eliminate any splinters or other irregularities.
A good floor leveler to try is DAP flexible floor patch and leveler.
How to Cut Carpet Tile
Anyone can do it; just be sure to use the right tools and be safe when dealing with utility knives.
What You’ll Need
- Modular carpet tile.
- Utility knife.
- Marker.
- Straight edge.
With most of the floor in place, it’s straightforward to cut the parts that run along the walls to size. The distance from the wall and the last full tile should be measured and transferred to a carpet tile.
It’s best to hold the tile upside down to mark where you’ll be making the cut.
Because walls are usually not completely straight, do not expect all finished carpet tiles to be identical in size. Take your time and carefully measure each place. Check the direction of the pile before cutting.
The same goes for cutting around corners. Knowing how to do this is useful in different situations, like installing carpet tiles on stairs or rooms with multiple corners.
Carpet Tile Installation Cost
The costs for carpet tile installation depend on the labor costs in your area, the type of carpet you choose, and the room size you want to cover.
For example, basic carpet tiles can cost between $180 and $245 for a 100 square-foot room. High-end tiles cost between $320 and $395 for the same area.
Installing the basic tiles usually costs between $125 and $135, but prices may vary depending on how much professionals in your area charge. That being said, it should cost you a maximum of $380 to professionally install basic carpet in a 100 square-foot room.
If you install carpet tiles as a DIY project, you will only pay for the materials, saving you a few hundred dollars.
Carpet Tiles Pattern Ideas
Carpet tiles don’t have to be gray and boring. There are tons of great ideas to use creatively!
Neutral Colors
This is a great idea to make your own area rug. With a neutral carpet tile, you can make the rug any size you want, and it’ll go with pretty much anything.
Red and Black
Because carpet tiles are square, have some fun and create a checkerboard pattern!
Triangle Patterns
I love this idea for a kid’s bedroom or playroom. Cut the tiles in half diagonally and mix and match the colors to create a cool pattern.
Vibrant Colors
This idea shows that you can mix and match colors as well as textures! Super fun for a playroom or a commercial location for kids.
Geometrical Shapes
If you choose a carpet tile that has a pattern, mixing the sequence creates an abstract and geometric look.
FAQs
Need a bit more info? Here are some common topics related to carpet tiles.

Can You Put Padding Under Carpet Tiles?
When placing carpet tiles, standard carpet cushioning is omitted. Carpet tile installation requires a clean, level, and unpadded substrate. While it is possible to put a roll pad and then carpet tile on top of it, installers and manufacturers do not suggest it.

Can You Put Carpet Tiles on an Uneven Floor?
To achieve the ideal appearance of carpet tiles flooring, you should consider laying them on a perfectly flat surface. If carpet tiles are laid on an uneven surface, they may bunch up and look unsightly.

What Do the Arrows Mean on the Back of Carpet Tiles?
Each carpet tile includes an arrow on the back showing the direction of the pile. Make sure the arrows point in the same direction to create a broadloom effect.
Final Words
Once you learn how to install carpet tiles, the process doesn’t feel so intimidating.
Some might argue that you need a steady hand and loads of free time, but that depends on the size of the room. Knowing how to install carpet squares on your own can also help you save money on labor costs.